

A step-by-step guide to the process of creating a new workspace on the Kolleges admin page or joining an existing workspace as an admin.
Kolleges guide: Create a new workspace or join an existing workspace as an admin member.
Accessing the Kolleges Admin Service
Go to the Admin Page and sign up or log in.
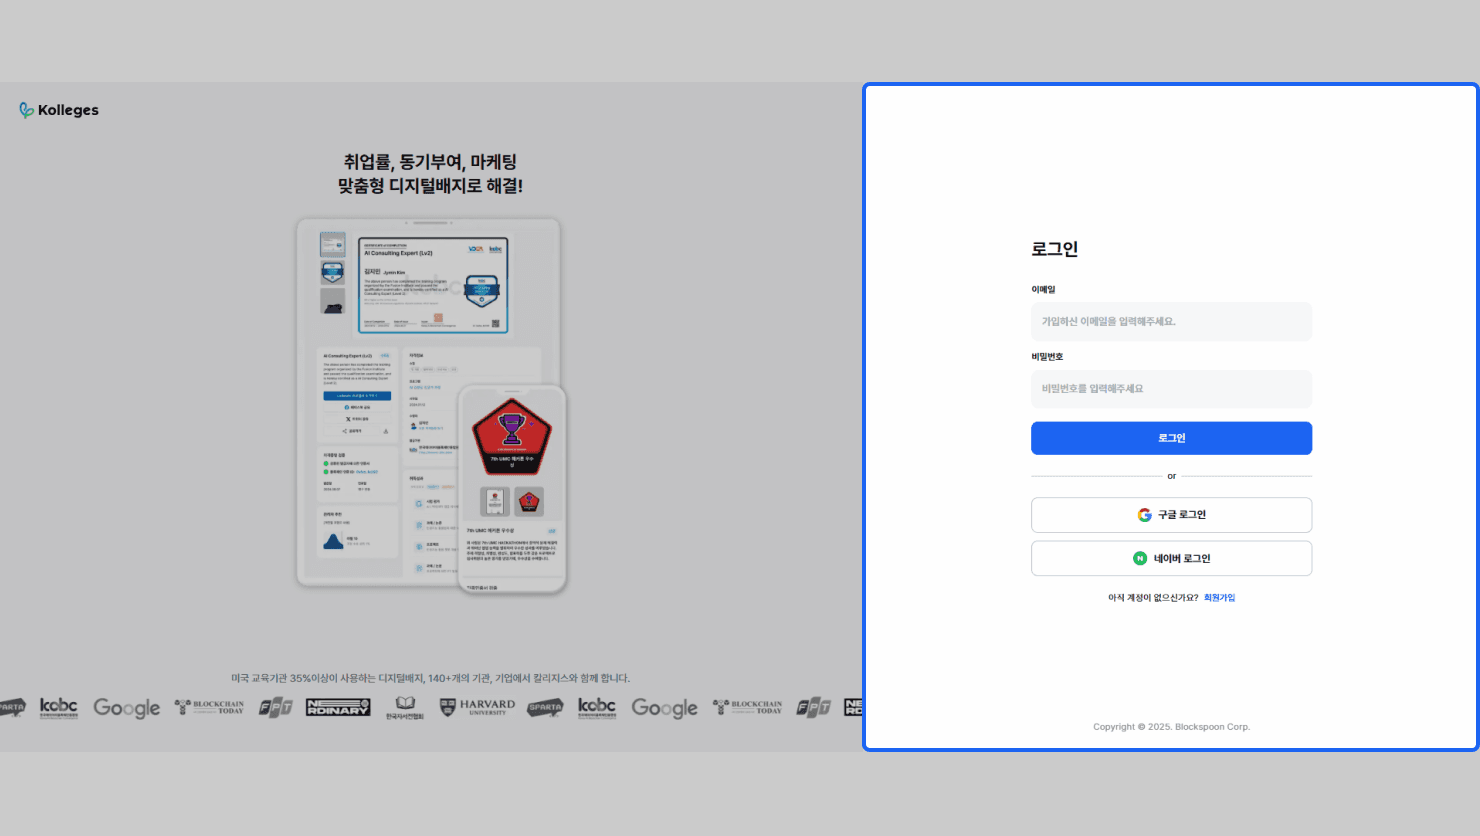
Creating a New Workspace
Enter the information required to create a new workspace.
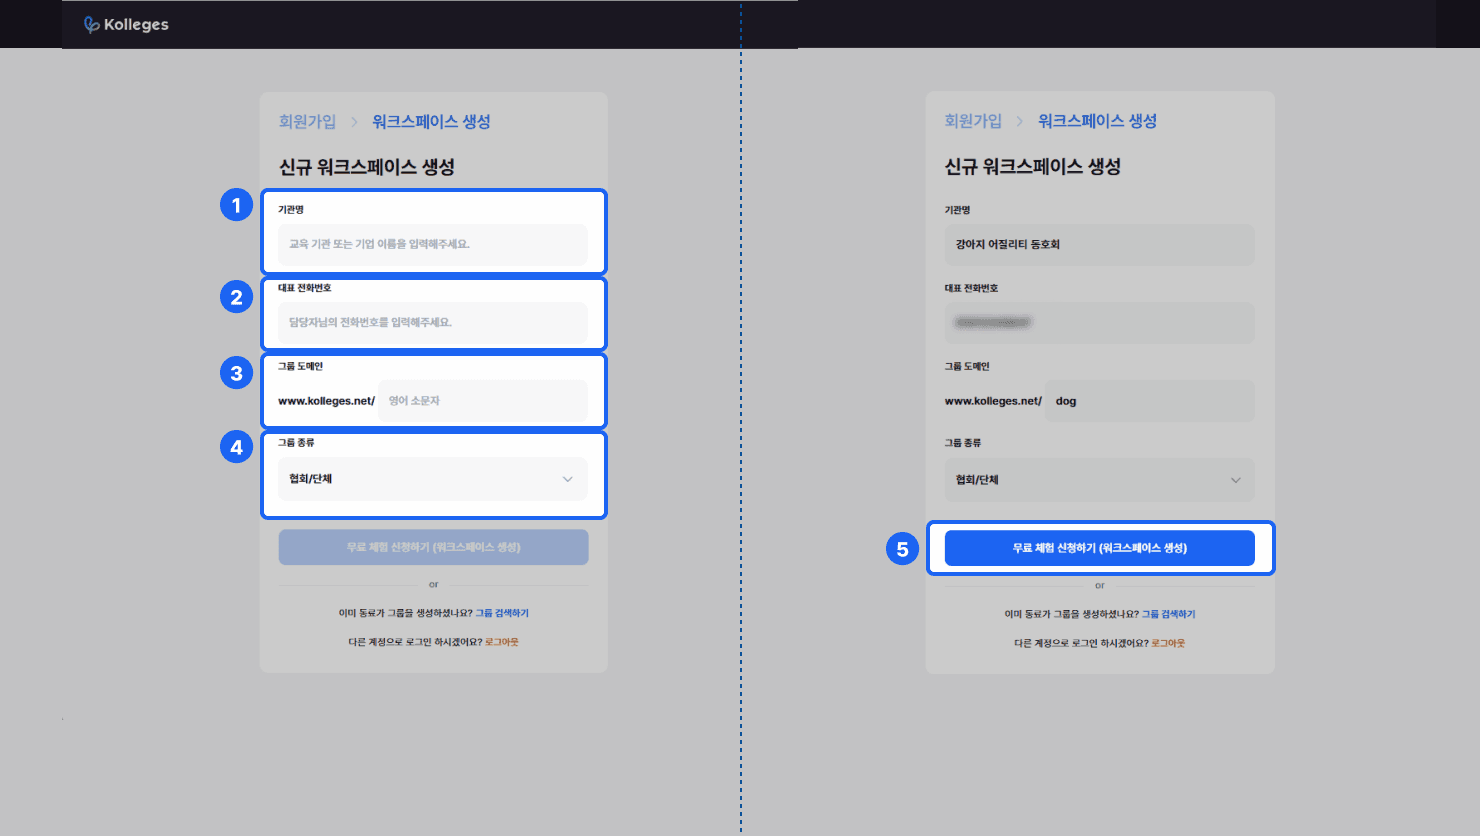
- Institution name: Enter the name of the institution that will open the workspace.
- Main phone number: Enter the phone number of the workspace’s management contact.
- Group domain: Enter the domain of the educational institution or enterprise.
- Only lowercase English letters, numbers, underscores (_), and hyphens (-) can be entered.
- Group type: Select the type of group operating the site.
- Institution
- Association/Organization
- School
- Enterprise
- Click the {Apply for Free Trial} button to create the workspace.
- When you create a workspace for the first time, it is created after Kolleges’ approval process. (within 3 business days)
*Users who have previously created a workspace can immediately create a new workspace without Kolleges’ approval.
*If you need immediate approval, please contact 1:1 Customer Support.
Admin Sign-Up for an Existing Workspace
If your affiliated institution already has a workspace in operation, you can request to join as an admin.
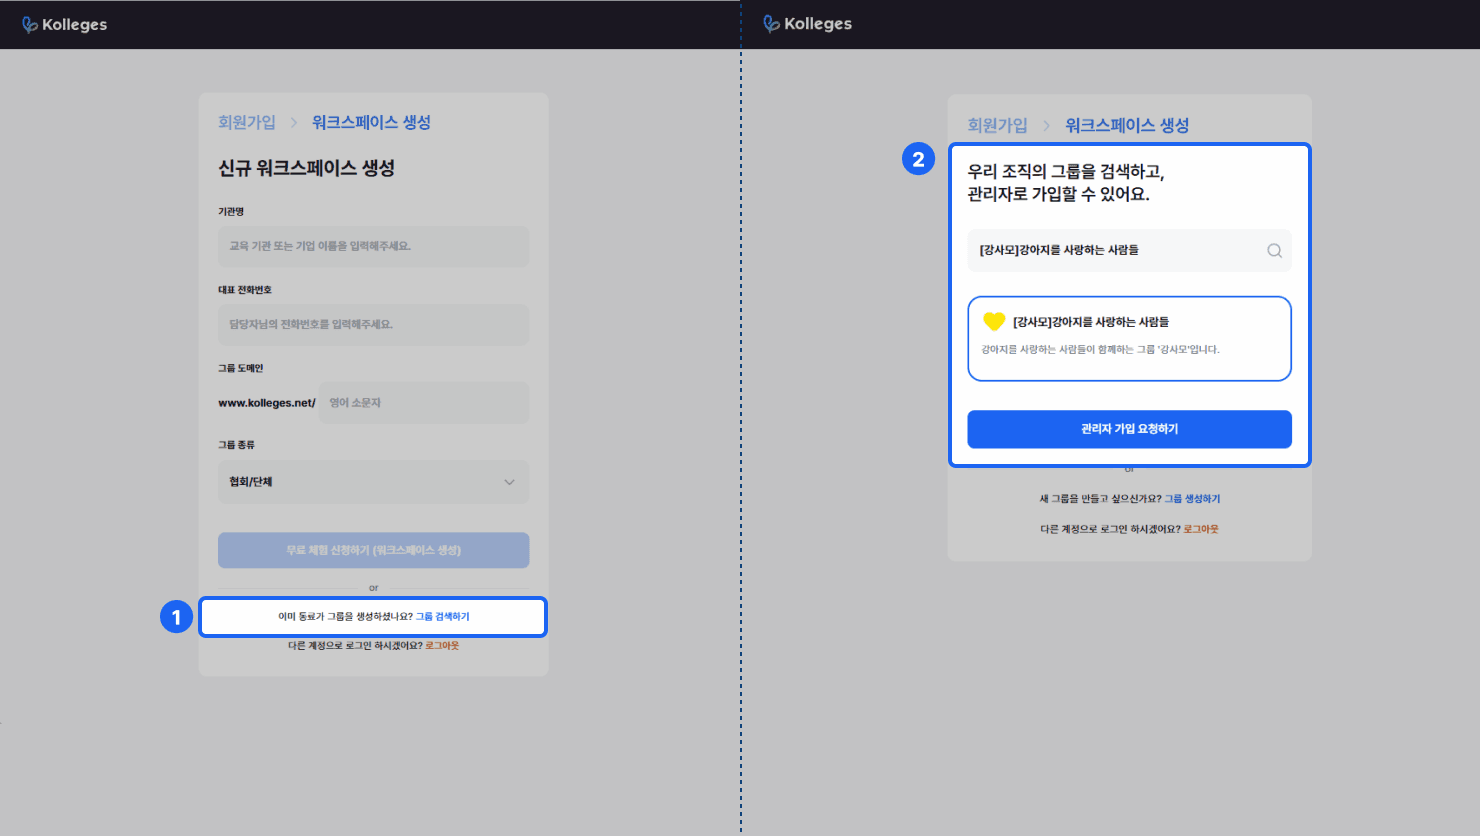
- Use the {Search Group} button to search for the name of the workspace you want to join as an admin.
- Click the {Request Admin Join} button to request to join the workspace.
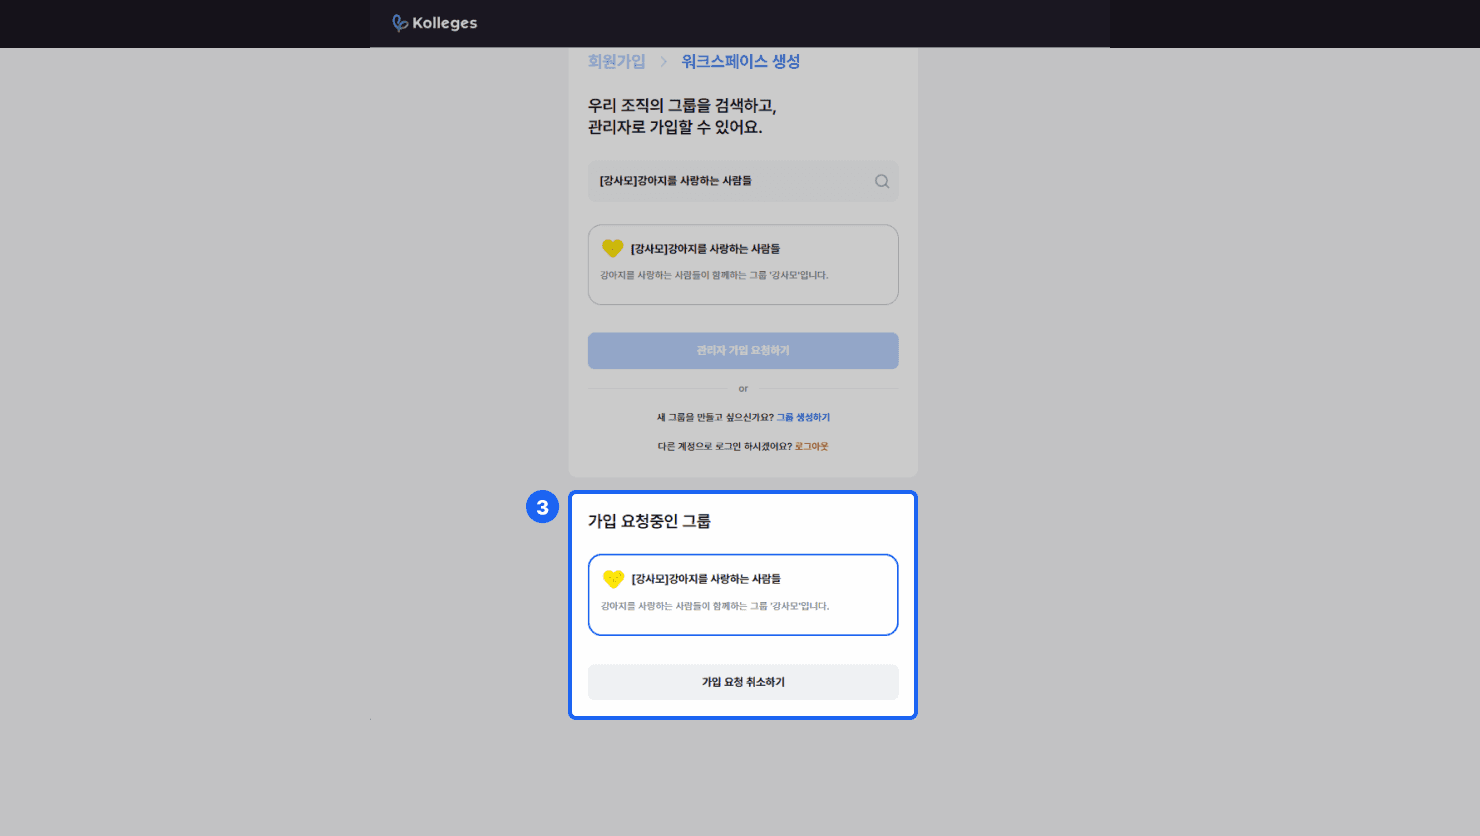
A group item with a pending join request is added at the bottom, and you can cancel the join request with the {Cancel Join Request} button.
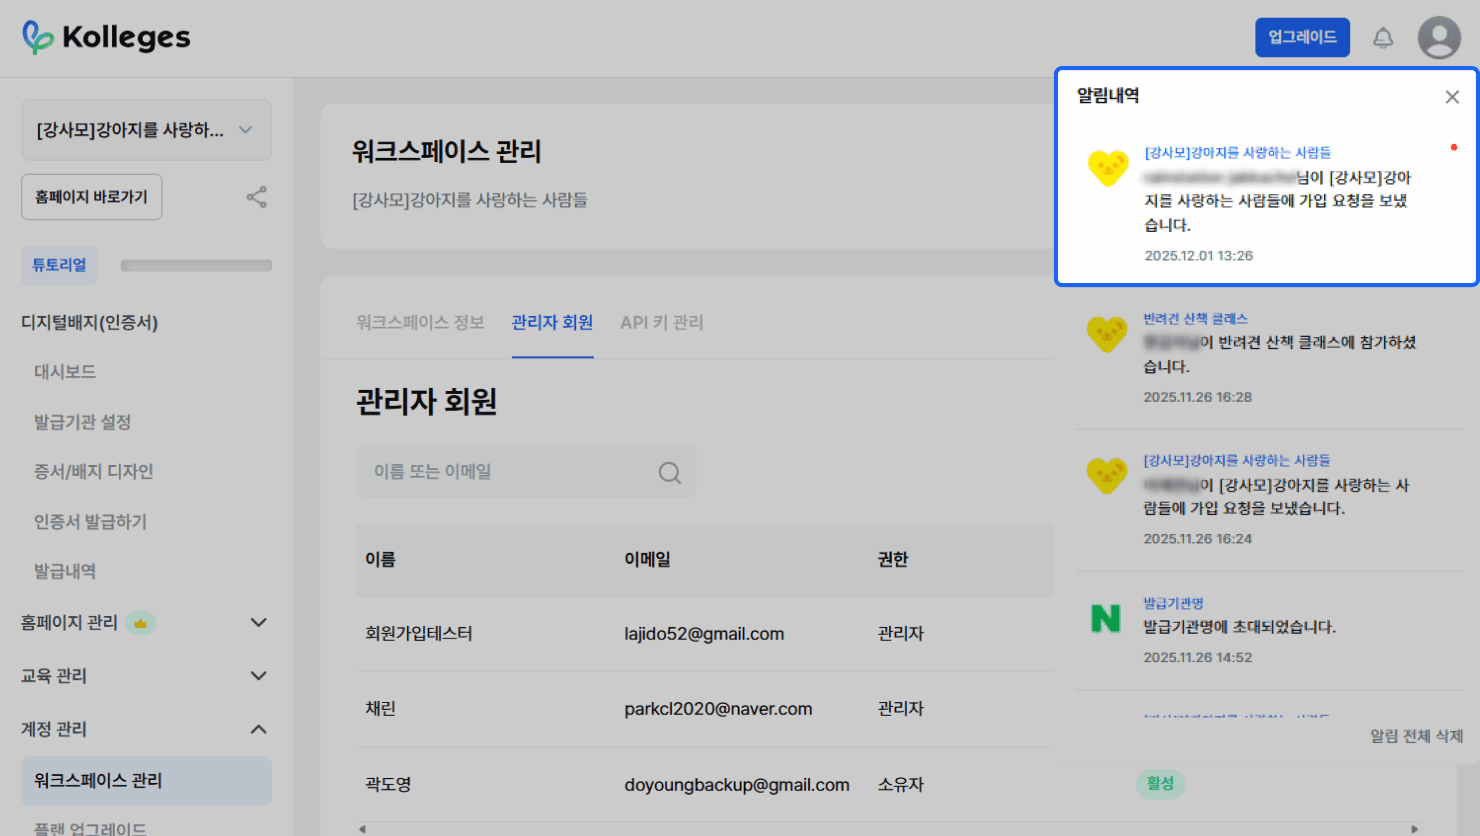
- A notification is sent to the workspace you requested to join as an admin.
- Once the workspace operator approves your admin join request, you can use the workspace.
Frequently asked questions
Want to turn learning outcomes into verifiable assets?
From issuing to verifying and amplifying, see it for yourself with Kolleges.
Request a Kolleges demo
Related posts
Homepage Information Settings
A step-by-step guide to setting homepage basic information (group name, brand colors, logo, membership approval method, etc.) and business (footer) information from the Kolleges homepage management menu.
Issuer Settings
[Primary] issuer information (institution name, symbol, official seal, logo) and the LinkedIn code must be registered first before you can officially issue badges and certificates.
Add/Remove Admin Accounts
A step-by-step guide to inviting and removing admins by email in your Kolleges workspace, and adjusting permissions by enabling or disabling them without deleting the account.