

[Primary] issuer information (institution name, symbol, official seal, logo) and the LinkedIn code must be registered first before you can officially issue badges and certificates.
A guide to setting up the badge issuer. Set up the institution information that will issue digital badges.

Issuer Settings
Before creating a certificate design, you must first complete the issuer settings.
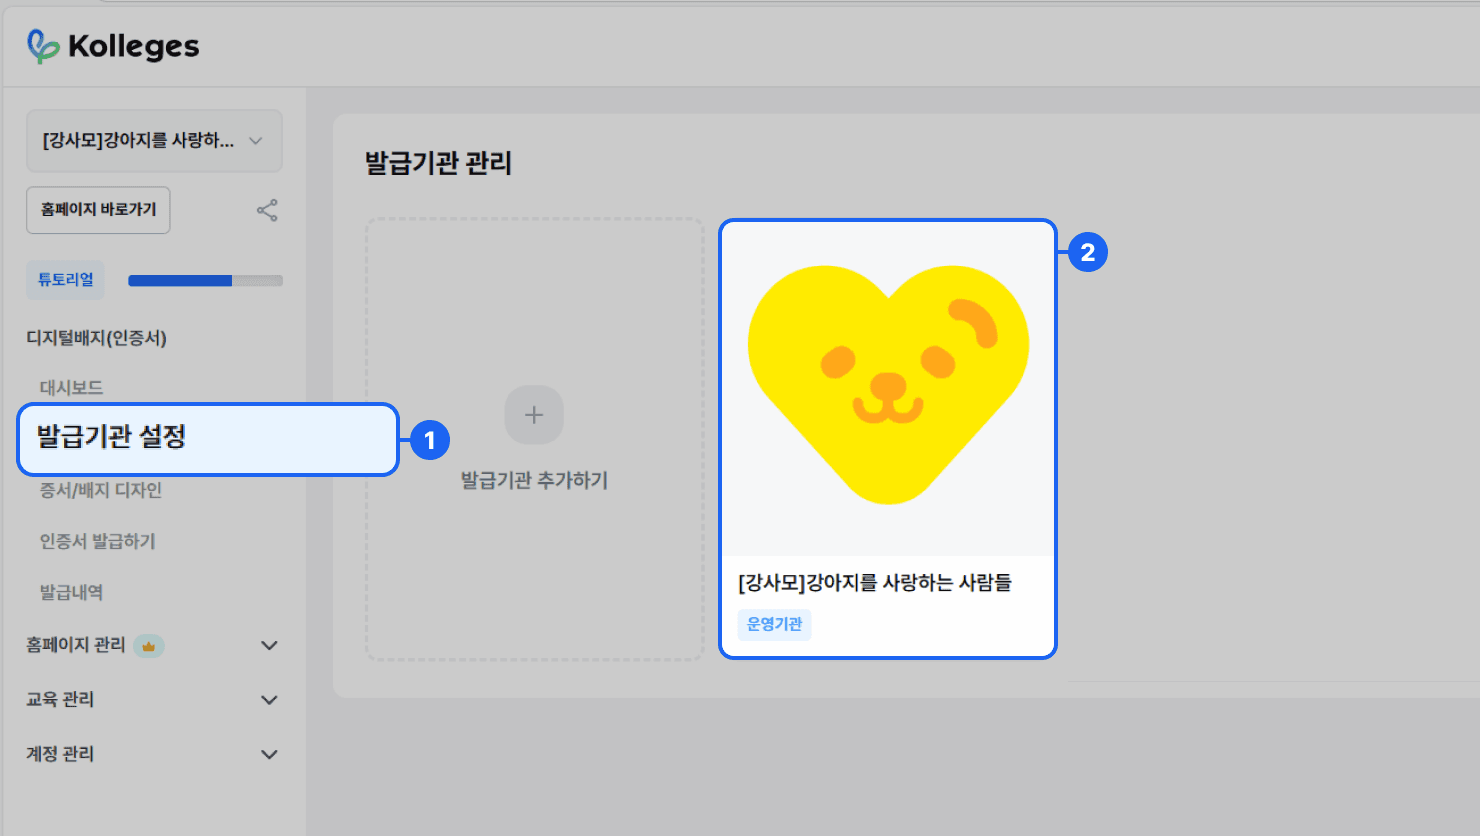
- In the left side menu, click the [Digital Badge (Certificate)] > [Issuer Settings] menu.
- In the [Issuer Settings] menu, click the {Operating Institution} card to move to the [Edit [Primary] Issuer] page where you can edit the [primary] issuer.
* The [primary] issuer (commonly called the operating institution) is the basic entity that issues certificates and serves as the representative institution of that group.
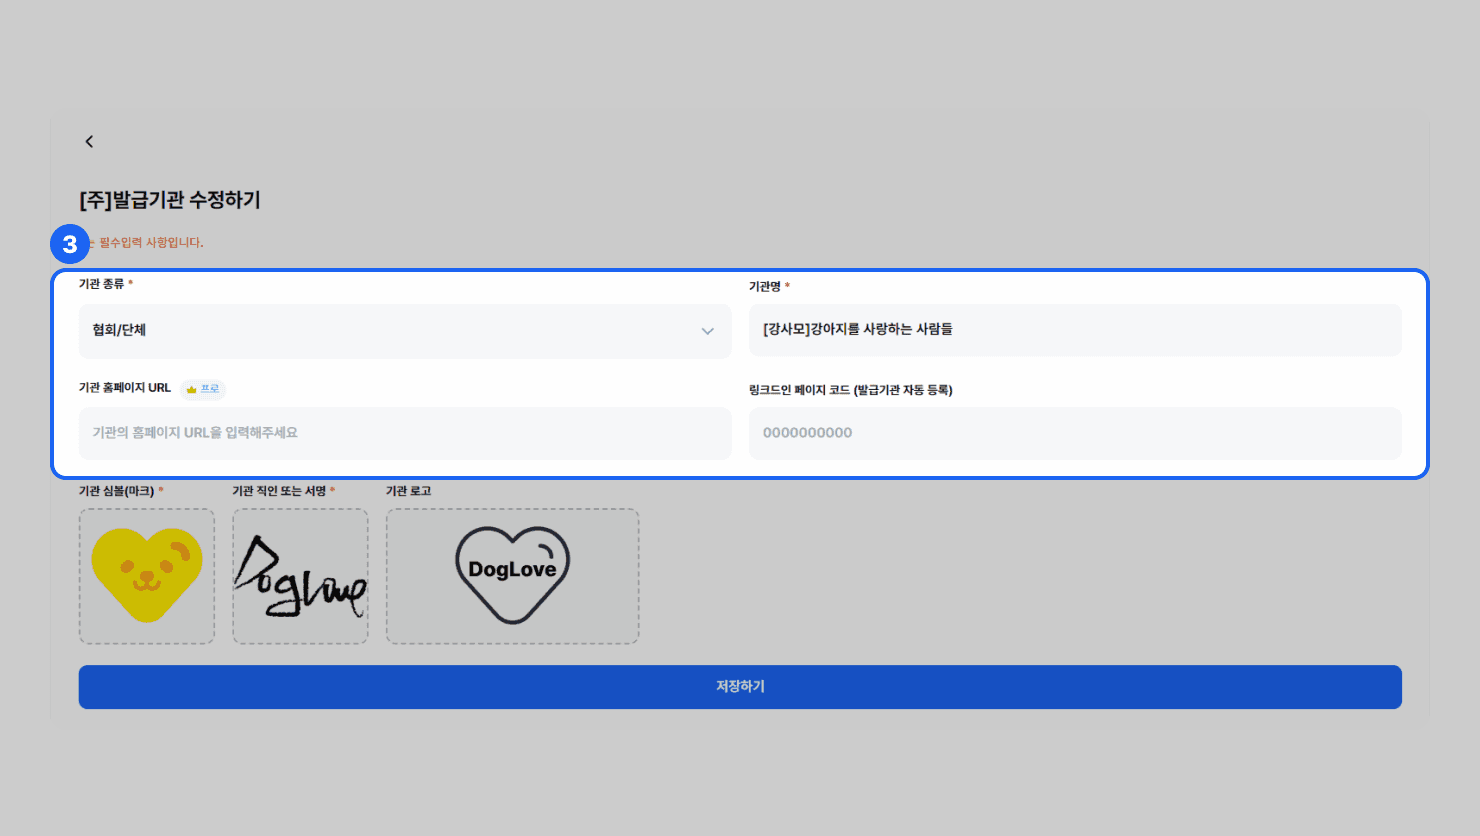
- Enter the institution information on the [Edit [Primary] Issuer] page.
- Institution type: Enter the institution type (institution, association/organization, school, enterprise).
- Institution name: Enter the official name of the issuer.
- Institution homepage URL: If the issuer has an official homepage, enter the URL.
- LinkedIn page code: If you register the LinkedIn page code, when a digital badge recipient adds the badge to their LinkedIn profile, the issuer’s name and logo are shown.
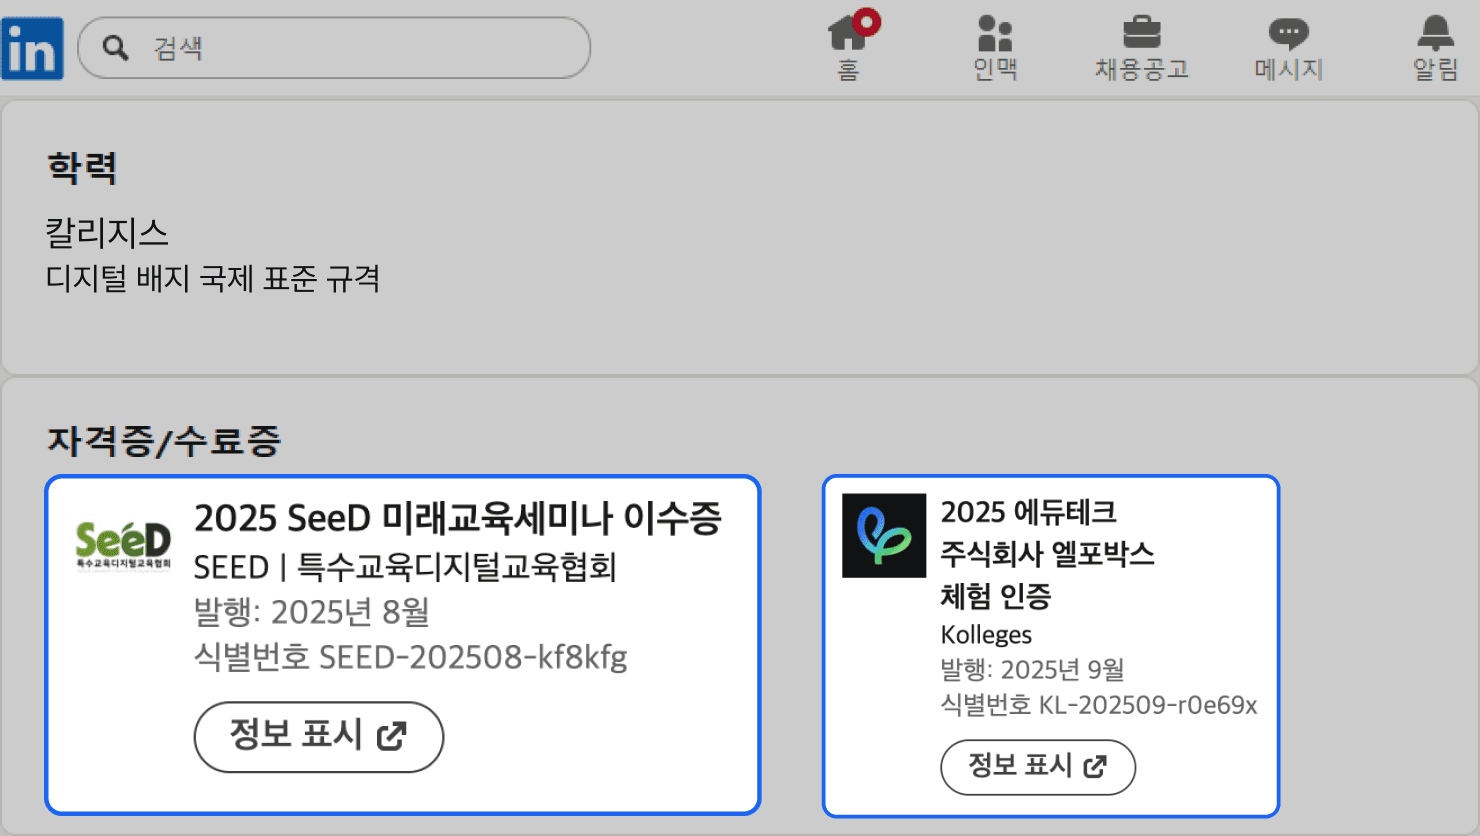
* If you do not register the LinkedIn page code, the Kolleges name and logo are shown when the badge is added to the profile.
Related guide: Managing your LinkedIn page
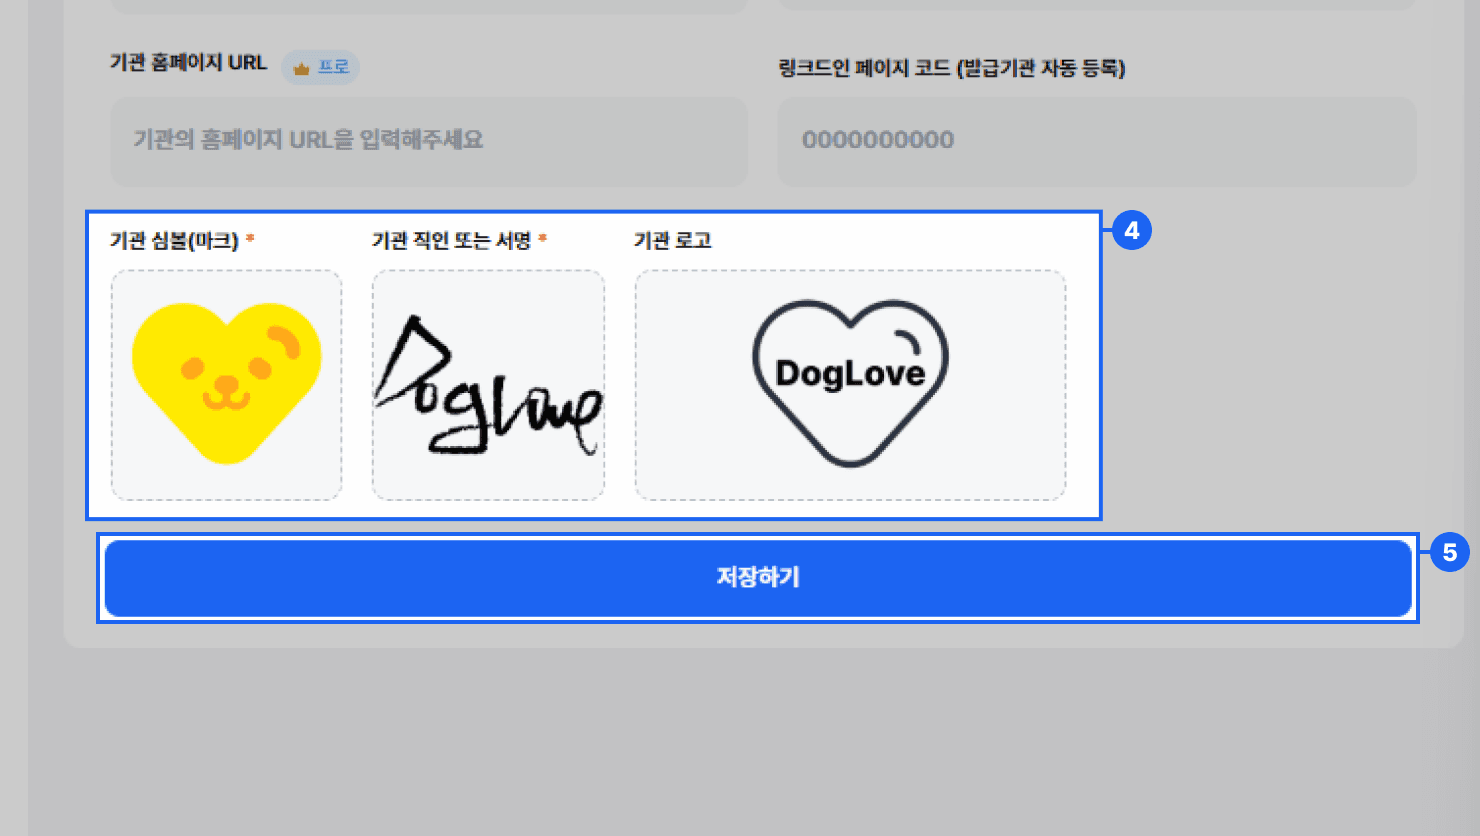
- Upload the image files on the [Edit [Primary] Issuer] page.
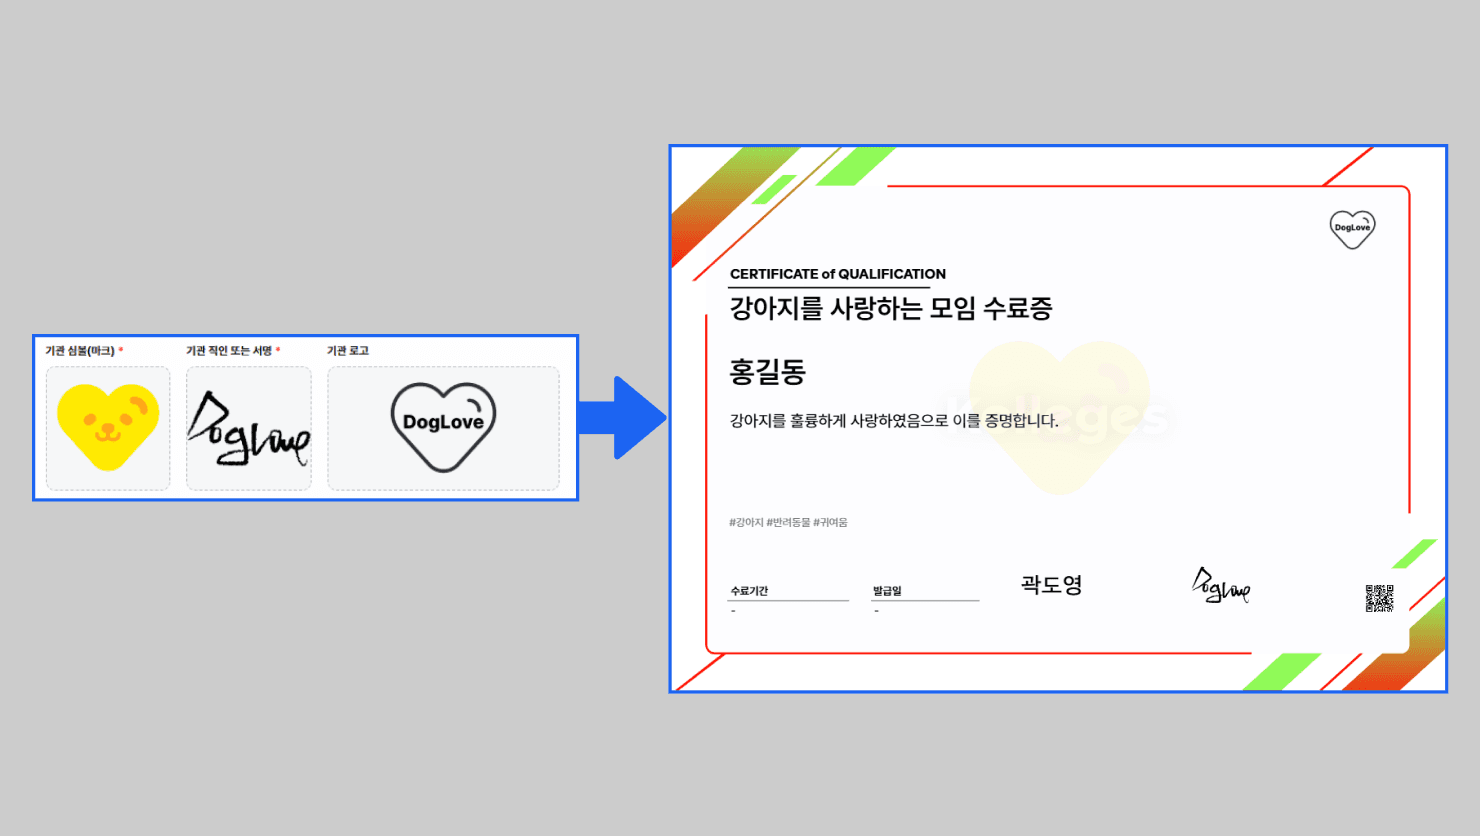
- Institution symbol (mark): Set the symbol image to be included on the certificate. (*1:1 ratio recommended)
- Institution official seal or signature: Set the official seal or signature image to be included on the certificate. (*1:1 ratio recommended)
- Institution logo: Set the logo image to be included on the certificate.
- Click the {Save} button and the edited content is immediately reflected on the homepage. (Caution: if you leave the page without clicking the {Save} button, the edited content is not saved.)
[Example Screen]
Adding a [Secondary] Issuer
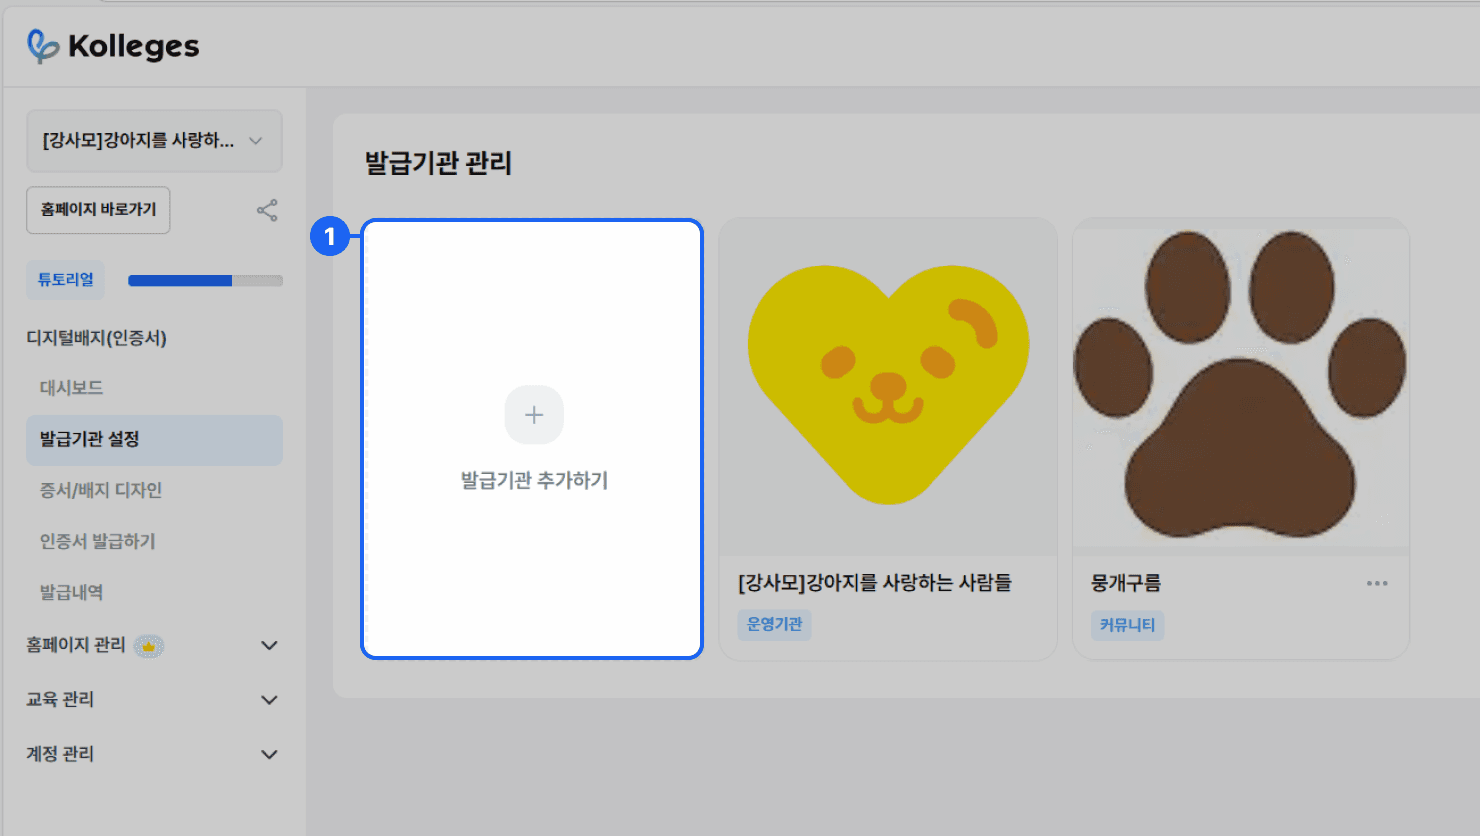
- In the [Issuer Settings] menu, click the {+ Add Issuer} card to move to the [Add [Secondary] Issuer] page where you can add a [secondary] issuer.
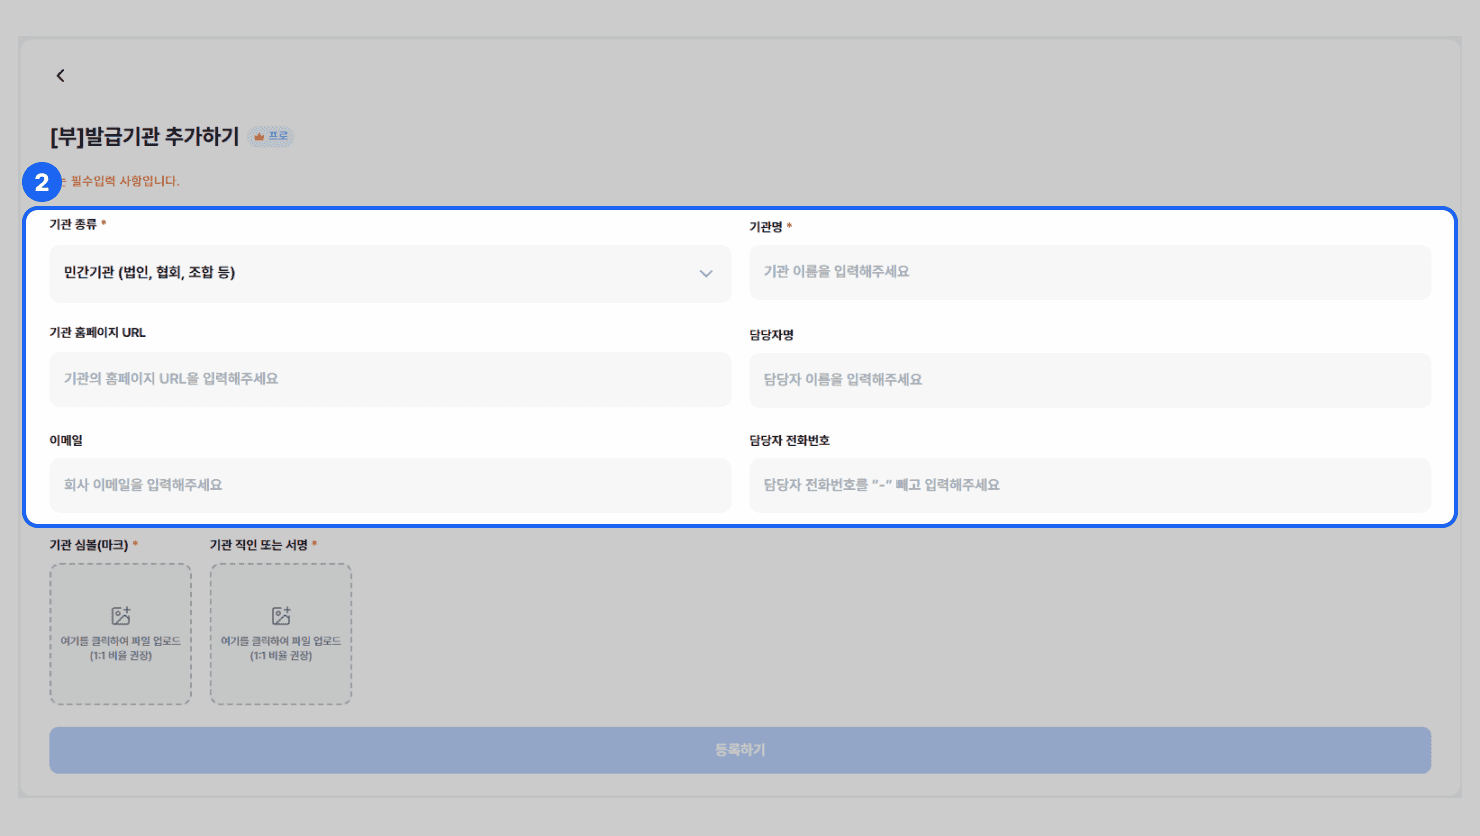
- Enter the information on the [Add [Secondary] Issuer] page.
- Institution type: Select the institution type (private institution, public institution, community).
- Institution name: Enter the name of the institution that appears on the certificate.
- Institution homepage URL: If the issuer has a homepage, enter the URL.
- Contact person name: Enter the contact person name of the [secondary] issuer.
- Email: Enter the email of the [secondary] issuer.
- Contact person phone number: Enter the phone number of the [secondary] issuer’s contact person.
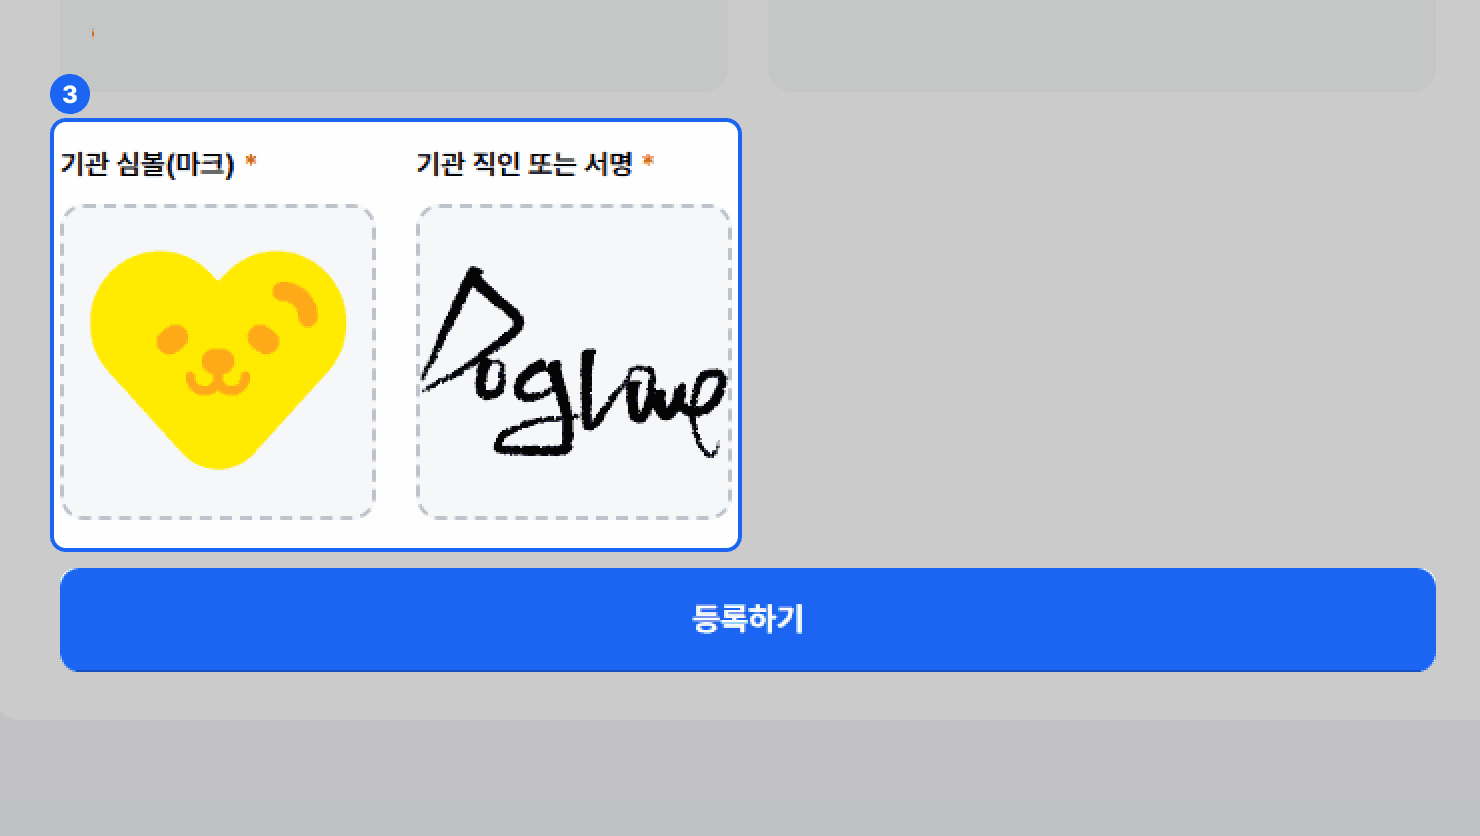
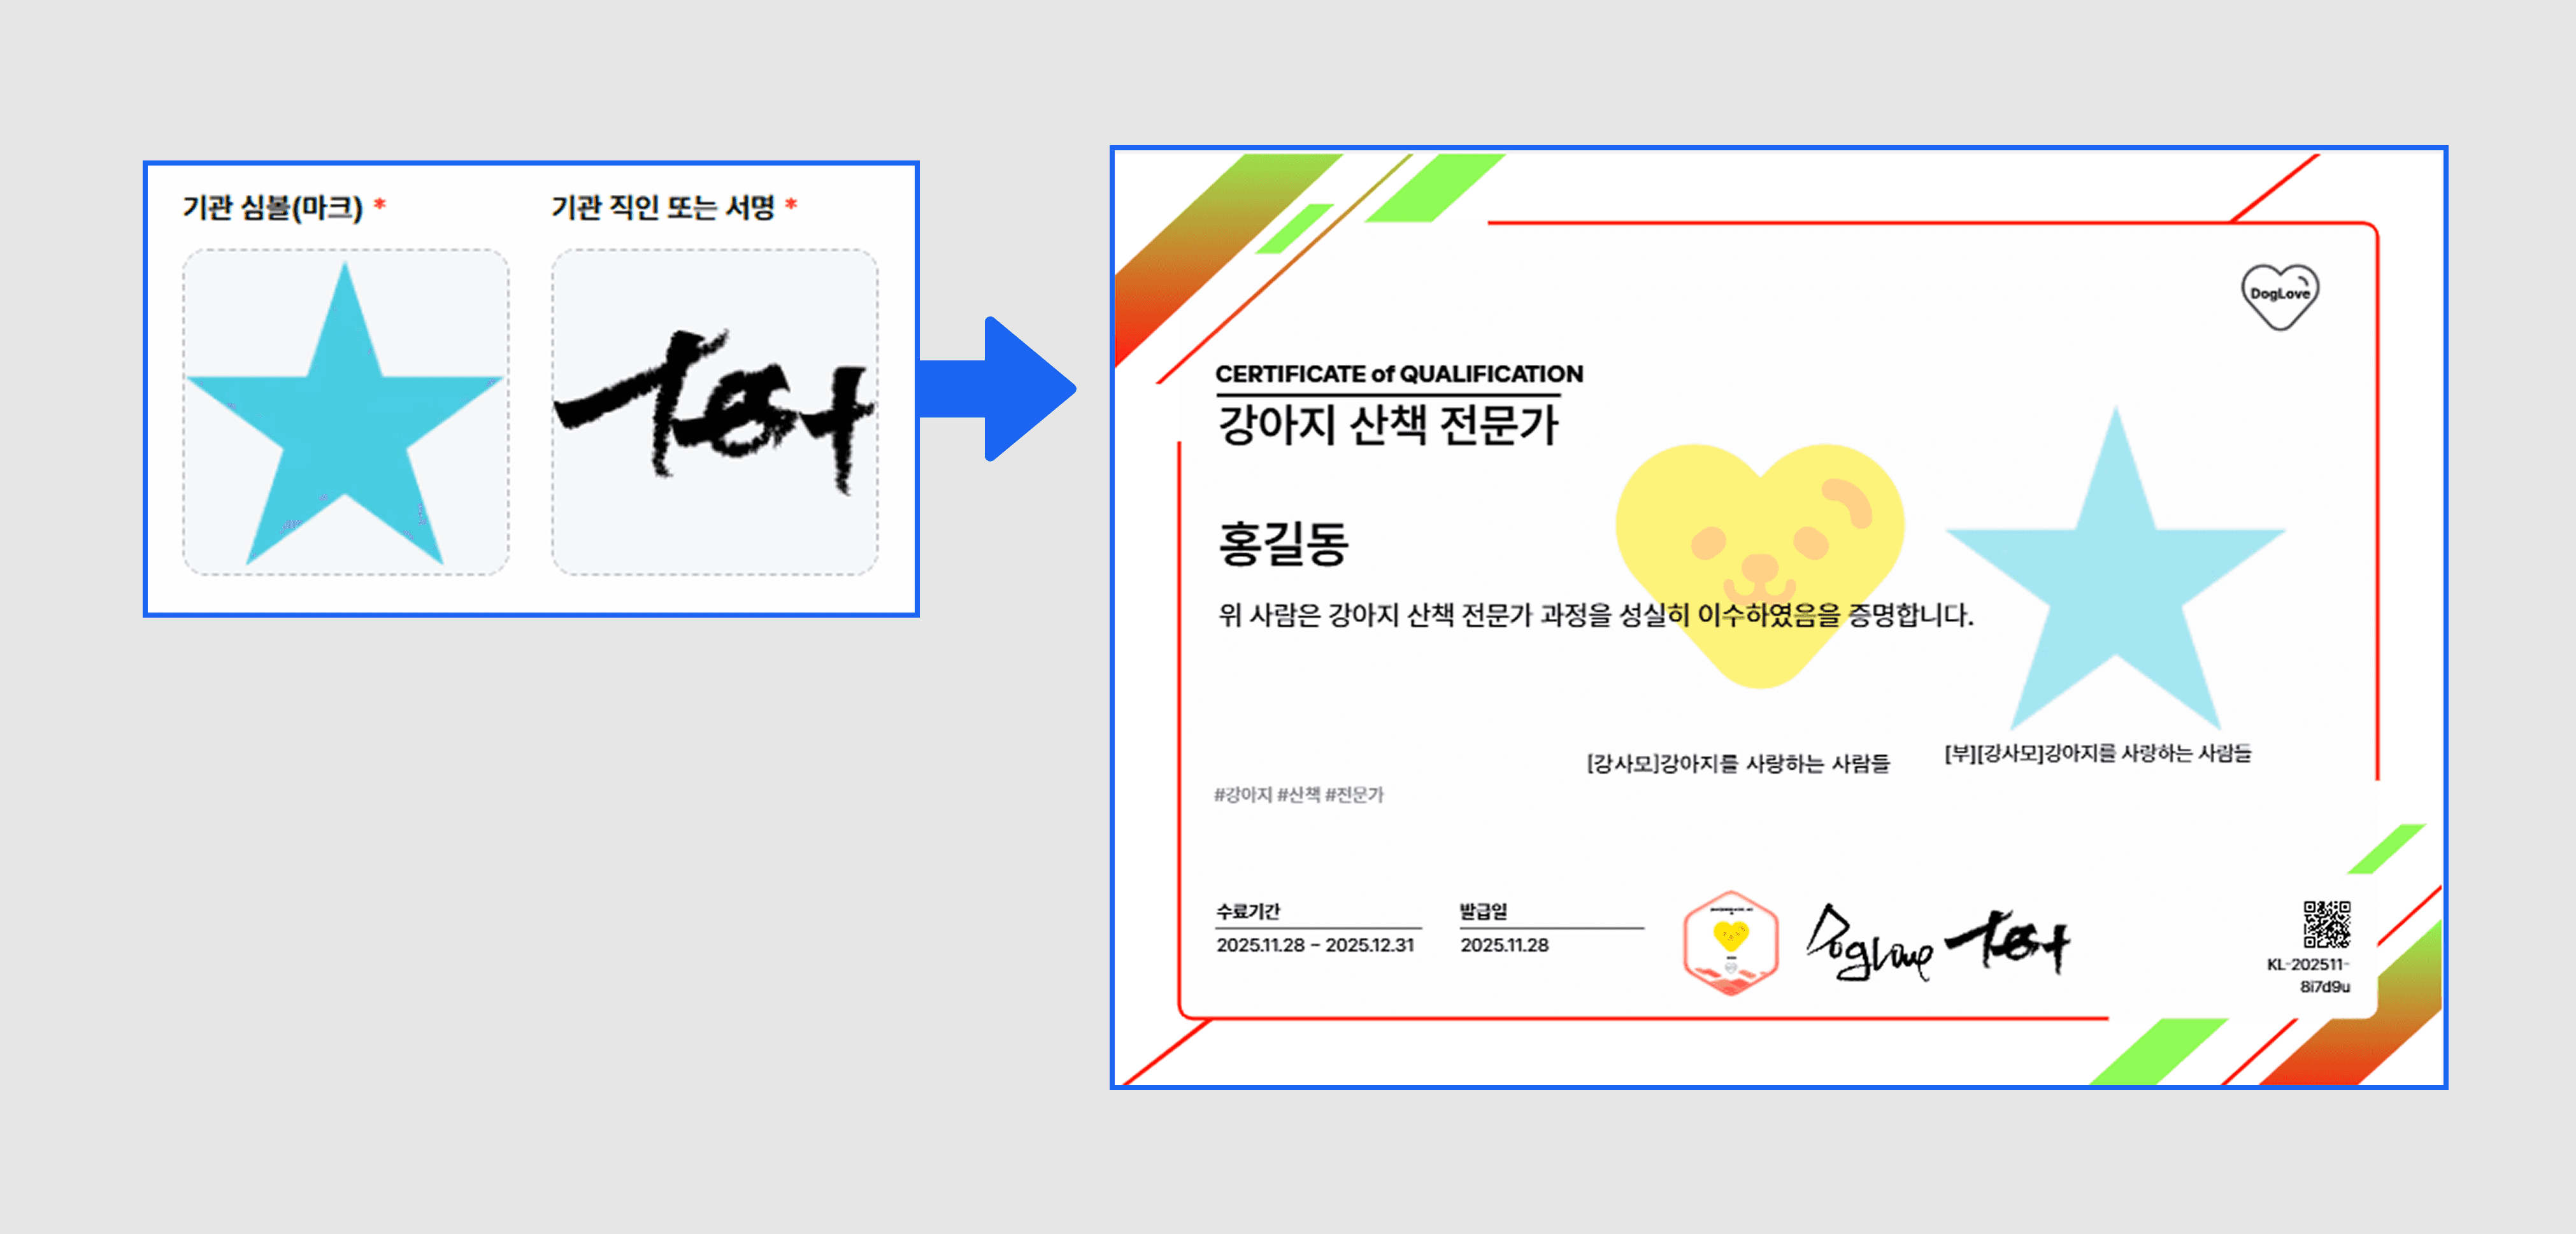
- Upload the institution symbol (mark) and the official seal or signature image files of the [secondary] issuer.
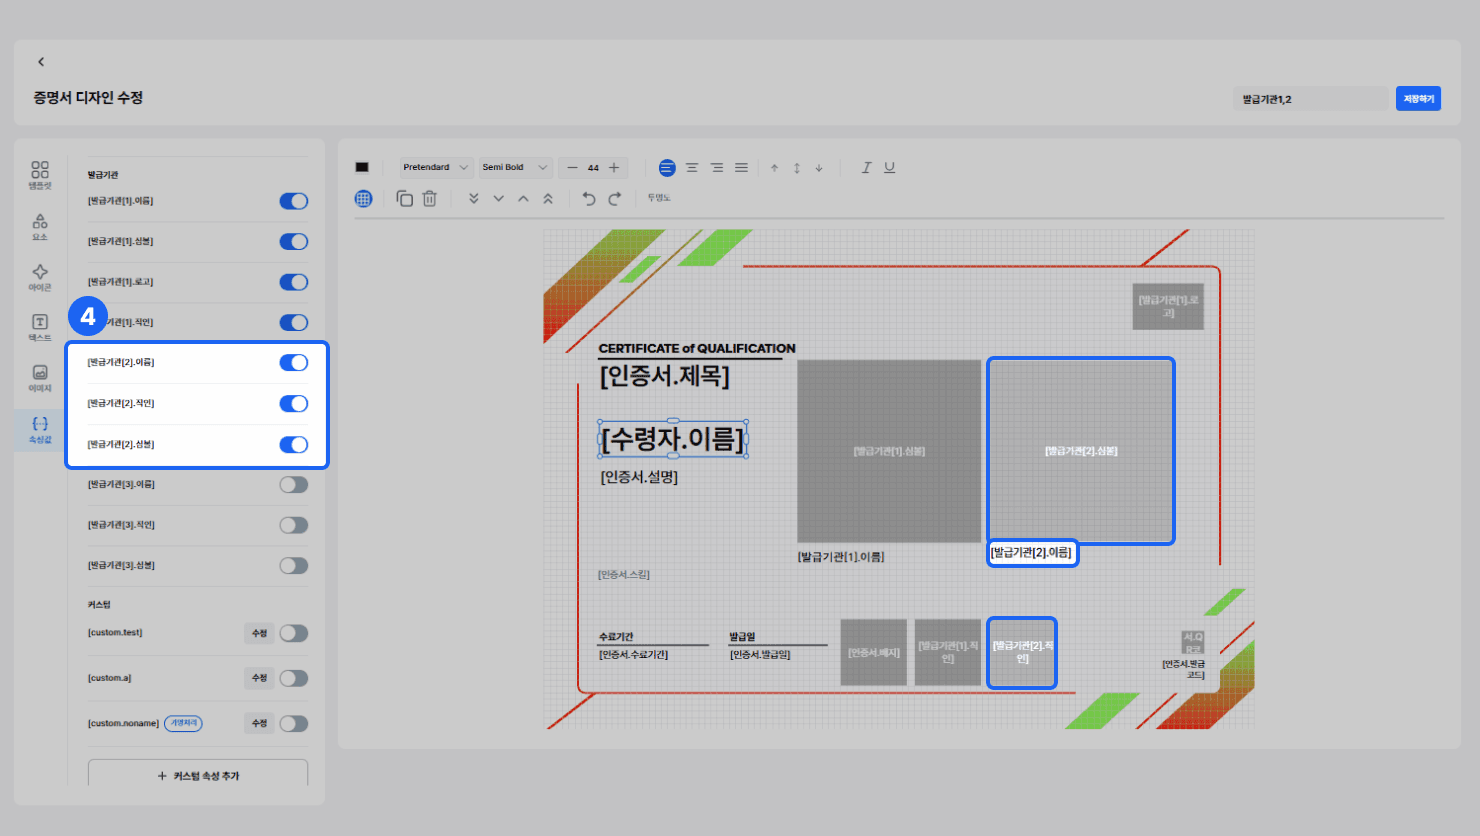
- Place the attribute values in the positions you want, then click the {Save} button in the top right.
* When you add a [secondary] issuer, it is displayed as a co-issuer together with the [primary] issuer on a single certificate.
[Example Screen]
Frequently asked questions
Want to turn learning outcomes into verifiable assets?
From issuing to verifying and amplifying, see it for yourself with Kolleges.
Request a Kolleges demo
Related posts

Homepage Information Settings
A step-by-step guide to setting homepage basic information (group name, brand colors, logo, membership approval method, etc.) and business (footer) information from the Kolleges homepage management menu.

Badge Design
In the Kolleges editor, you can adjust templates, badges, ribbons, icons, text, and attribute values step by step to complete a digital badge that fits your institution's brand.

Creating a Digital Badge
A step-by-step guide to the entire Kolleges certificate creation process, from entering basic information, skill tags, and acquisition conditions to adding co-issuers and enabling English certificates.