

A step-by-step guide to setting homepage basic information (group name, brand colors, logo, membership approval method, etc.) and business (footer) information from the Kolleges homepage management menu.
Kolleges guide: This article introduces how to set homepage basic information and business information.

Basic Information Settings
You can set homepage information in the [Homepage Management] > [Homepage Information] > [Basic Information] tab.
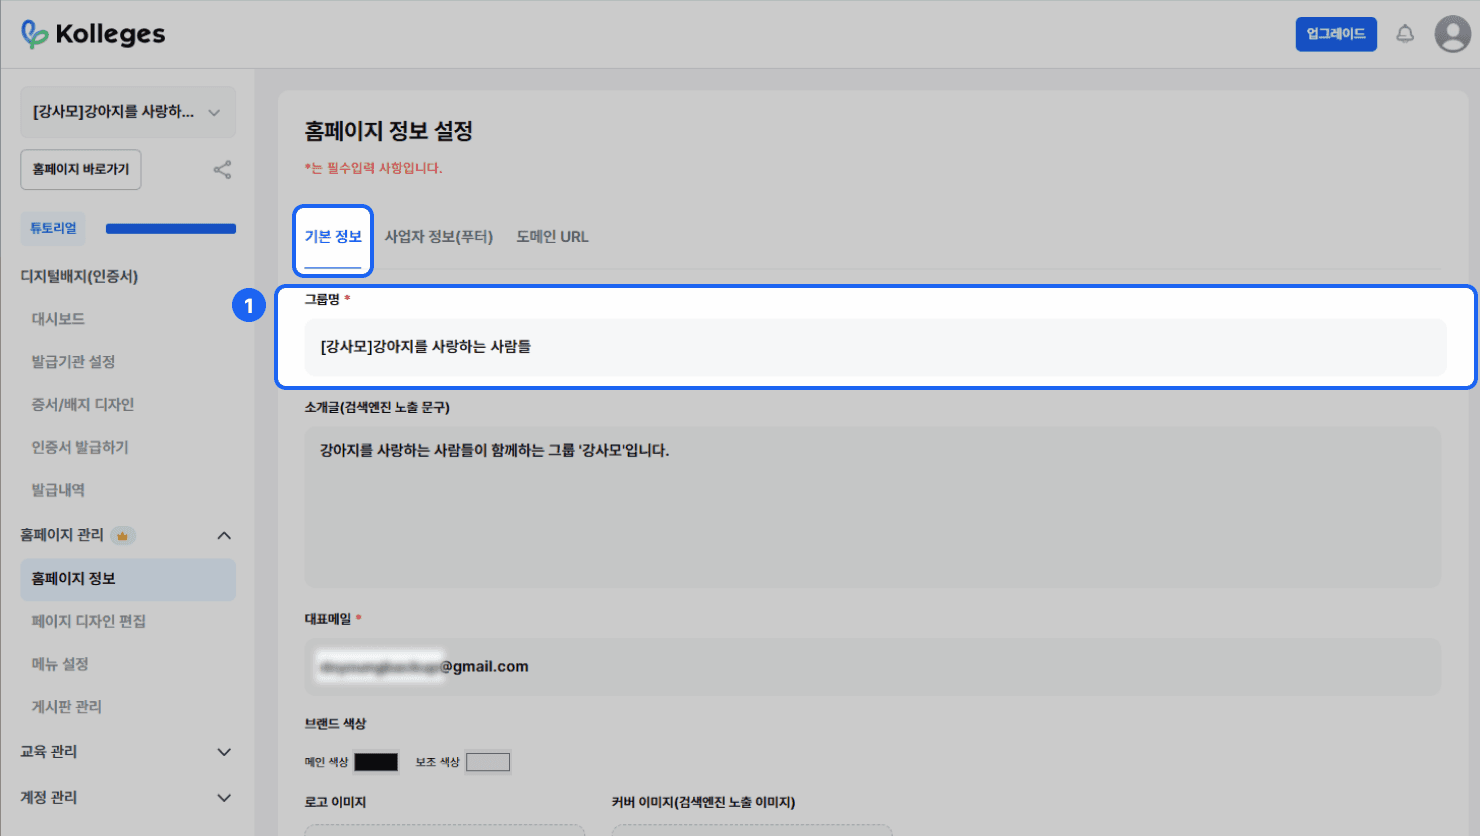
- Group name: The group name of the homepage.
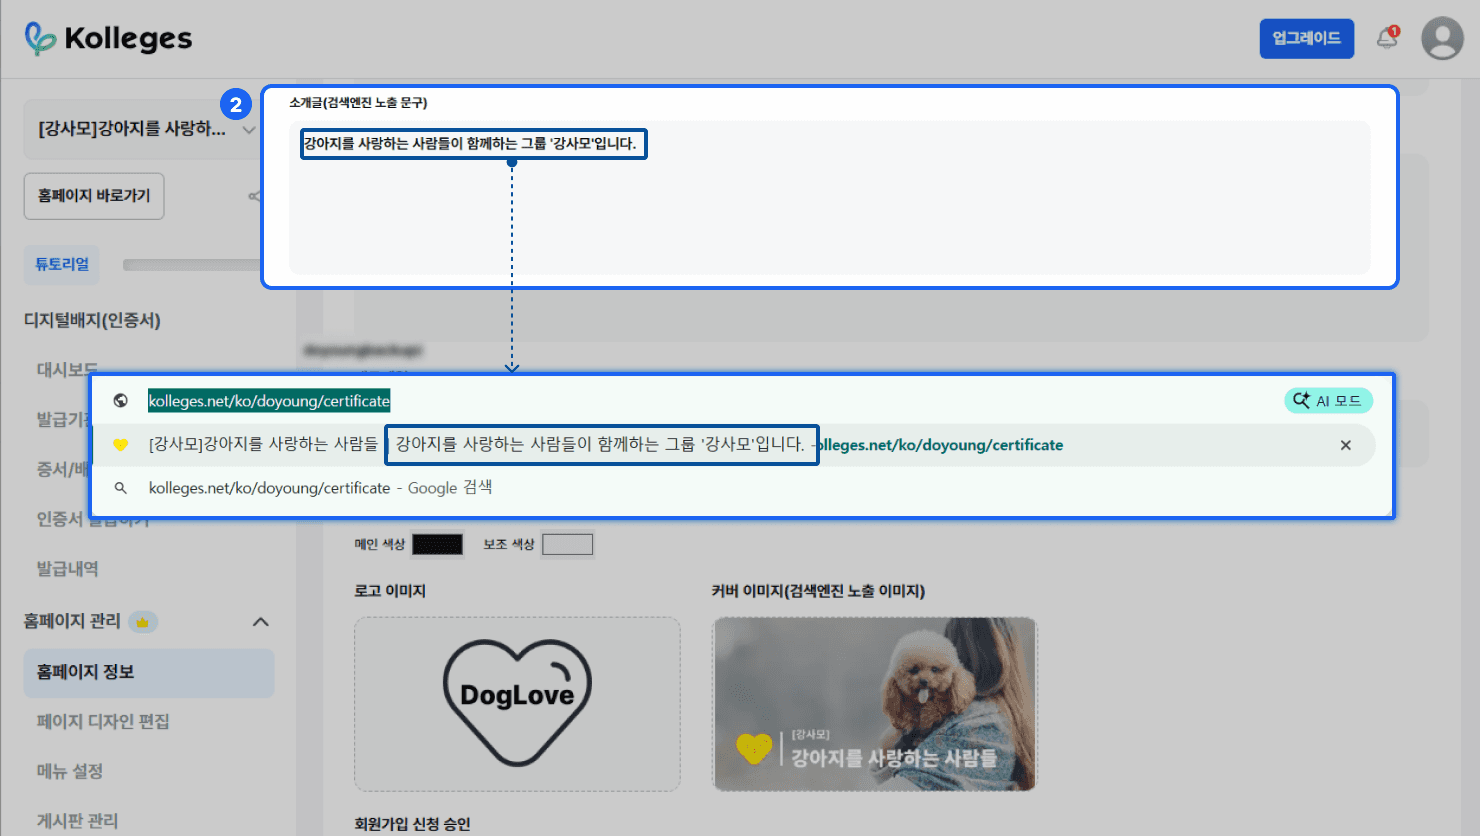
- Introduction: The introduction text for the homepage. When the homepage is searched, this introduction is shown together with the group name.
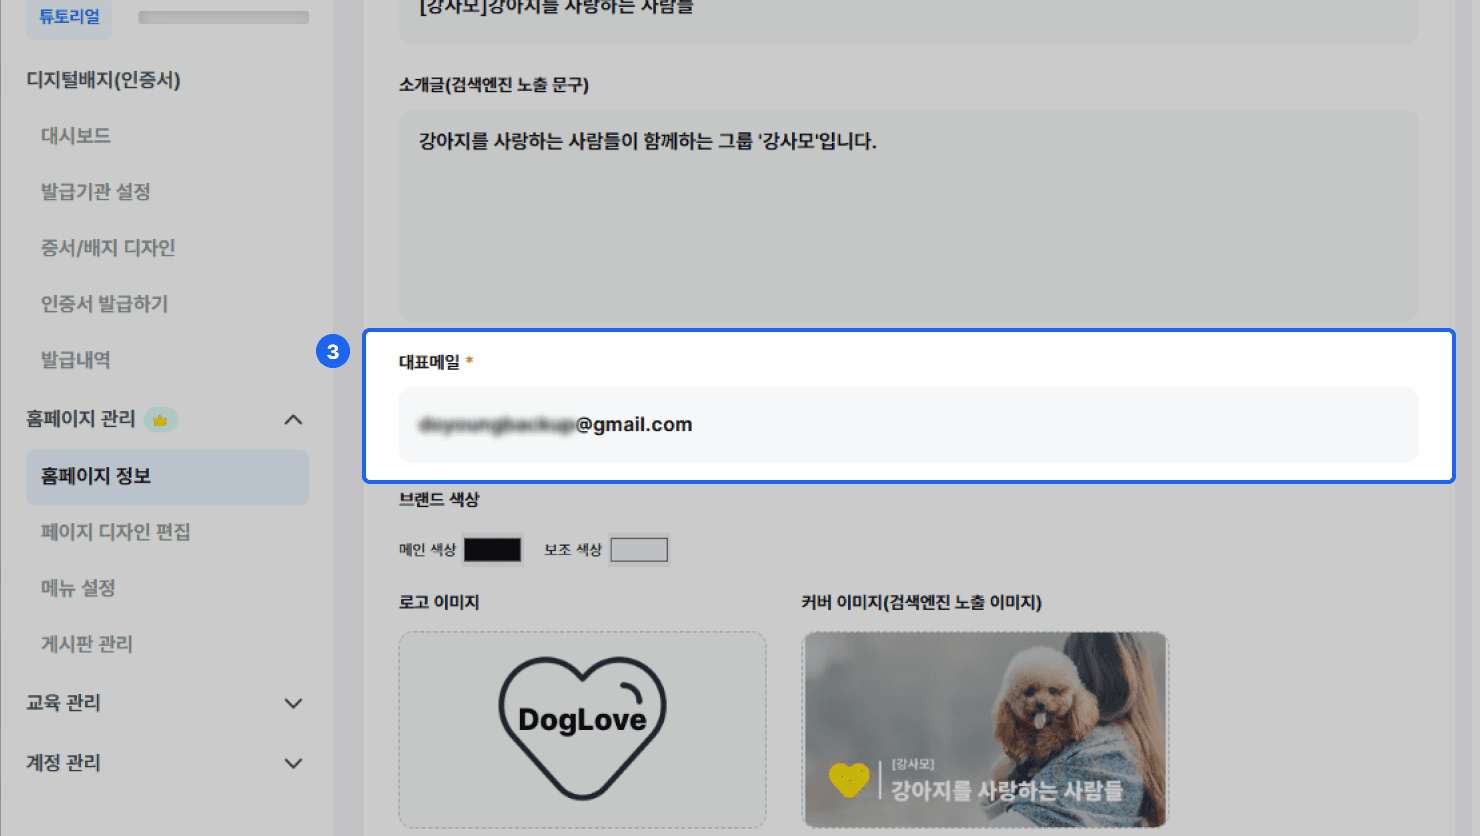
- Representative email: The representative email of the homepage.
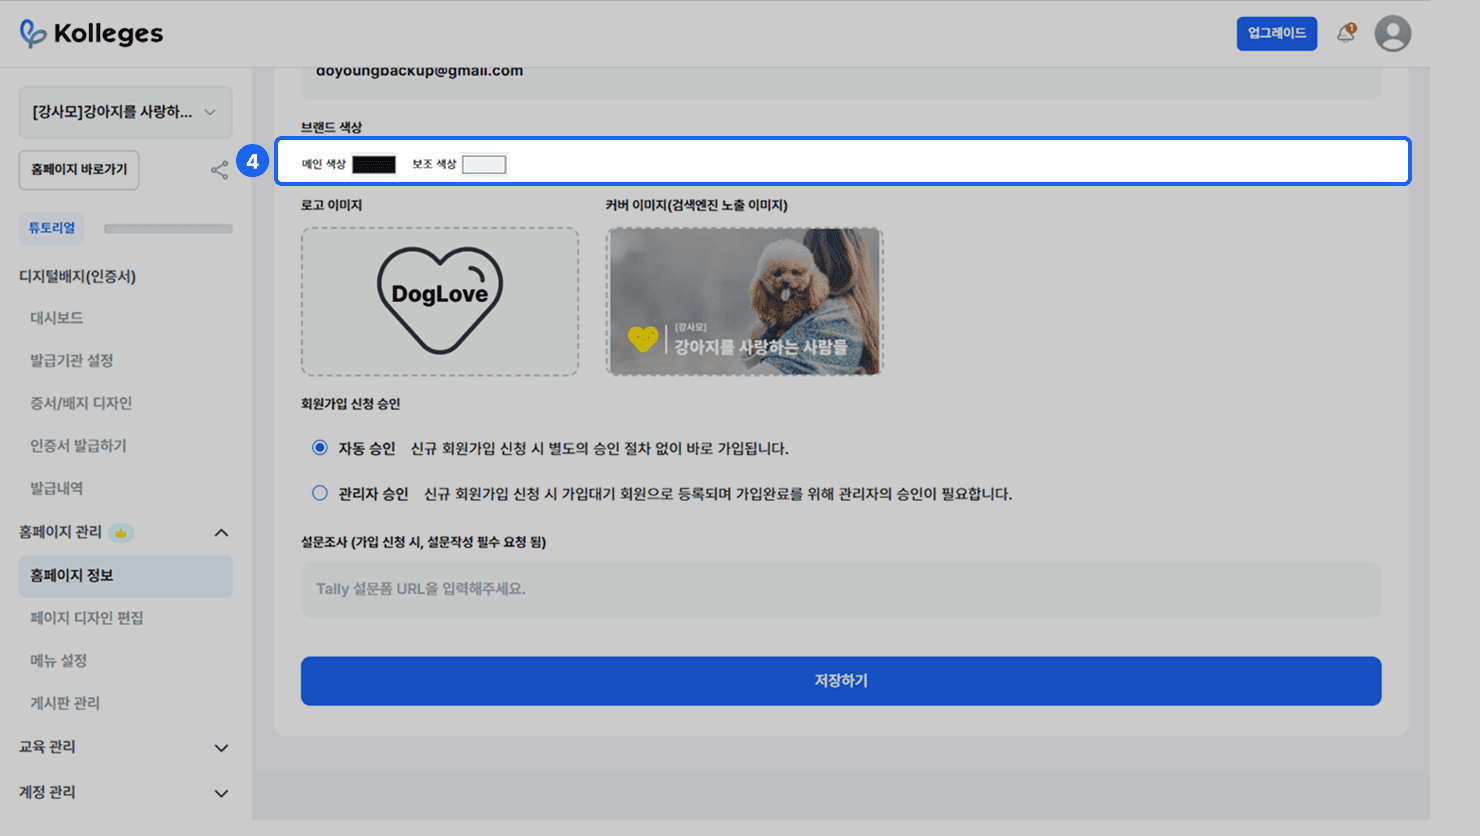
- Brand colors: The main color and secondary color to apply to the site.
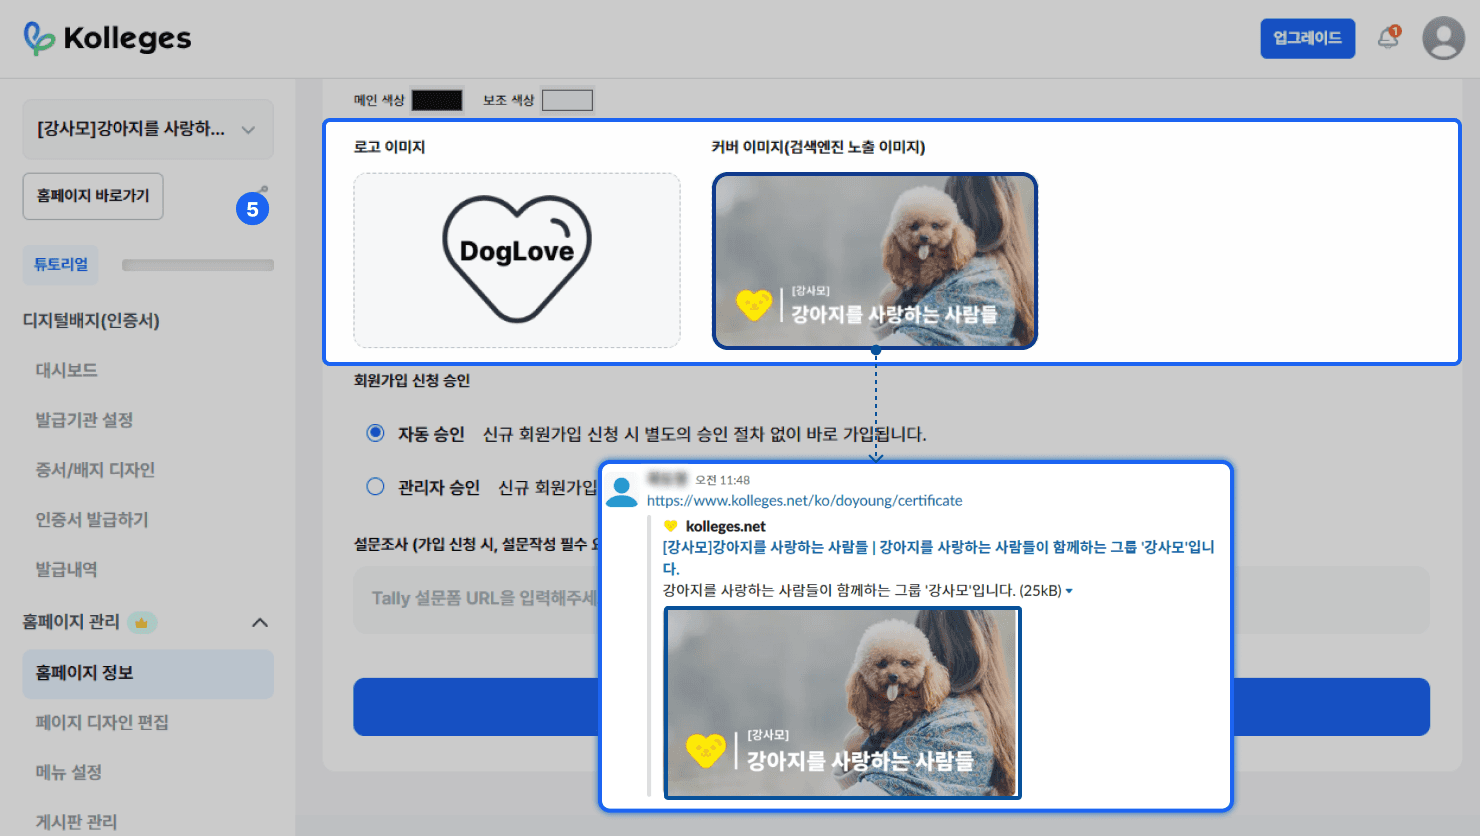
- Images
- Logo image: Used as the homepage main logo and the issuer logo.
- Cover image: Used as the preview image when the homepage link is shared.
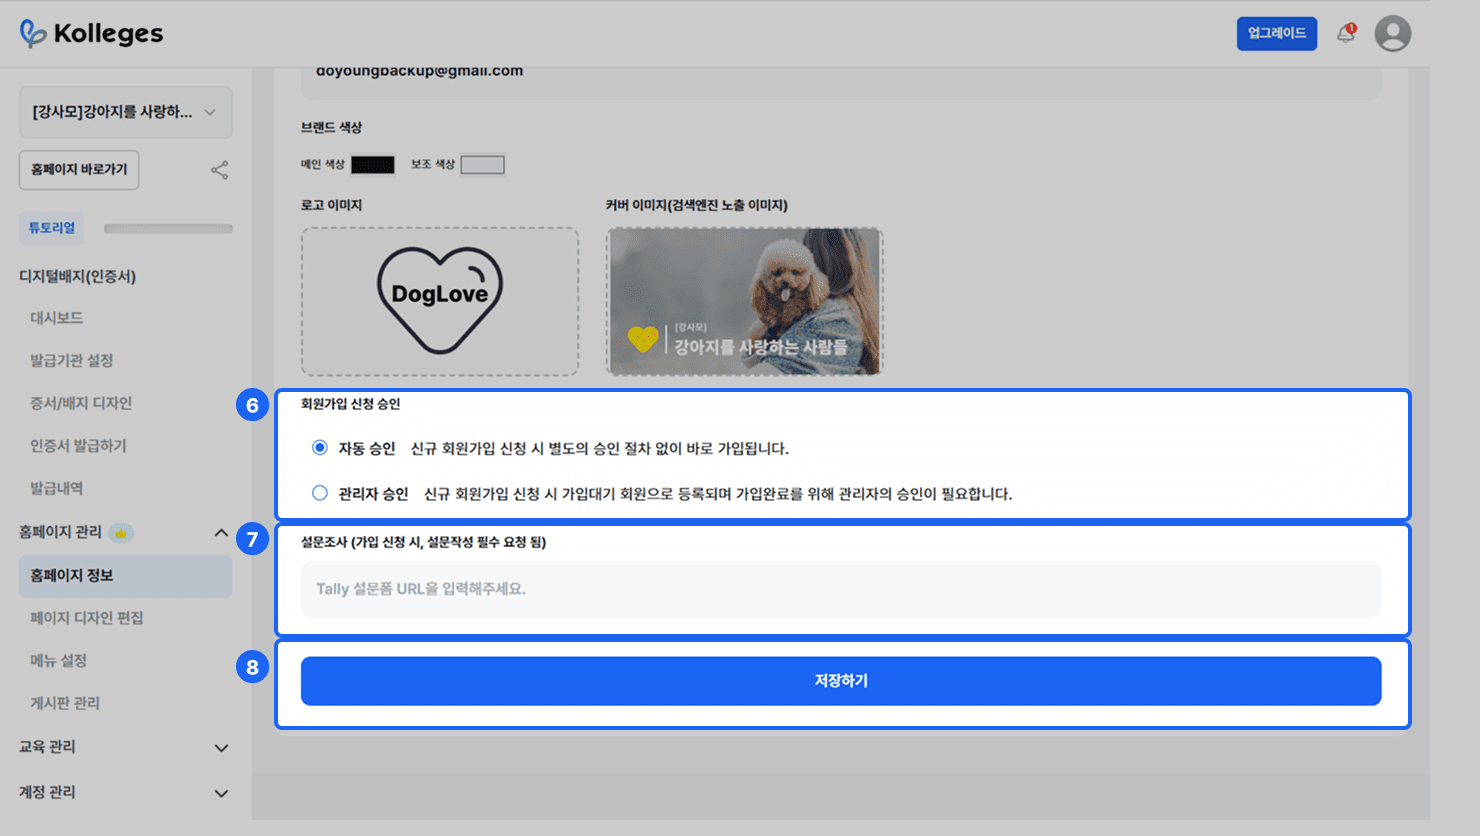
- Membership sign-up approval
- Automatic approval: When a new membership sign-up is submitted, sign-up is processed without a separate approval procedure.
- Admin approval: When a new membership sign-up is submitted, it is registered in a pending state, and sign-up is completed after the admin approves it.
- Survey: When a student joins the group, they are required to submit the survey.
- Copy and paste the link of the survey created with Tally.
- Save: Saves the changed content and information.
(Note: if you leave the page without clicking the {Save} button, your changes will not be saved.)
Business Information (Footer) Settings
You can set the homepage footer information in the [Homepage Management] > [Homepage Information] > [Business Information (Footer)] tab.
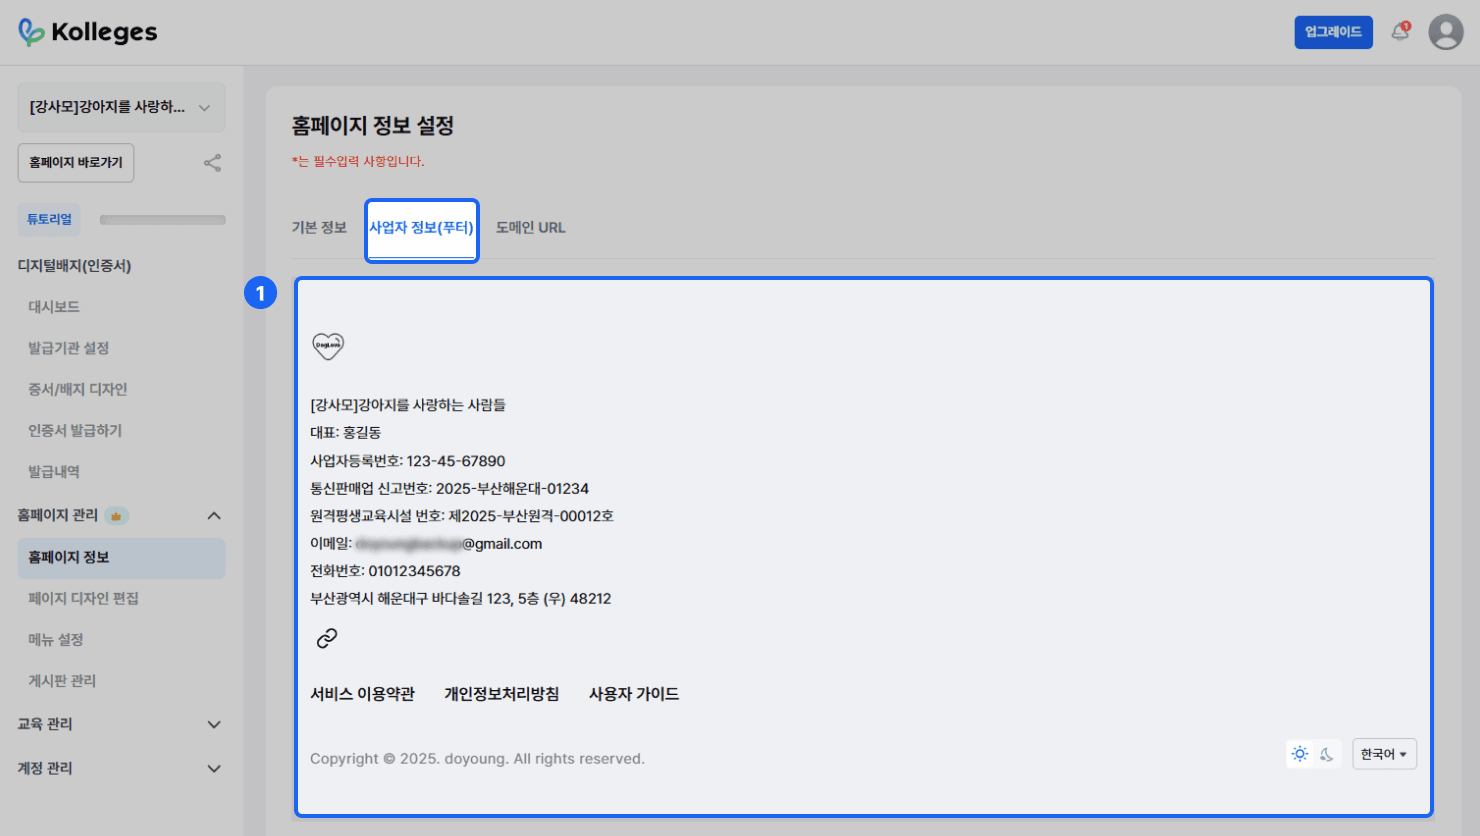
- Preview: You can check the content you entered for the business information (footer) in a preview.
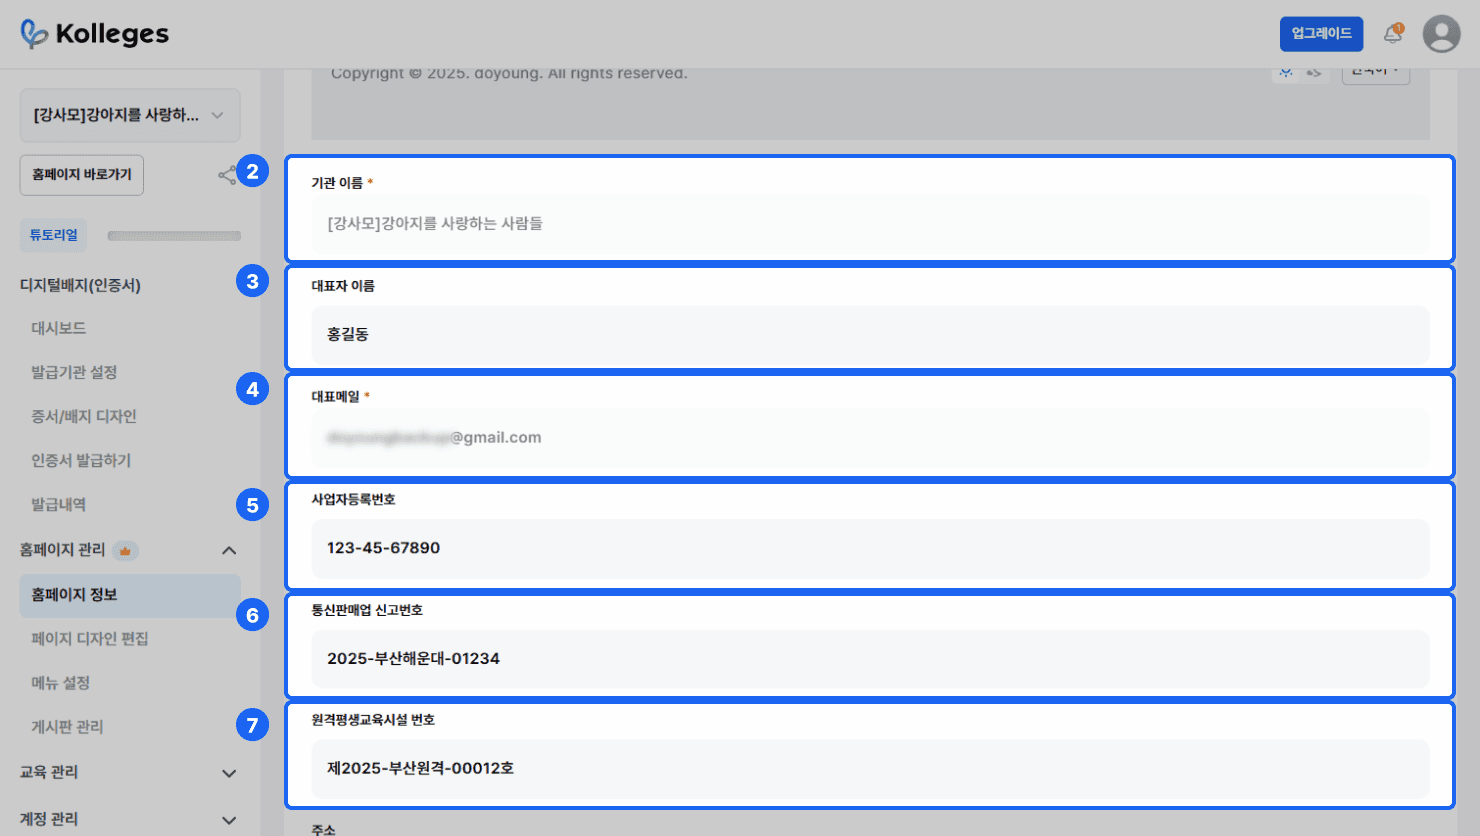
- Organization name: The organization’s name is filled in automatically.
- Representative name: Enter the name of the organization’s representative.
- Representative email: The organization’s representative email is filled in automatically.
- Business registration number: Enter the 10-digit business registration number.
- Mail-order business report number: Enter the mail-order business report number.
- Remote lifelong education facility number: Enter the remote lifelong education facility number.
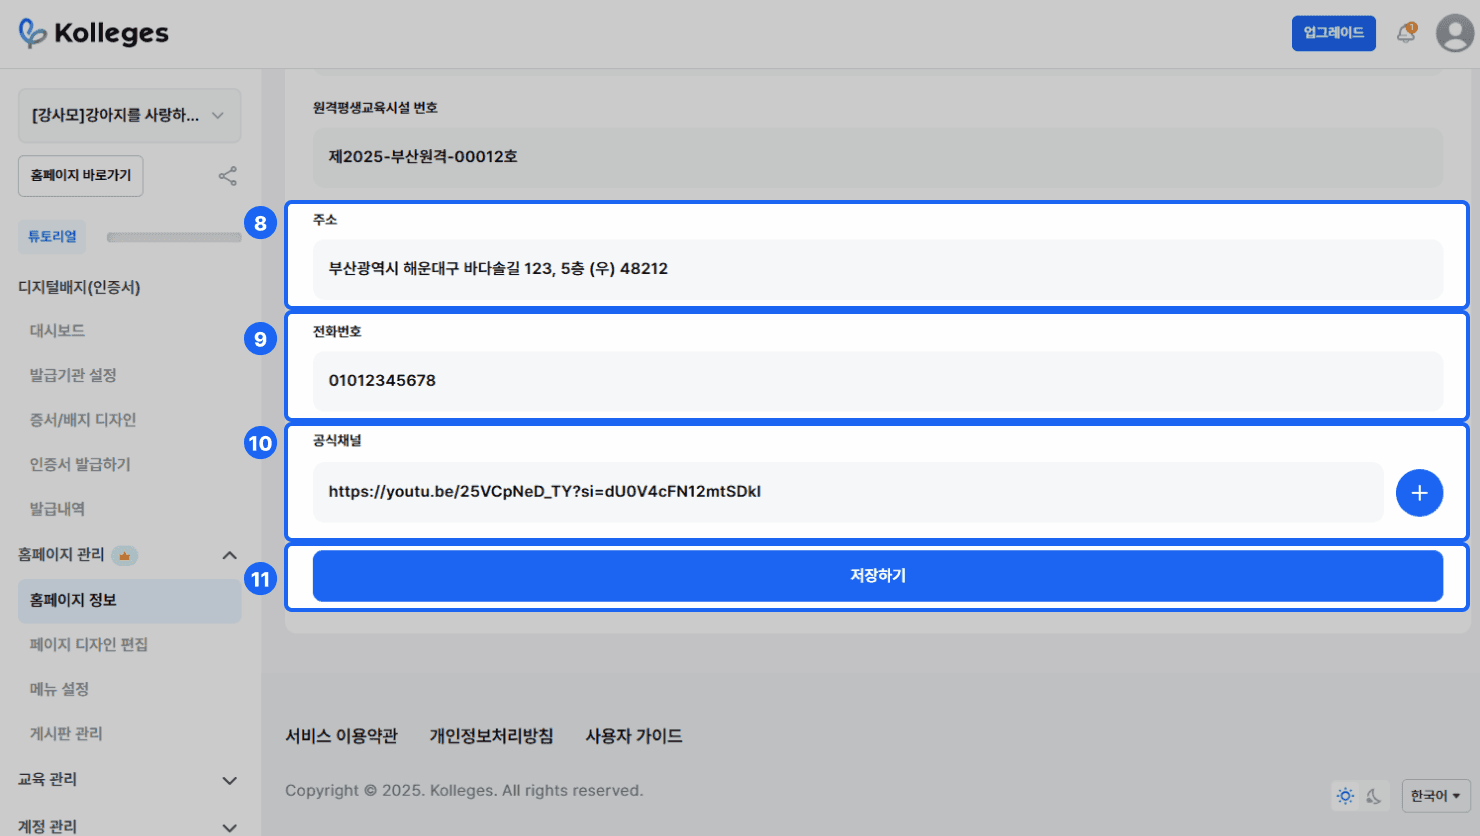
- Address: Enter the organization’s address.
- Phone number: Enter the organization’s phone number.
- Official channels: Enter URLs such as the organization’s official homepage, YouTube, Discord, and KakaoTalk channel. If you want to add more channels, you can add them with the {+} button.
- {Save}: Saves the changed content and information.
(Note: if you leave the page without clicking the {Save} button, your changes will not be saved.)
Frequently asked questions
Want to turn learning outcomes into verifiable assets?
From issuing to verifying and amplifying, see it for yourself with Kolleges.
Request a Kolleges demo
Related posts

Creating a Workspace
A step-by-step guide to the process of creating a new workspace on the Kolleges admin page or joining an existing workspace as an admin.

Homepage Design Editing Guide: Customizing Your Badge Platform Brand
A step-by-step editing guide for completing a homepage that matches your organization's brand by editing 9 components such as the logo, theme color, and banners in the Kolleges admin screen.

Issuer Settings
[Primary] issuer information (institution name, symbol, official seal, logo) and the LinkedIn code must be registered first before you can officially issue badges and certificates.