
In the Kolleges editor, you can adjust templates, badges, ribbons, icons, text, and attribute values step by step to complete a digital badge that fits your institution's brand.
How to set up your digital badge design. Create a badge that fits your brand with Kolleges.
Badge Design
Before creating a certificate, you must first create a badge design.
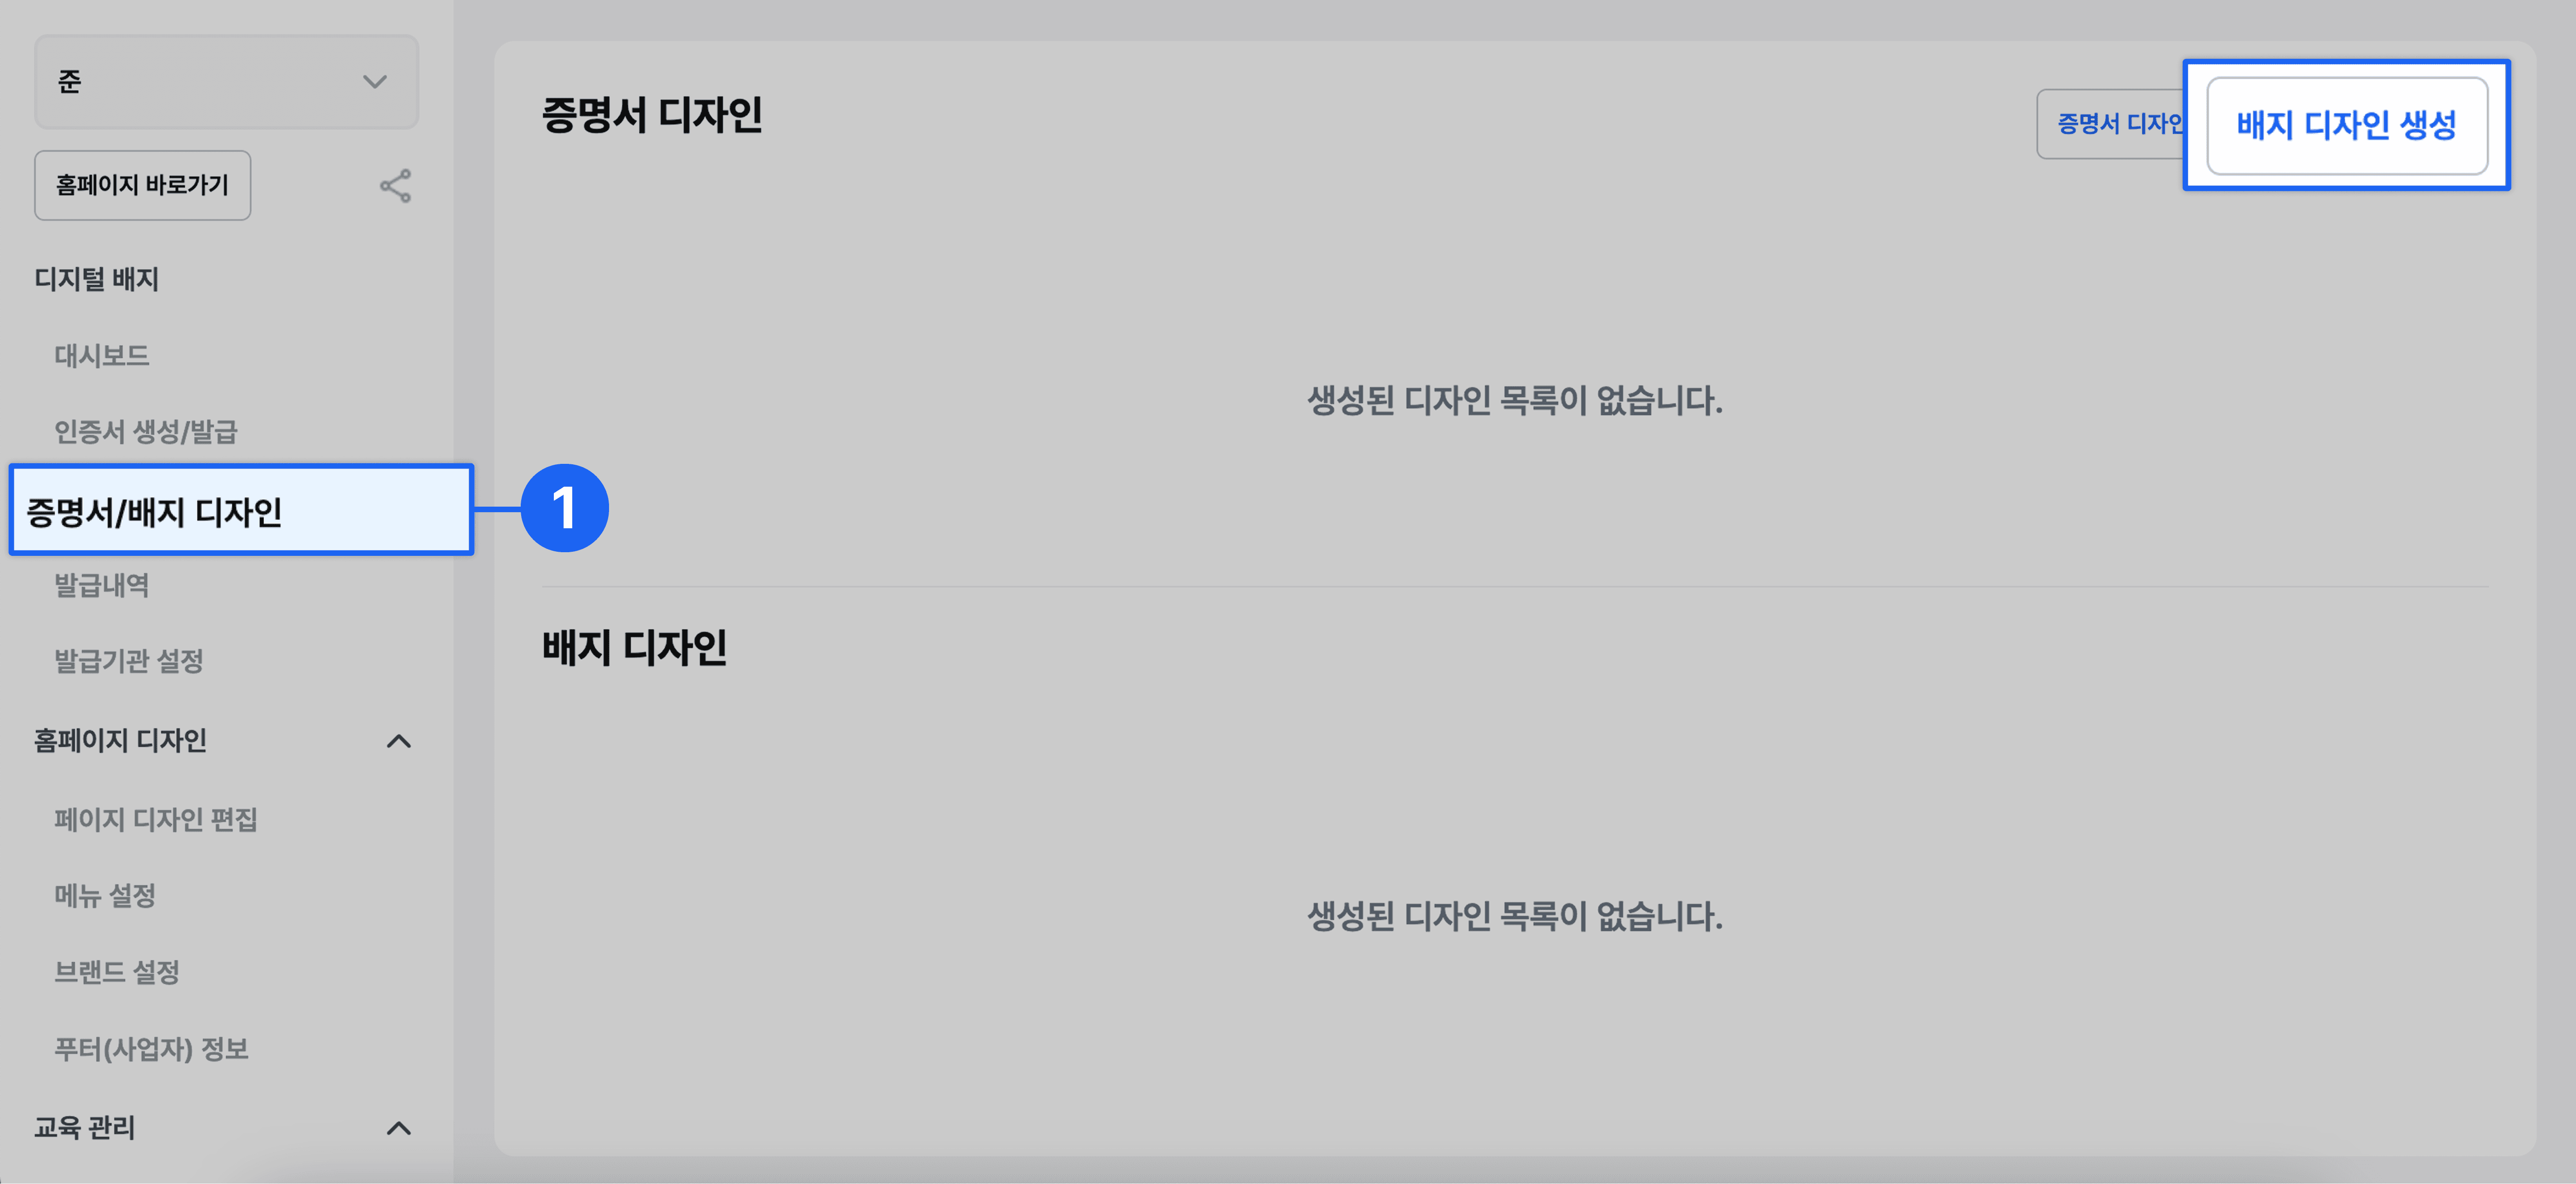
- Click [Certificate/Badge Design] in the left menu.
- Click the [Create Badge Design] button in the top right.
Using a Template
If you select a template, you can quickly create a badge without any separate design work.
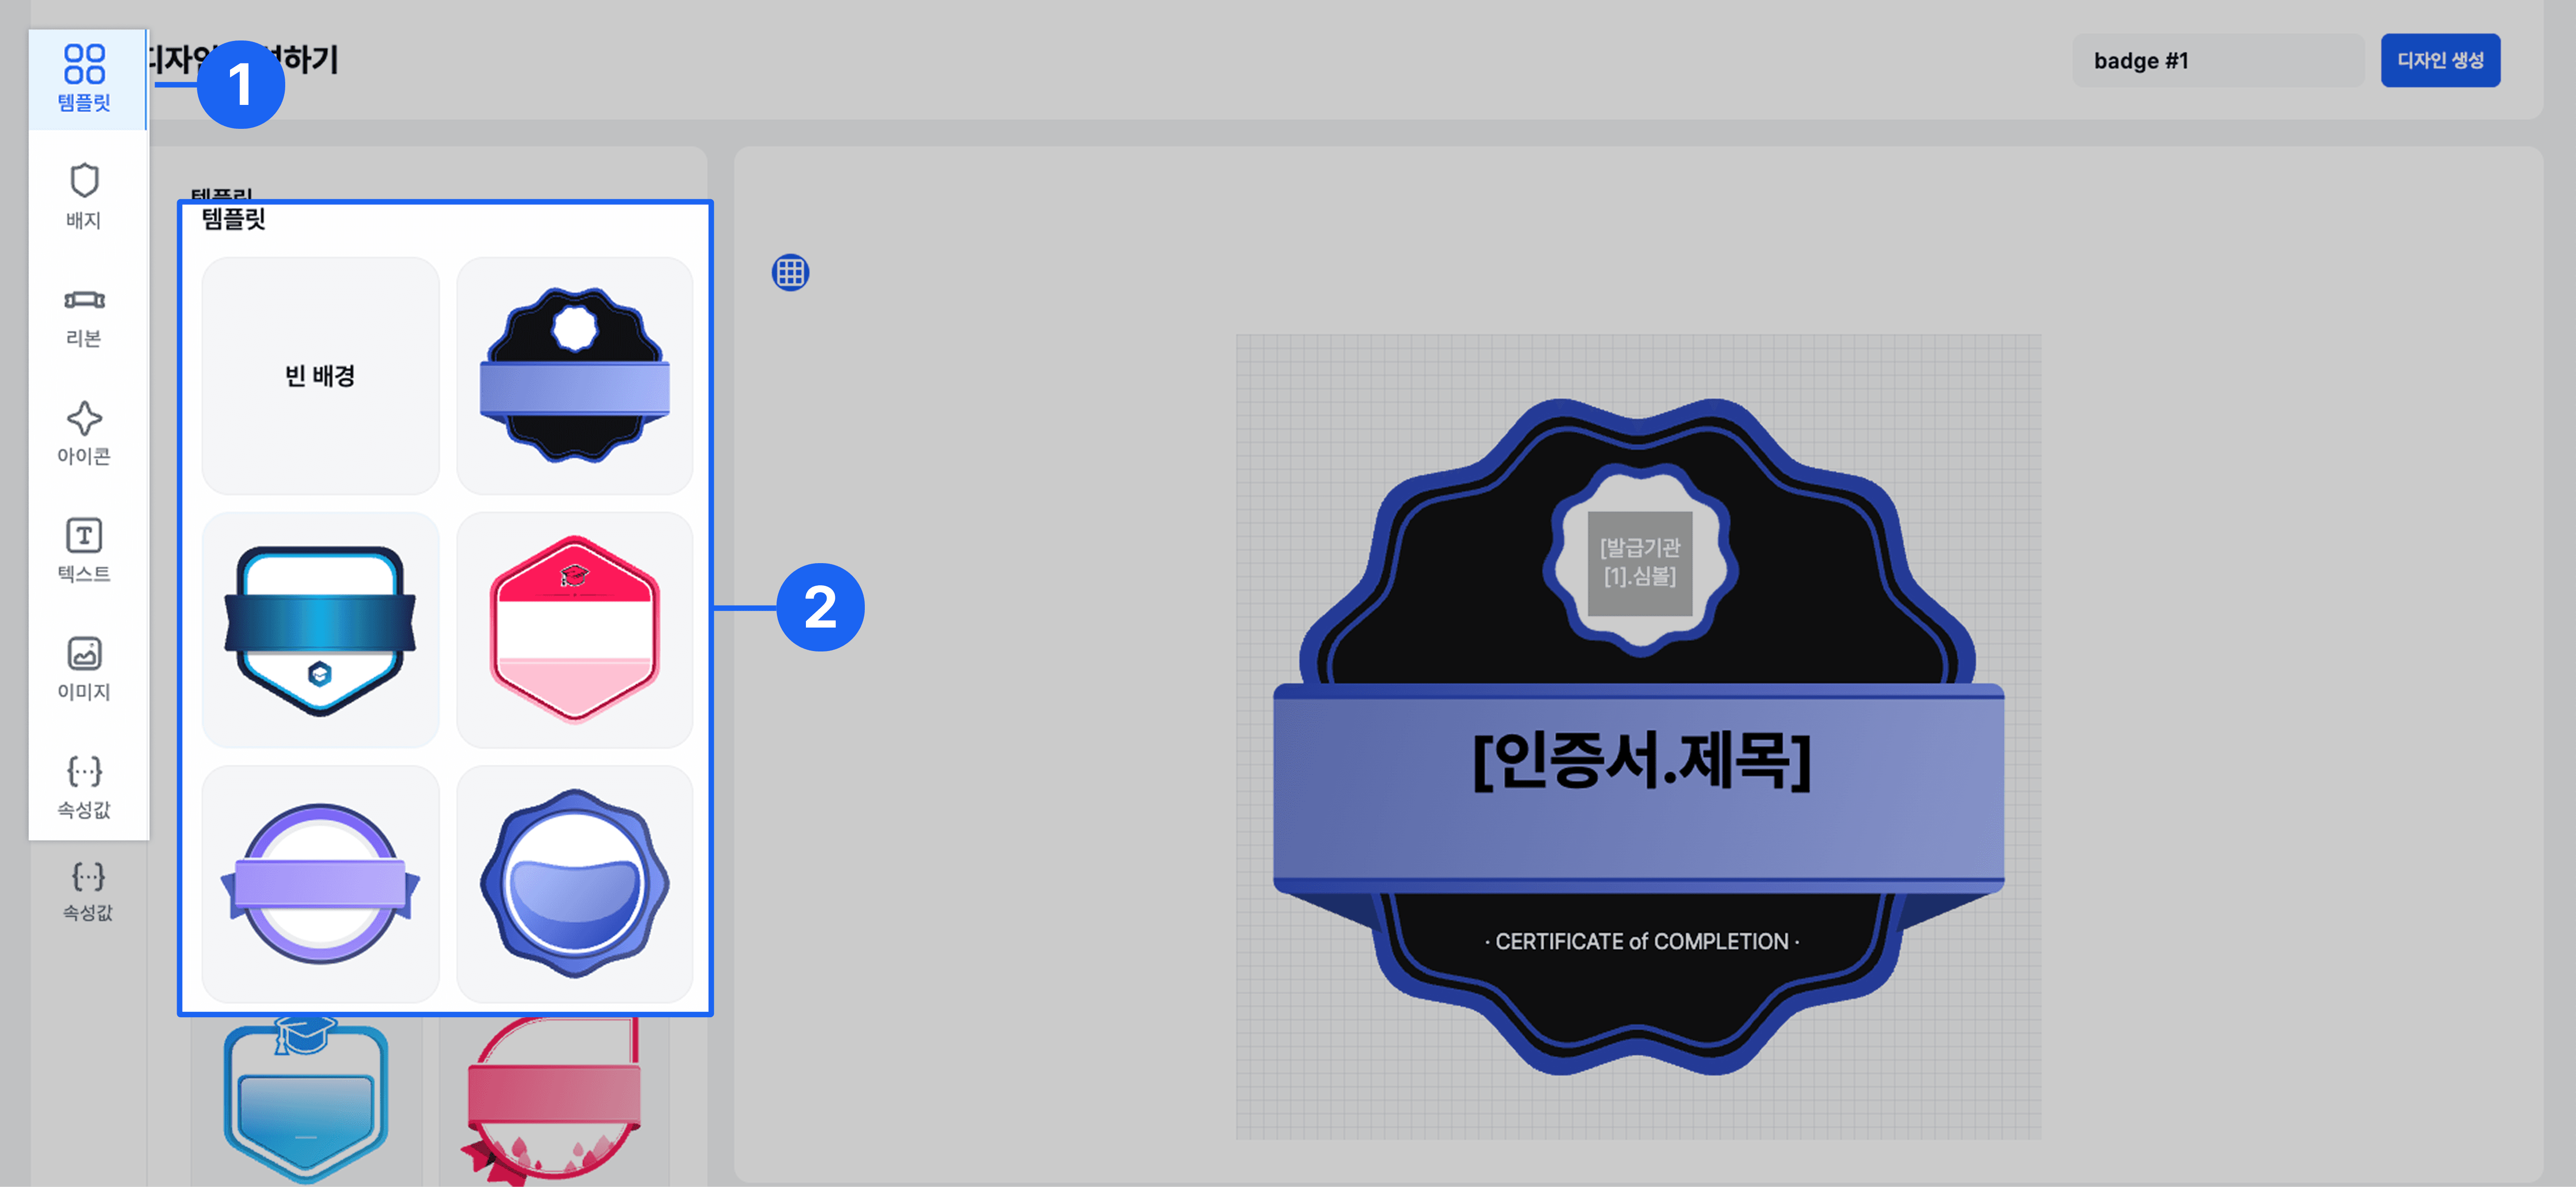
- Click Templates in the left menu.
- Select the template of the shape you want.
Changing the Badge Design
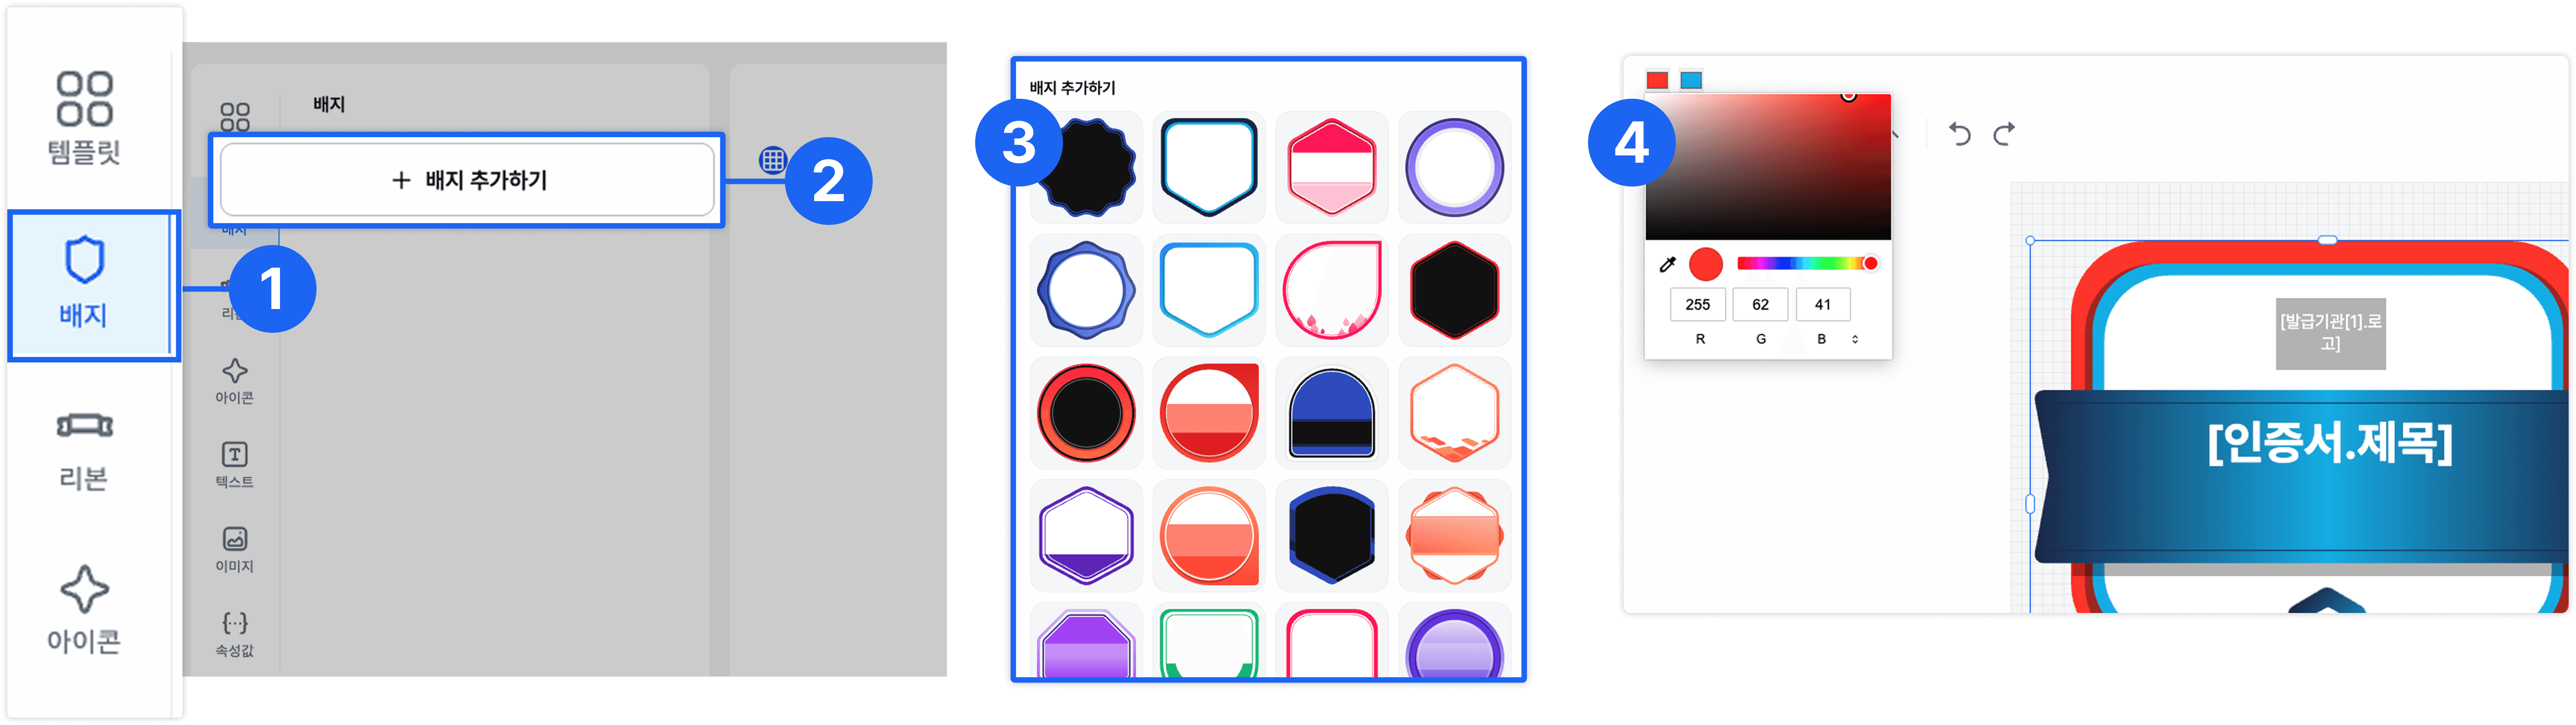
- Click [Badge] in the left menu.
- Click the [+ Add Badge] button.
- Select the badge shape you want.
- Select a color chip to change the badge color.
Changing the Ribbon Design
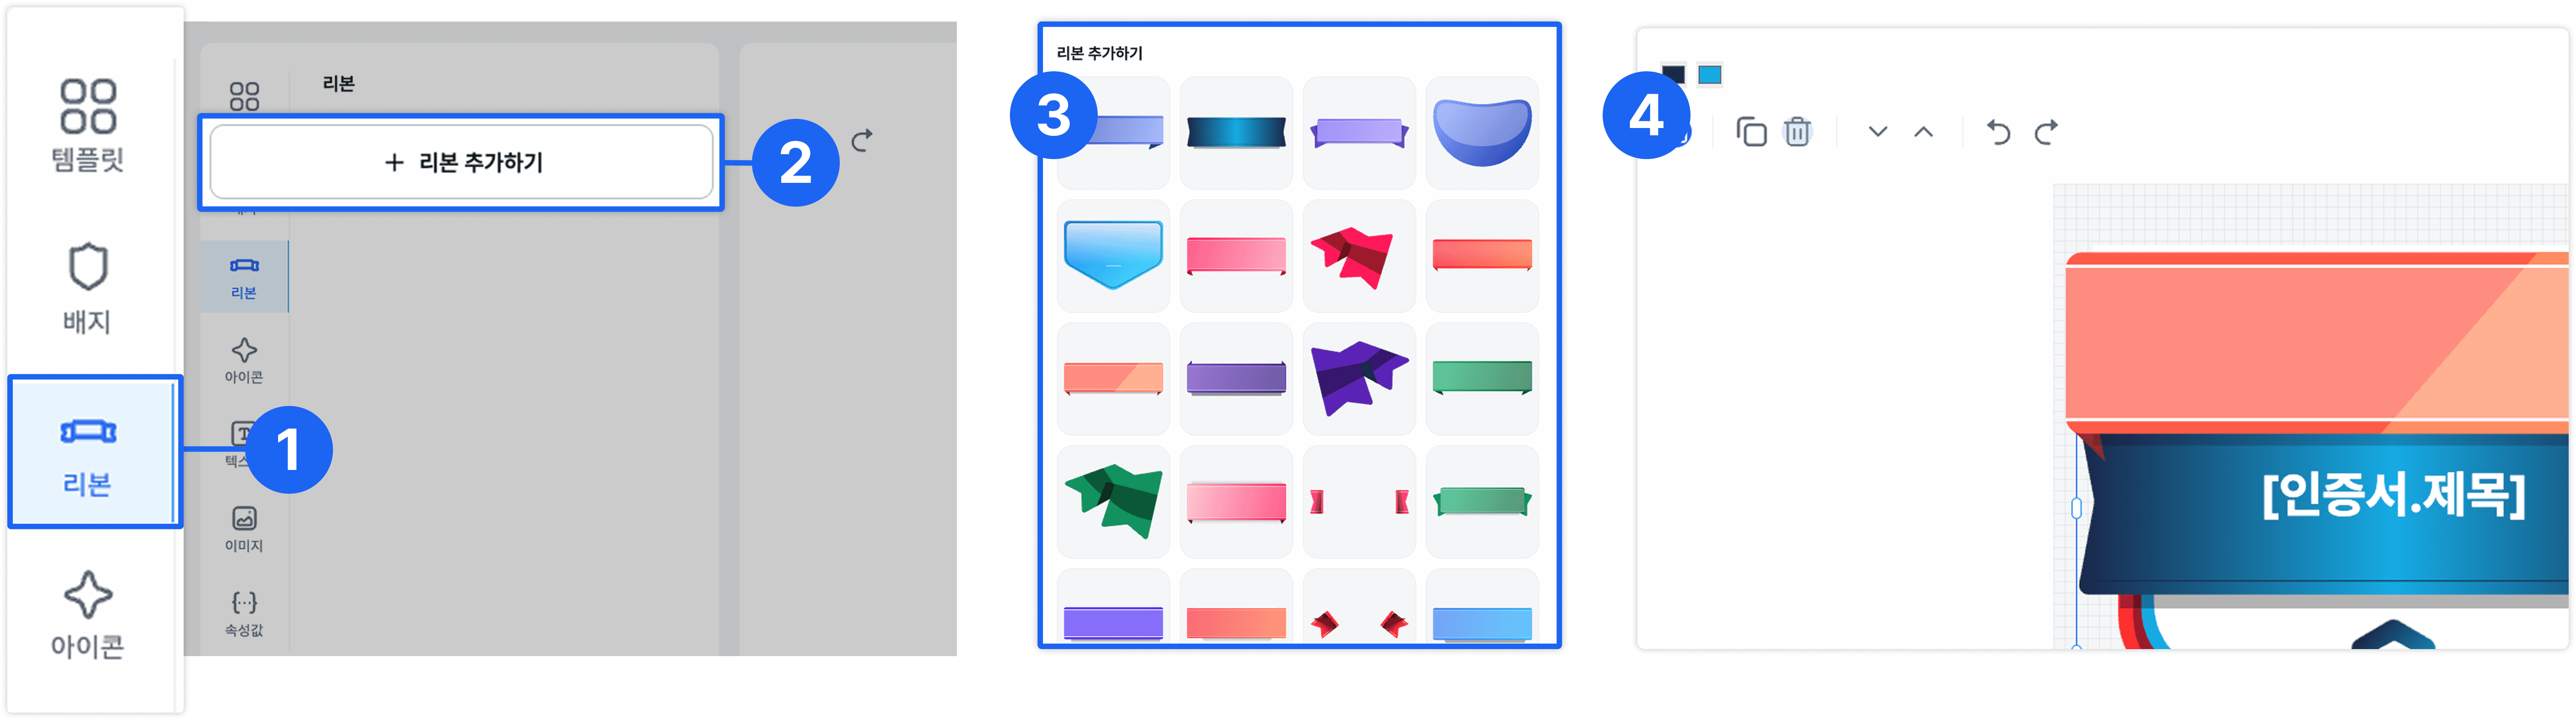
- Click [Ribbon] in the left menu.
- Click the [+ Add Ribbon] button.
- Select the ribbon shape you want.
- Select a color chip to change the ribbon color.
- You can also use the duplicate, delete, move forward/backward, and undo/redo functions.
Changing the Icon Design
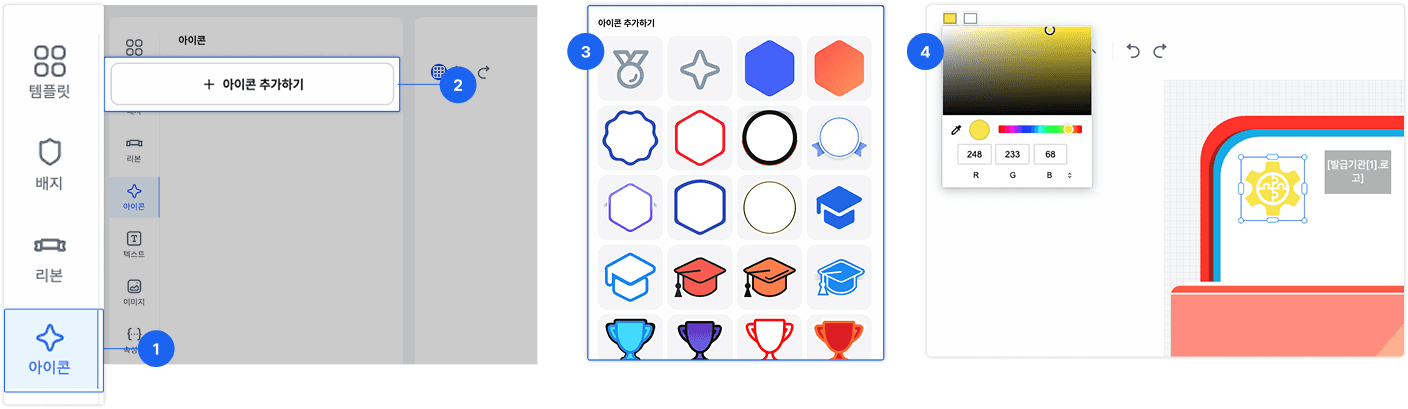
- Click [Icon] in the left menu.
- Click the [+ Add Icon] button.
- Select the icon shape you want.
- Select a color chip to change the icon color.
- You can also use the duplicate, delete, move forward/backward, and undo/redo functions.
Editing Text
You can modify fixed text or add new text.
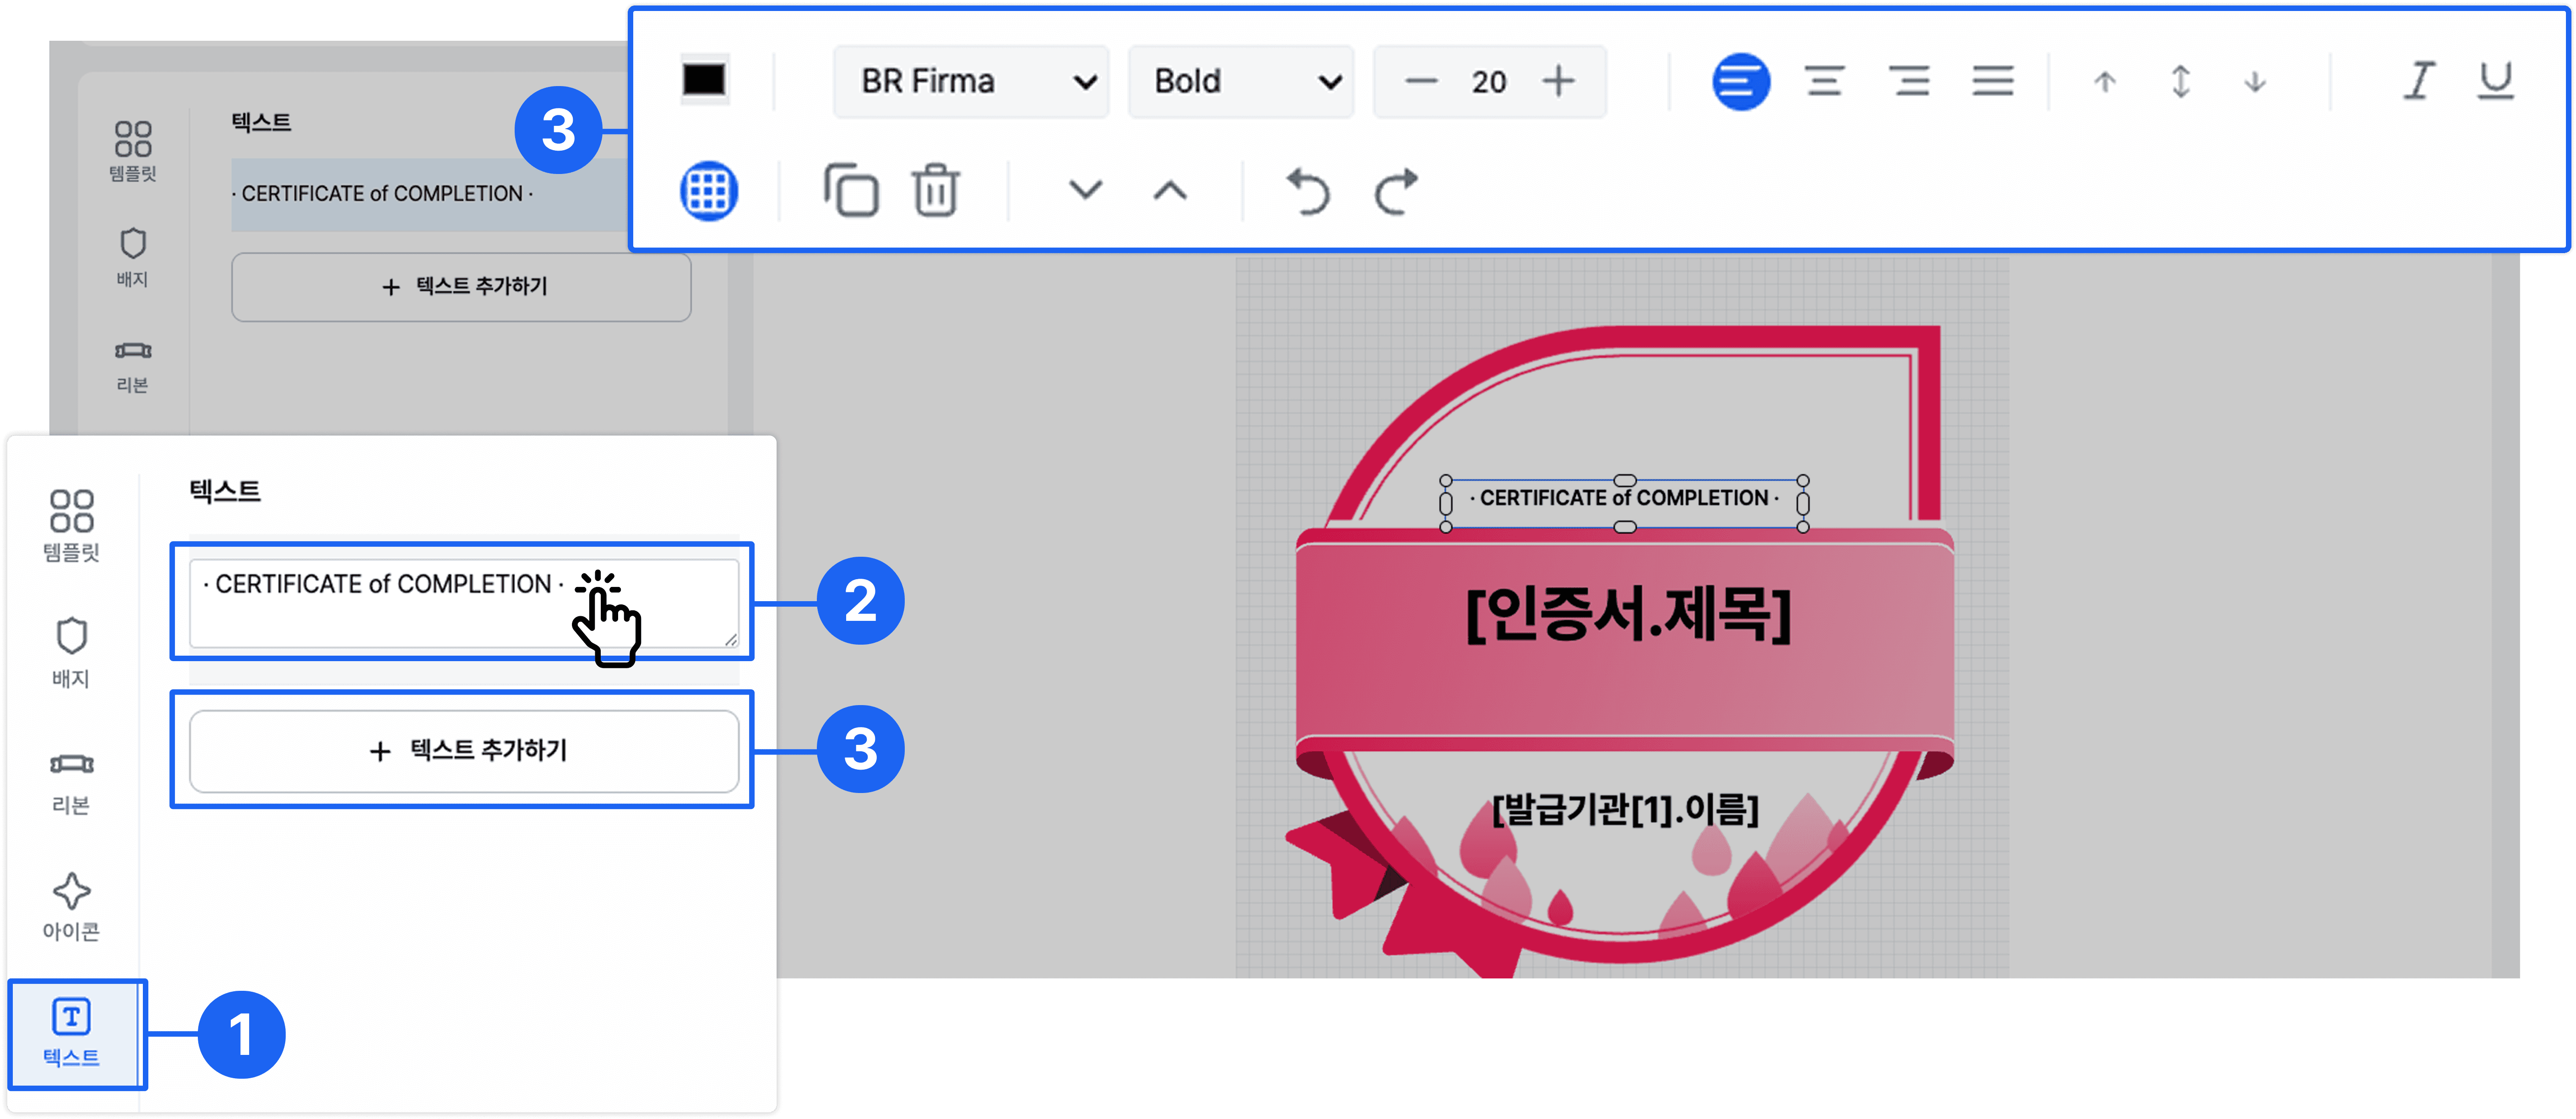
- Click [Text] in the left menu.
- Double-click the text to edit it.
- Click the [+ Add Text button] to add new text.
- Adjust detailed settings such as font, size, and alignment using the text toolbox.
Adjusting Attribute Values
You can add or delete attribute values as needed.
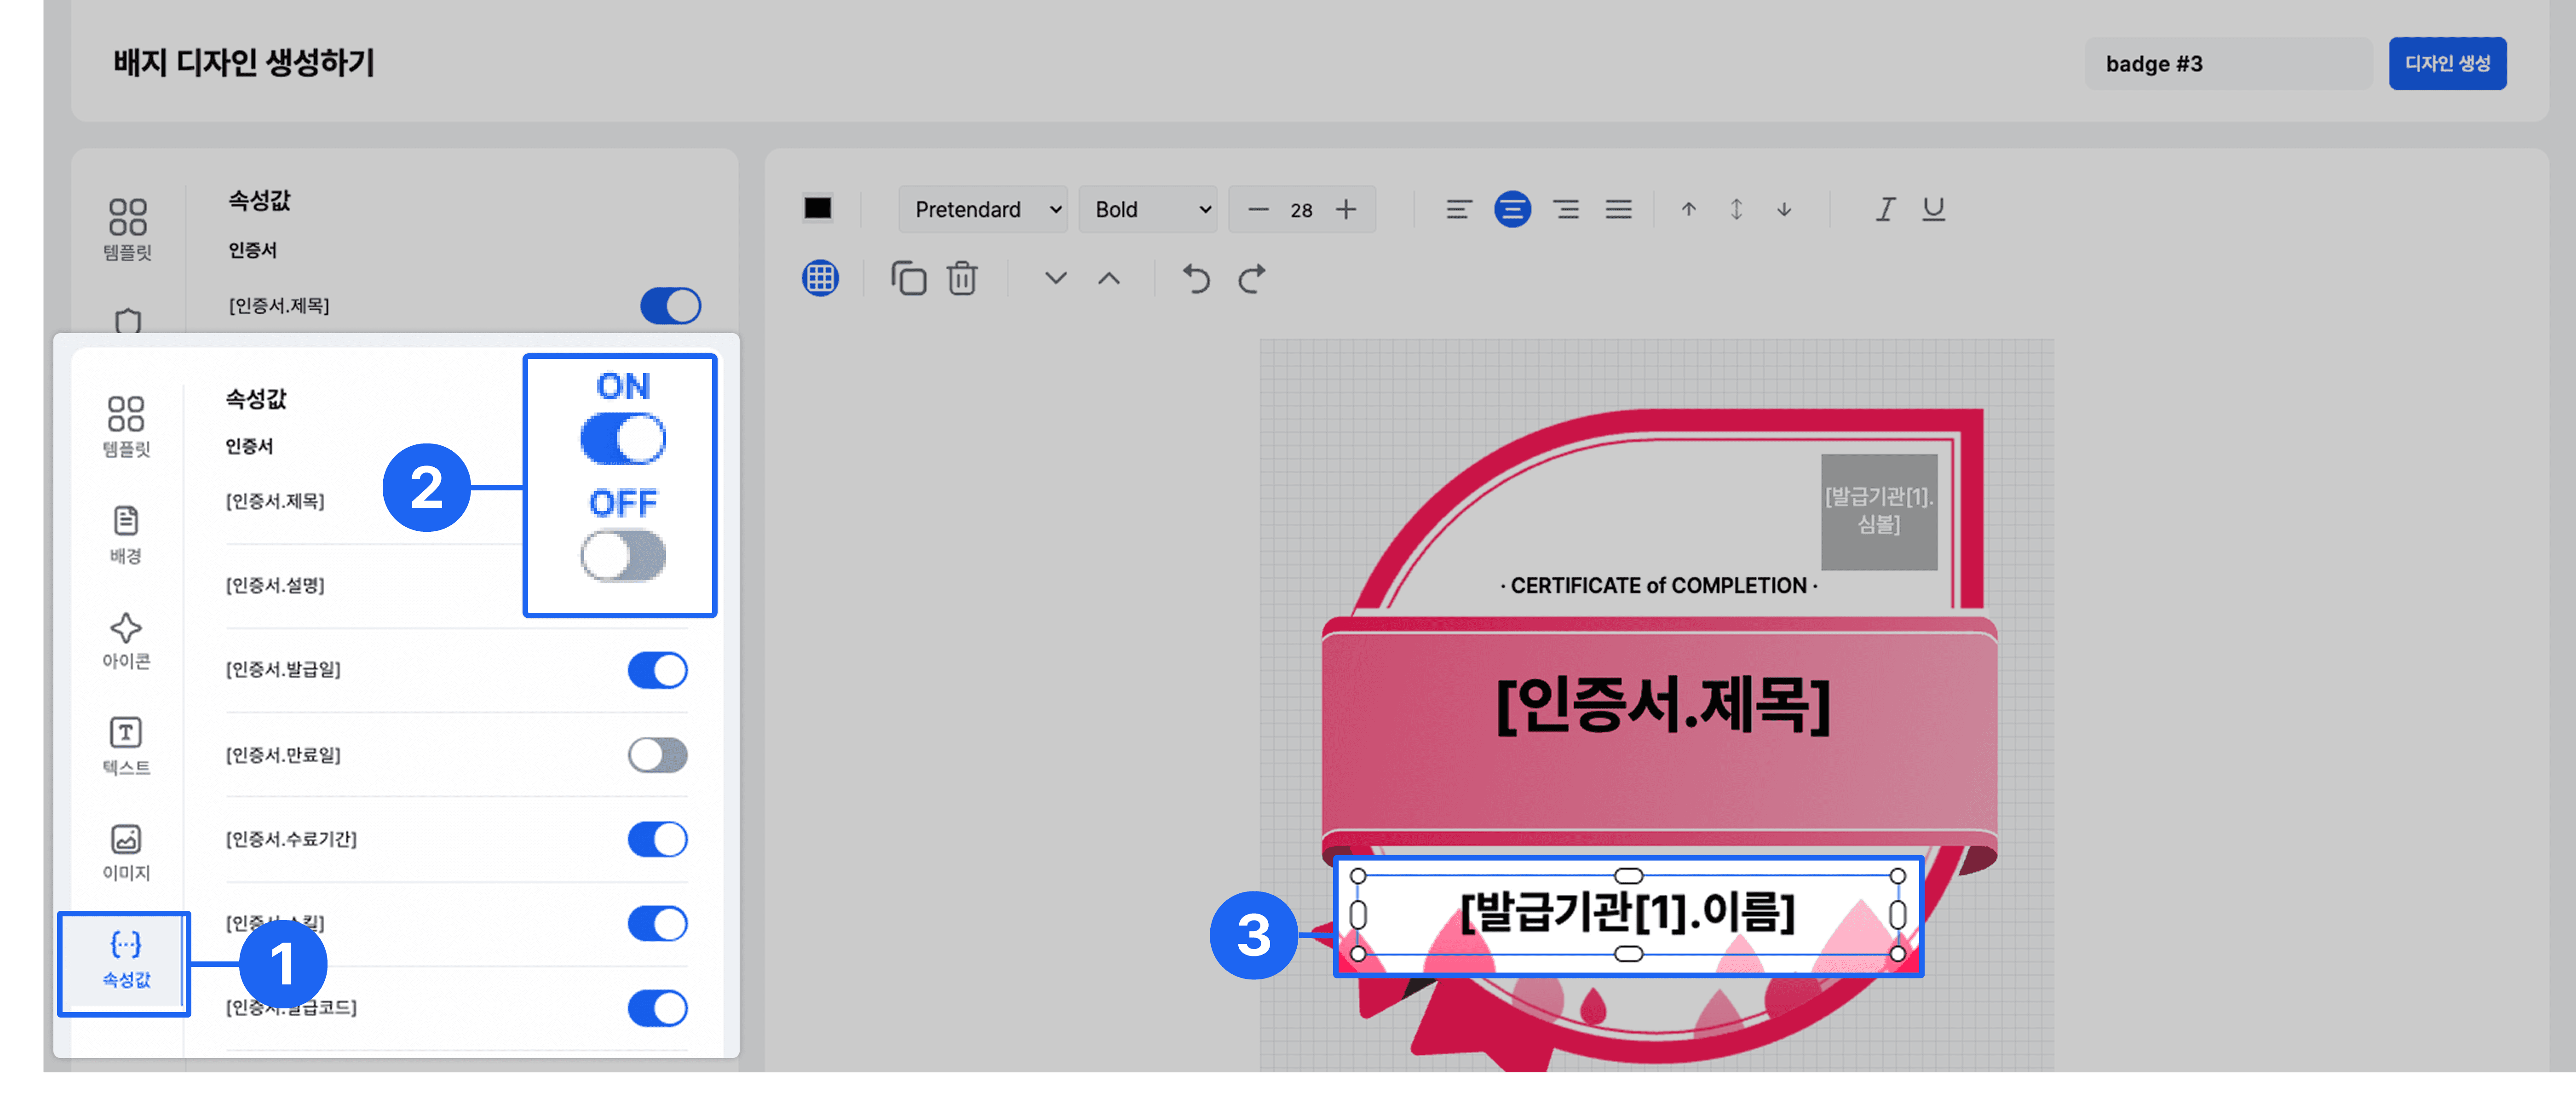
- Select [Attribute Values] in the left menu.
- Click the switch ON/OFF to add or delete an attribute value.
- Click an added attribute value to adjust its position or delete it.
Creating the Badge Design
After editing the badge name in the top right, click the [Create Design] button to finish.

Frequently asked questions
Want to turn learning outcomes into verifiable assets?
From issuing to verifying and amplifying, see it for yourself with Kolleges.
Request a Kolleges demo
Related posts
Certificate Design
A step-by-step guide for Kolleges admins to complete a digital-badge-linked certificate design that matches the organization's brand, using templates, icons, text, and attribute values.
Creating a Digital Badge
A step-by-step guide to the entire Kolleges certificate creation process, from entering basic information, skill tags, and acquisition conditions to adding co-issuers and enabling English certificates.
How to Issue a Digital Badge
This guide walks you step by step through the full flow of Kolleges certificate issuance, from individual entry and bulk Excel upload to scheduled issuance.