
A step-by-step guide to inviting and removing admins by email in your Kolleges workspace, and adjusting permissions by enabling or disabling them without deleting the account.
A guide to the admin editing feature. Manage your education and badge operations flexibly with Kolleges.
Add/Remove Admin Accounts
Learn how to add admin accounts to your workspace or adjust their permissions.

- In the left menu, click [Account Management] → [Workspace Management]
- Select [Admin Members] from the top tabs
- You can view the list of currently registered admin accounts
Adding an Admin

- Click the [Add Admin] button
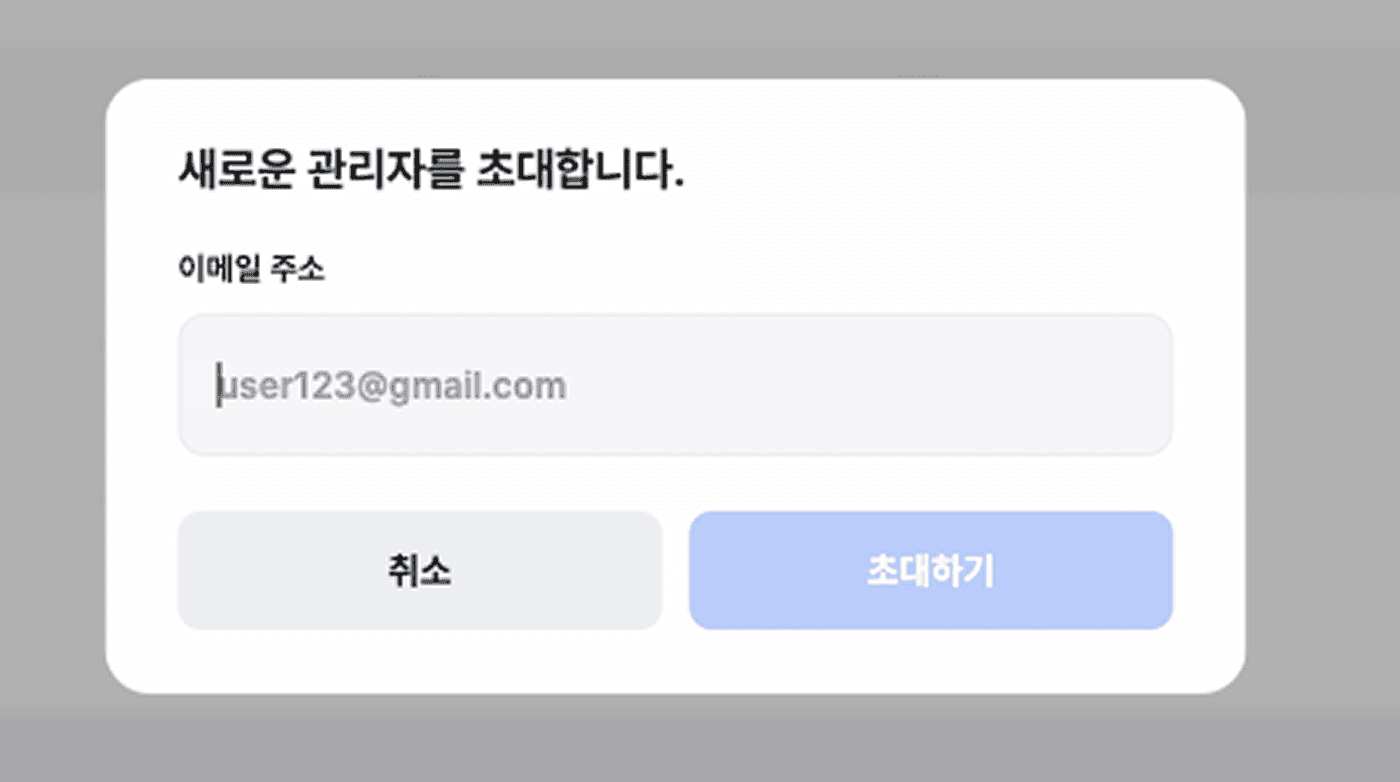
- In the email address entry popup, enter the email of the user you want to add
- Click [Invite]
- The user is granted admin permissions and added to the list
Removing an Admin (Demotion)

- In the admin list, click the trailing meatball menu (⋮) of the user you want to remove
- Select [Remove] from the dropdown
- The user is demoted to a regular member and removed from the list
Enabling/Disabling Admins
Instead of removing an admin, you can temporarily restrict only their permissions.
- Disabling
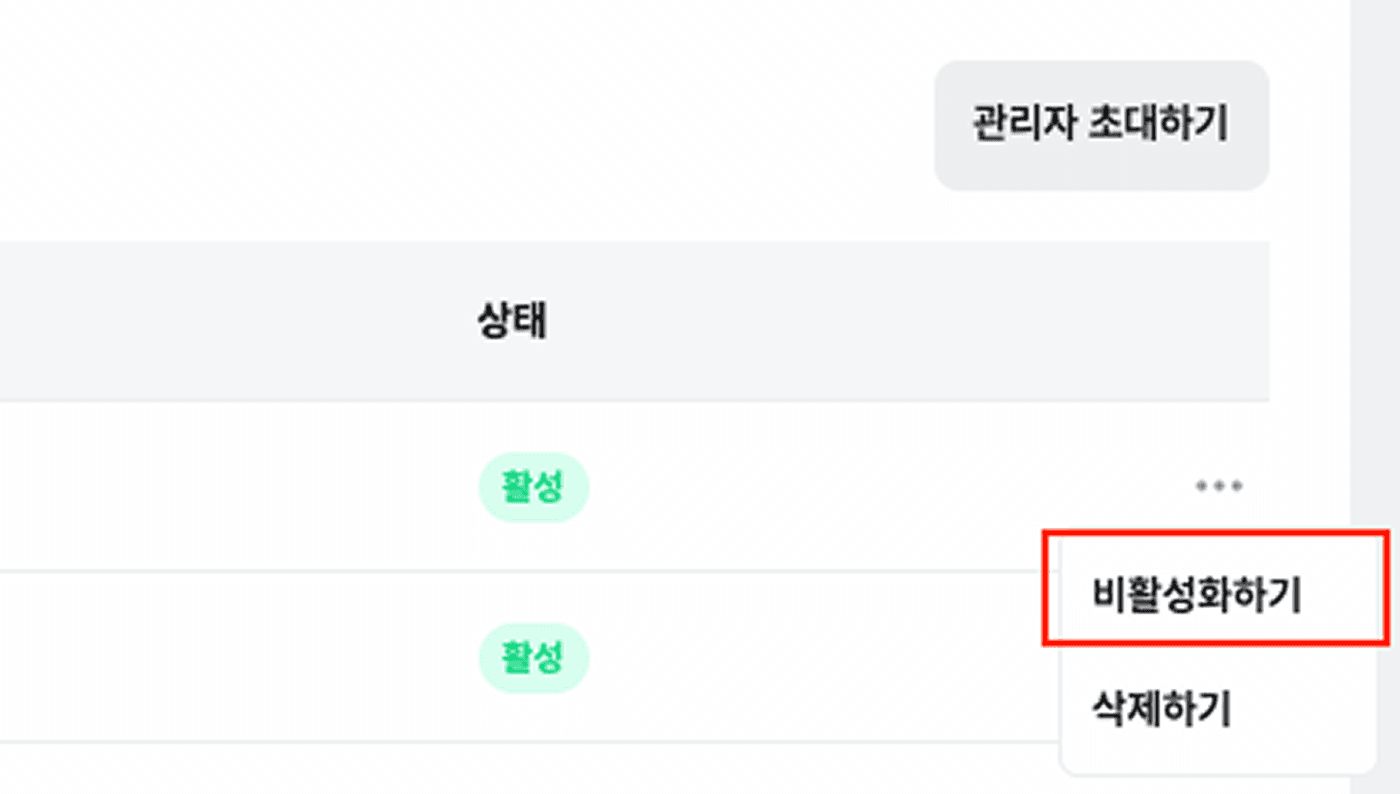
- Meatball menu (⋮) → select [Disable]
- The user enters a “Disabled” state and can no longer use admin permissions
- Enabling
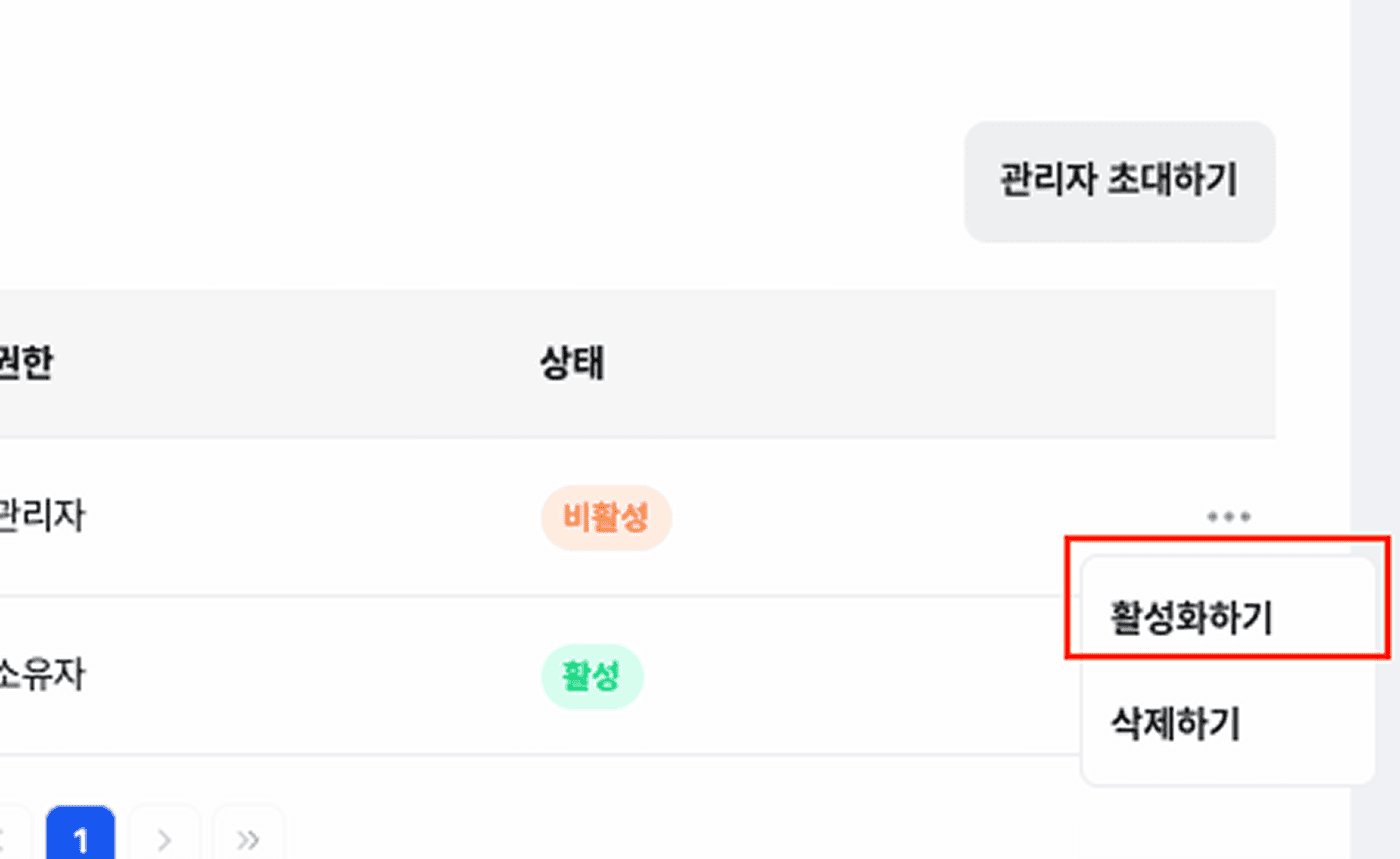
- Meatball menu (⋮) → select [Enable]
- The state changes to “Active” and admin permissions are restored
A disabled account remains in the list, but its use of admin features is restricted.
Frequently asked questions
Want to turn learning outcomes into verifiable assets?
From issuing to verifying and amplifying, see it for yourself with Kolleges.
Request a Kolleges demo
Related posts
Member List Management Guide: How to Add Members, Check Information, and Set Permissions
This guide walks Kolleges education admins step by step through the full flow of adding members via individual invitation or bulk Excel upload, viewing and deleting member information by status (full member, joining, invited), and approving or rejecting members awaiting admin approval.

Creating a Workspace
A step-by-step guide to the process of creating a new workspace on the Kolleges admin page or joining an existing workspace as an admin.
Plan Upgrade Guide: How to Manage Payments and Subscriptions
A clear overview of the entire subscription management process admins need to know, from the Kolleges Starter, Pro, and Premium plan upgrade steps to reviewing payment history and changing cards.