
Member List Management Guide: How to Add Members, Check Information, and Set Permissions
 Robin Yoon · Customer Success Team Published
This guide walks Kolleges education admins step by step through the full flow of adding members via individual invitation or bulk Excel upload, viewing and deleting member information by status (full member, joining, invited), and approving or rejecting members awaiting admin approval.
This guide explains how to view the member list and add new members in Kolleges. It walks education institution operators step by step through the member management features they need to know, including registering names, emails, and external IDs, setting permissions, and managing statuses.
Inviting
You can add members to invite to a group.
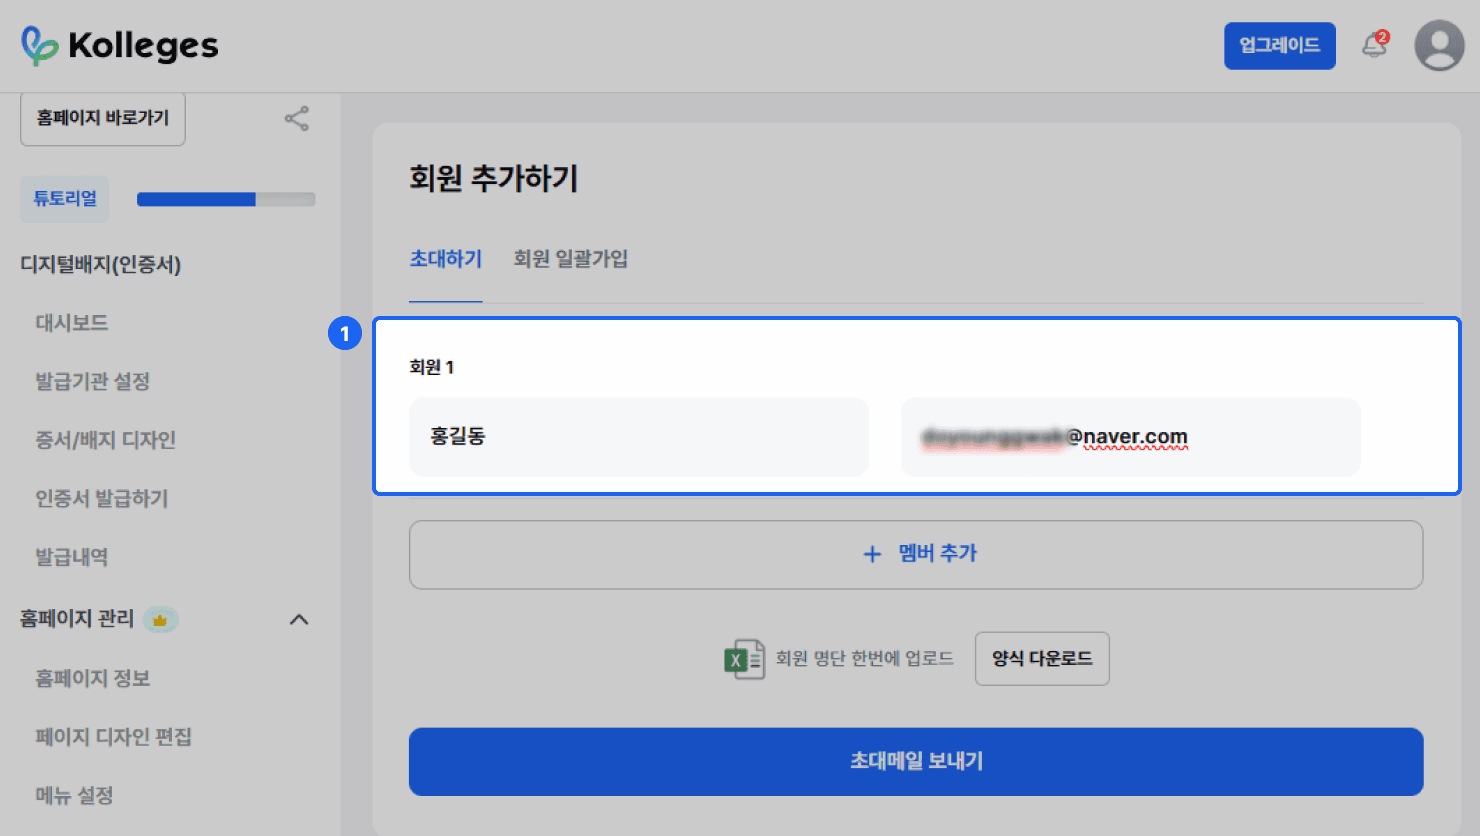
- On the [Manage Education] > [Add Member] page, enter the name and email information of the member you want to add.
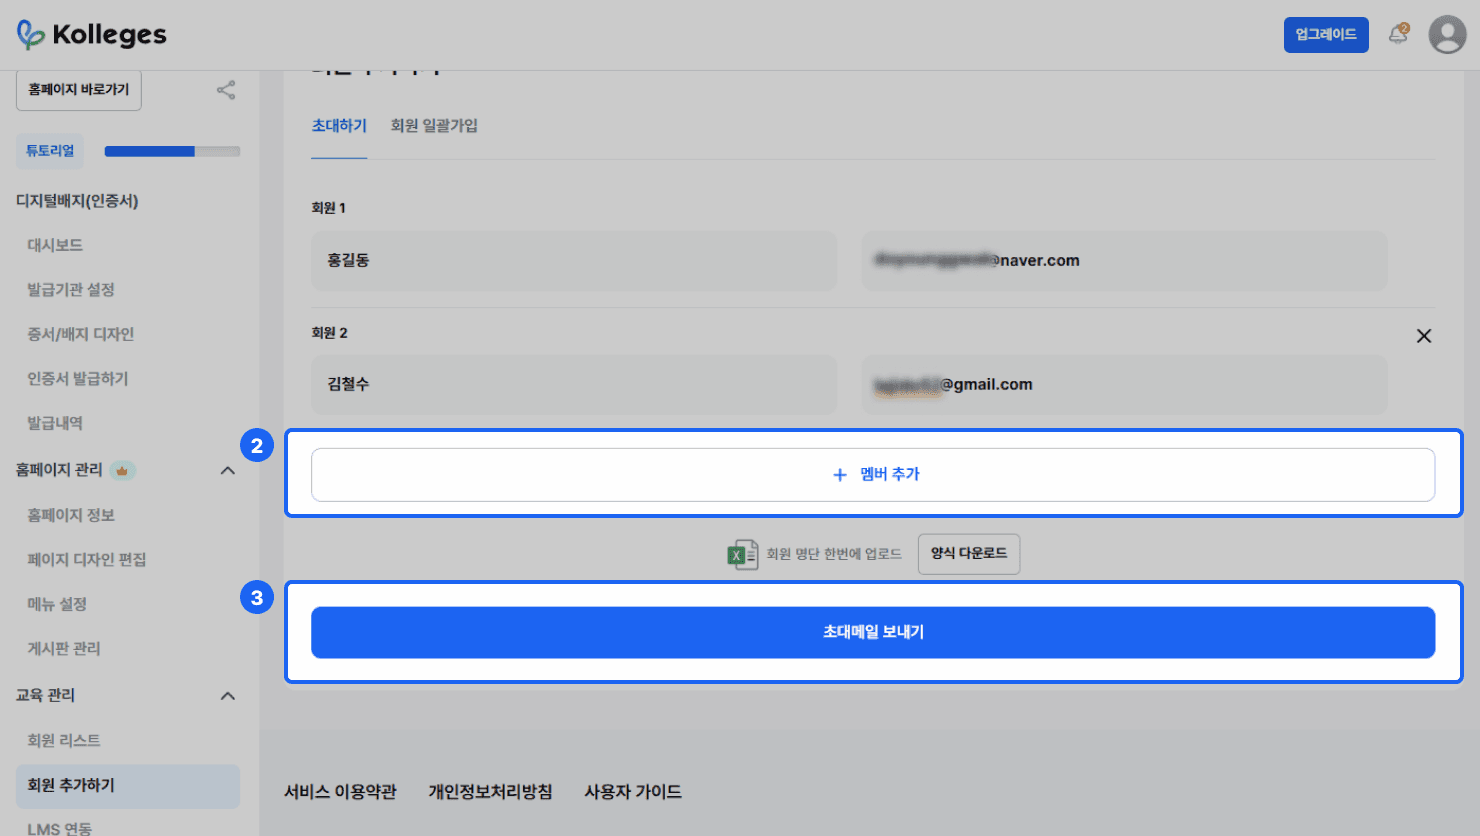
- Click the {+ Add Member} button to add as many entries as the number of members you want to invite, and enter each member’s name and email.
- Click the {Send Invitation Email} button to send an invitation email to everyone on the list.
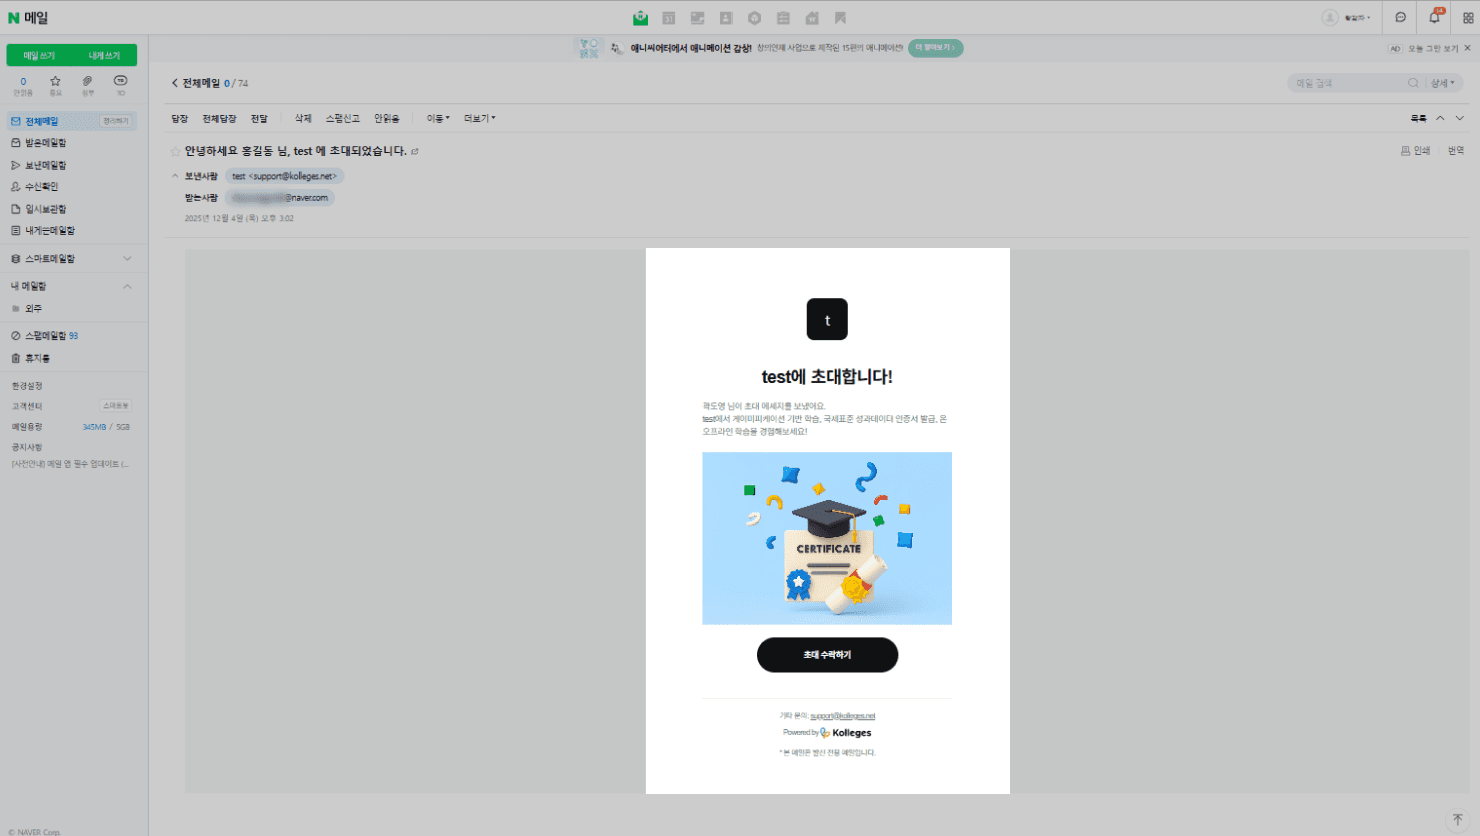
[Example Screen]
Upload the Member Roster at Once
You can upload the roster of members to invite to a group all at once.
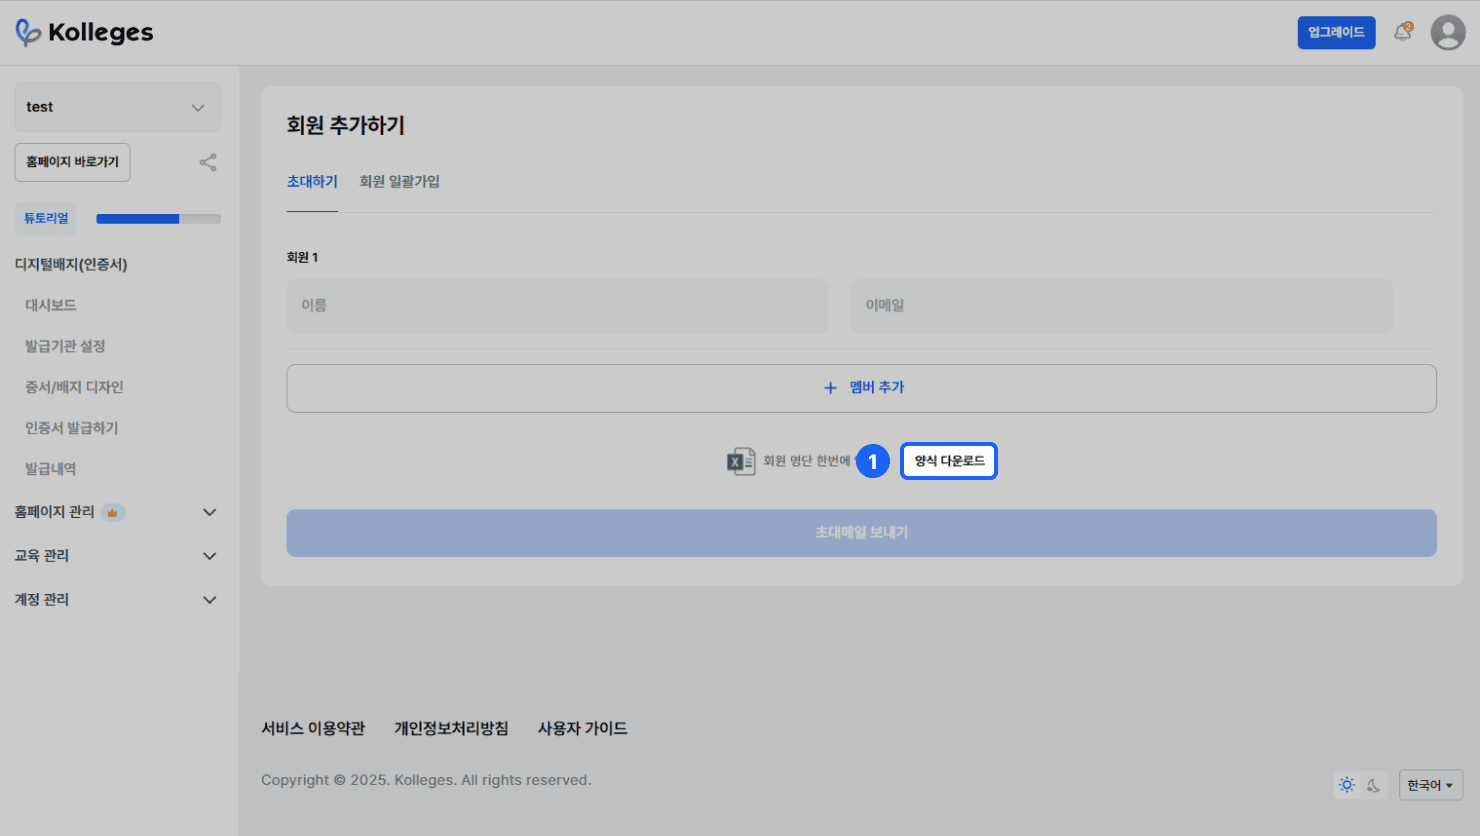
- Click the {Download Form} button to download the roster Excel form.
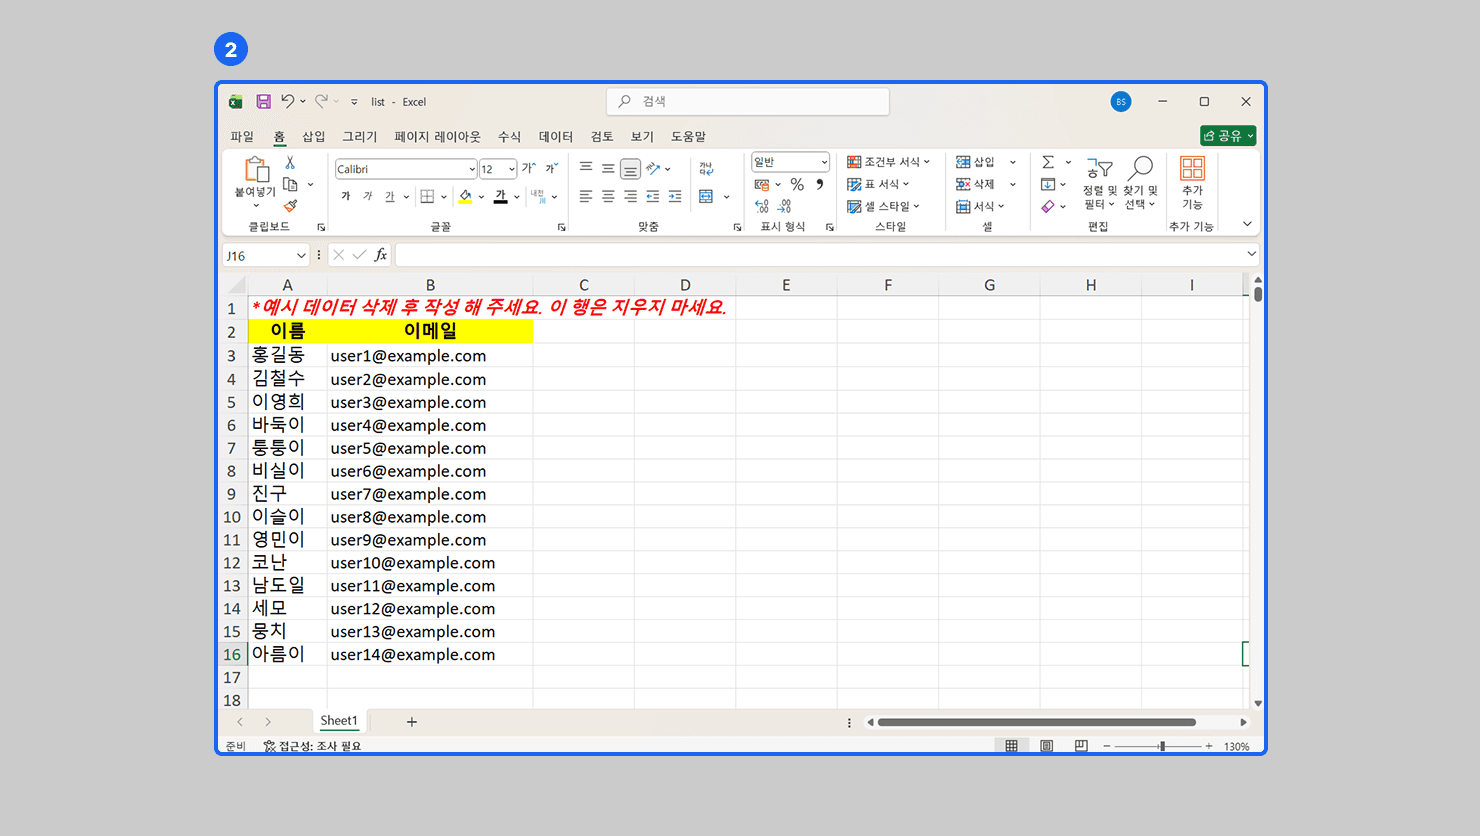
- Open the downloaded “list.xlsx” file, fill in the member roster according to the form, and save it.
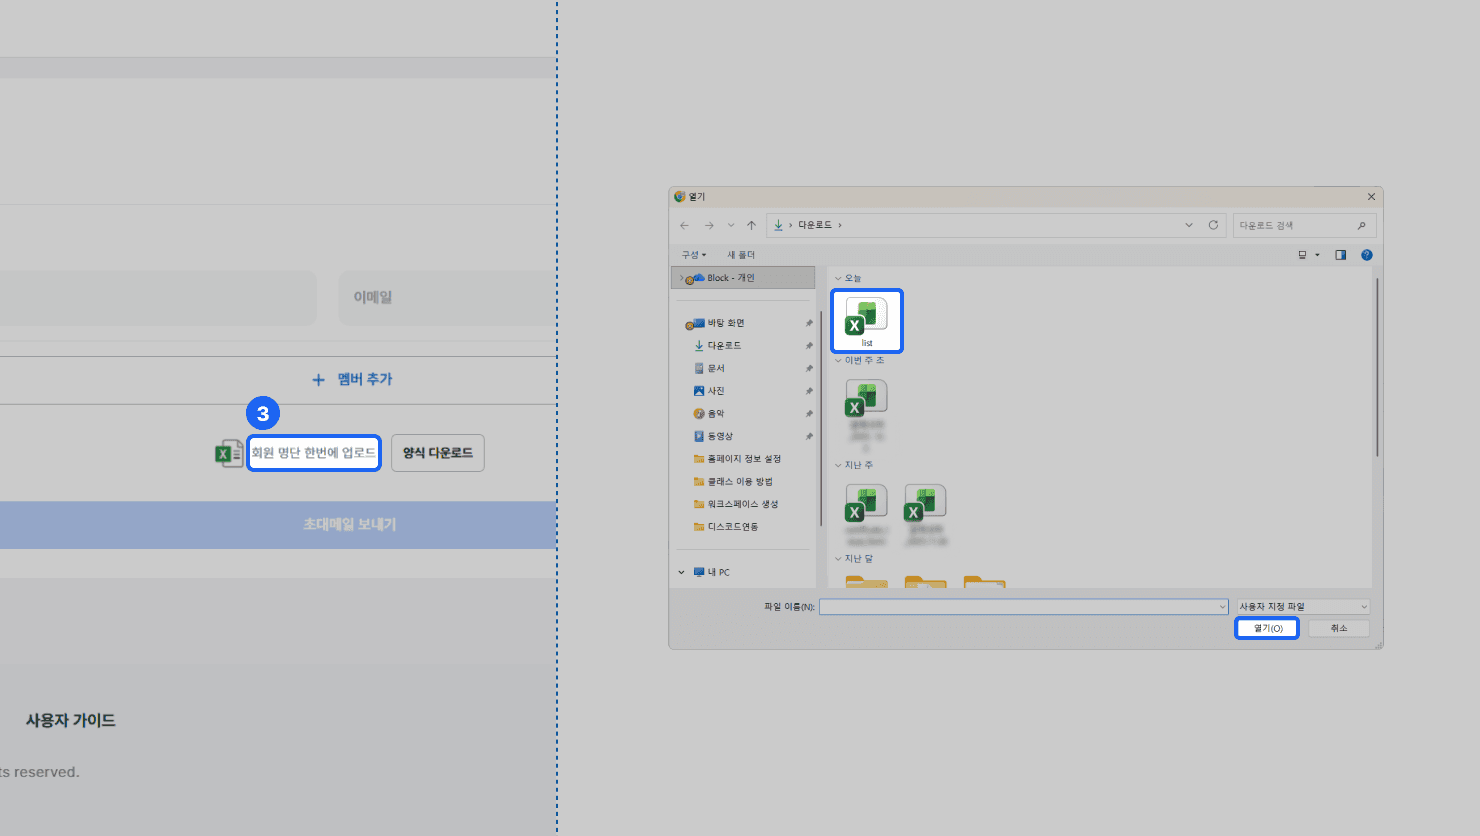
- Click the {Upload Member Roster at Once} button to upload the “list.xlsx” file you filled in.
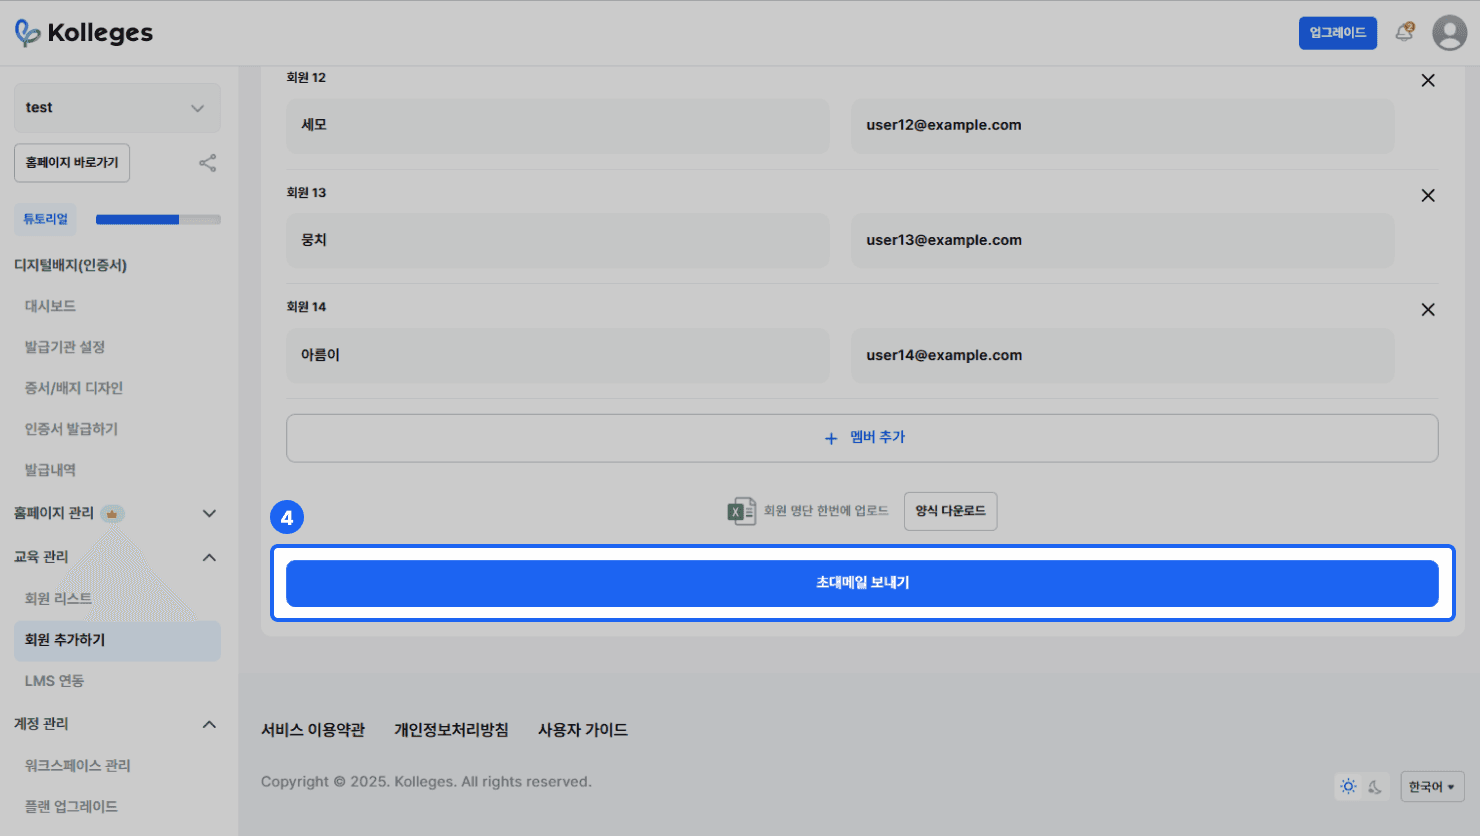
- After reviewing the member roster uploaded at once, click the {Send Invitation Email} button to send an invitation email to everyone on the list.
Checking Member Information in the Member List
You can check the information of all members associated with the group.
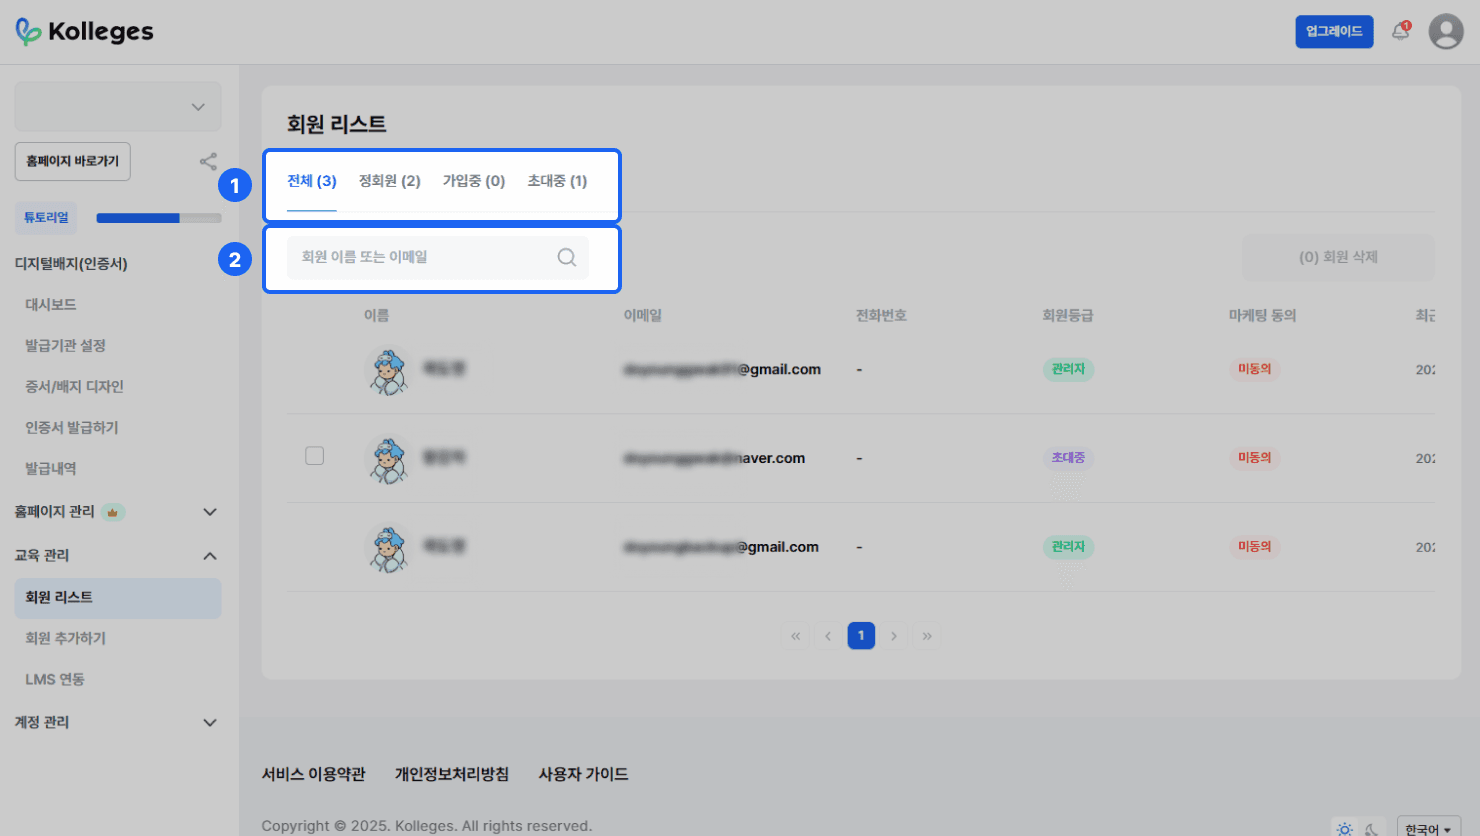
- In [Manage Education] > [Member List], you can check all members who are full members / joining / invited.
- All: You can check the information of all members associated with the group.
- Full members: The list of members who have properly joined the group.
- Joining: The list of members awaiting admin approval.
- Invited: The list of members who received an invitation email via the {Send Invitation Email} button in [Add Member].
- Search for the member you want to look up by member name or email.
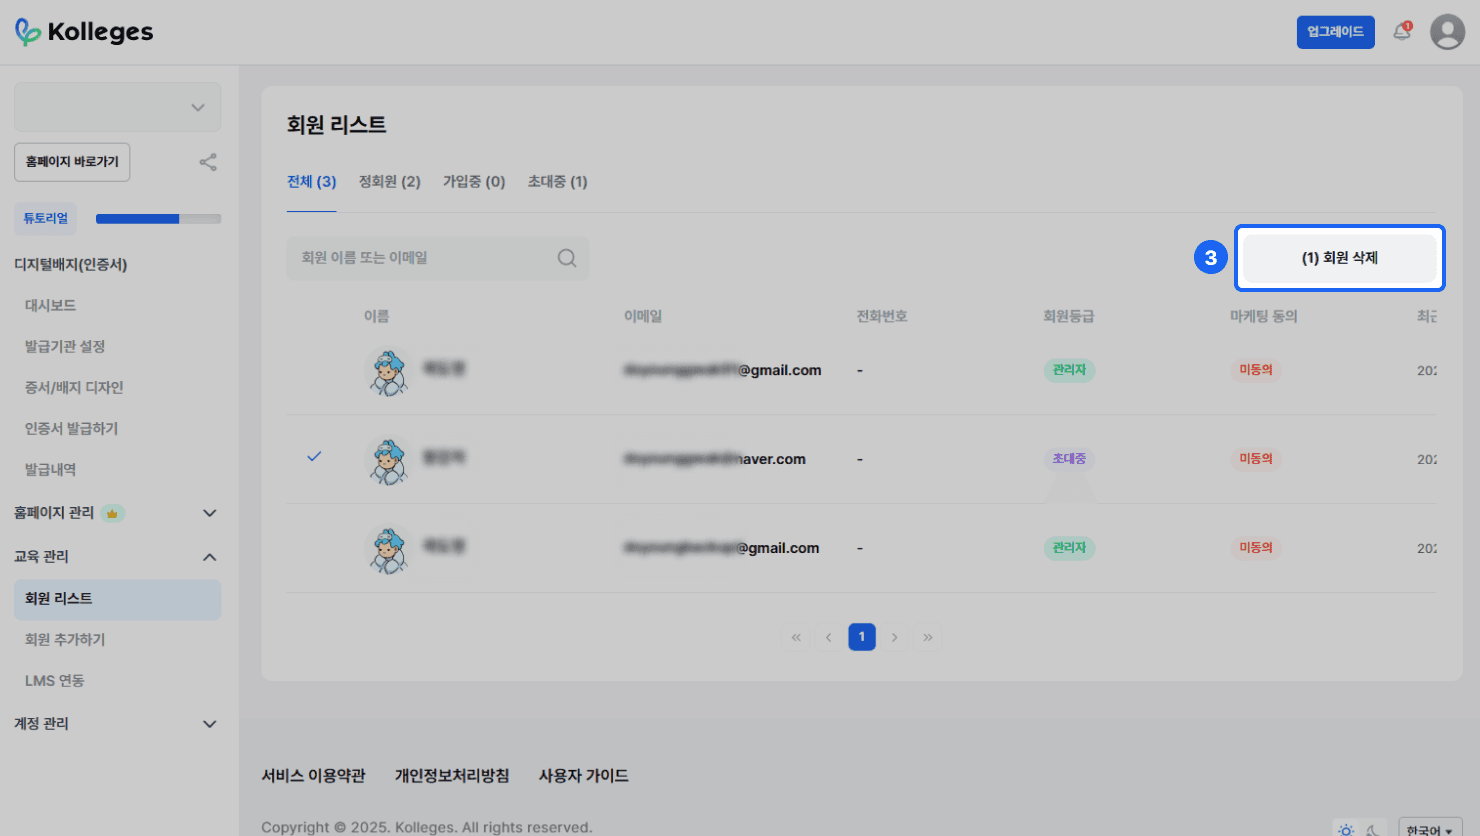
- Check a member in the member list, then click the {Delete (n) Members} button to delete the member.
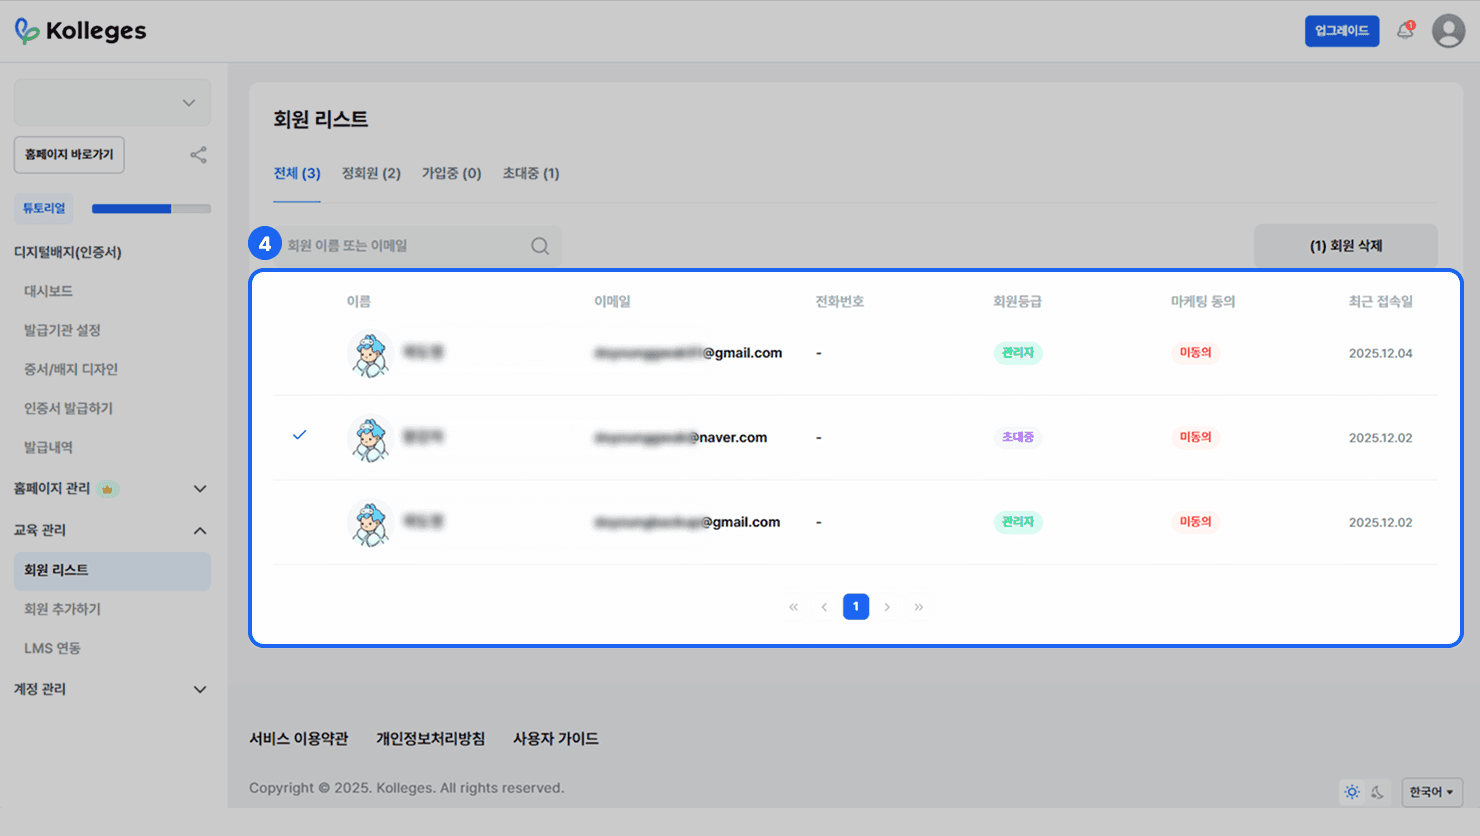
- This is the full member list.
- It displays name / email / phone number / member tier / marketing consent / last access date.
Approving Member Sign-up
You can approve the sign-up of members awaiting admin approval.
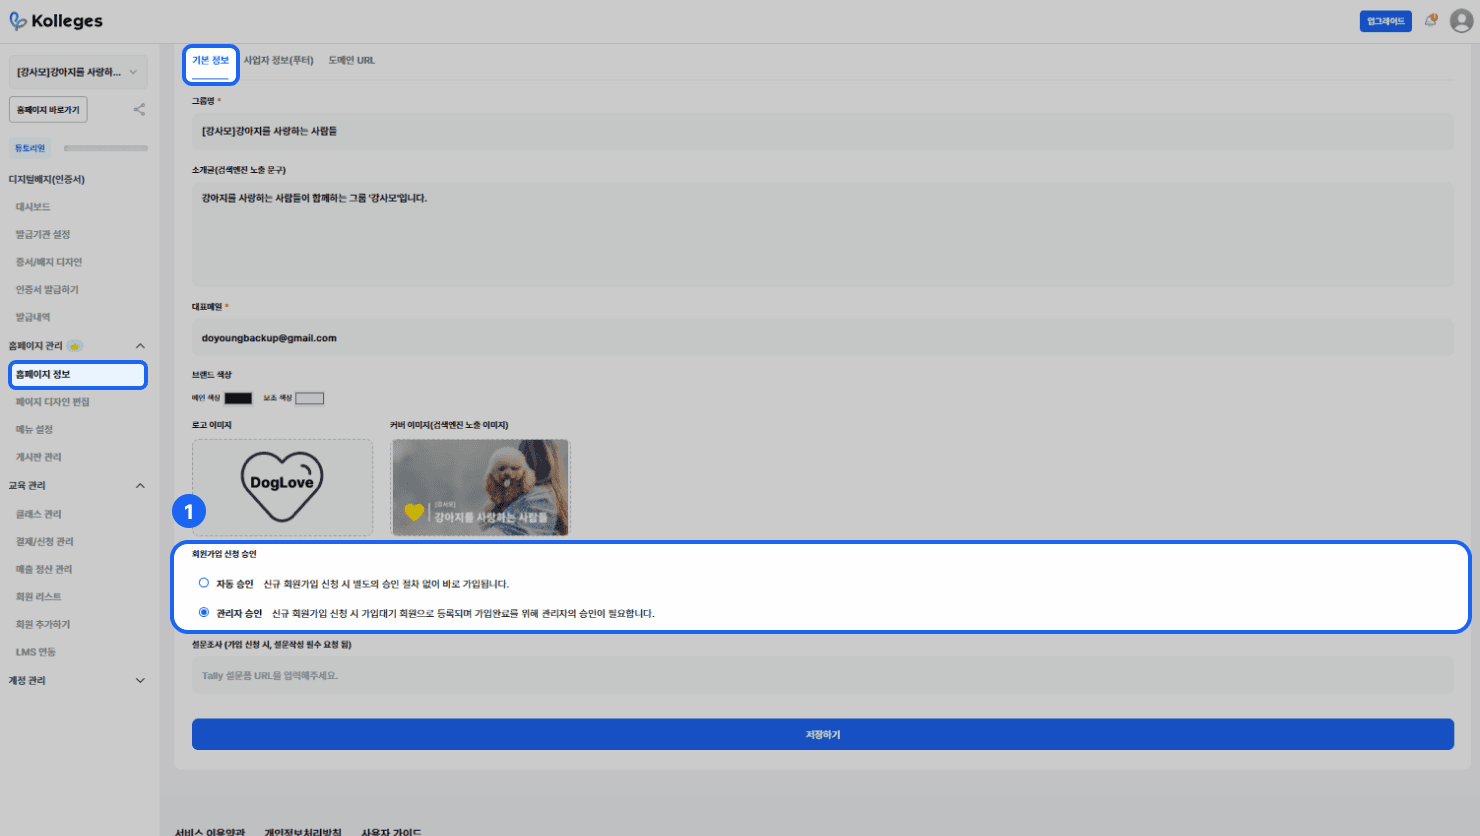
- If you set the sign-up application approval to admin approval in the [Homepage Management] > [Homepage Information] > [Basic Information] tab, then when a user tries to join the group, that member enters the joining status in the [Member List].
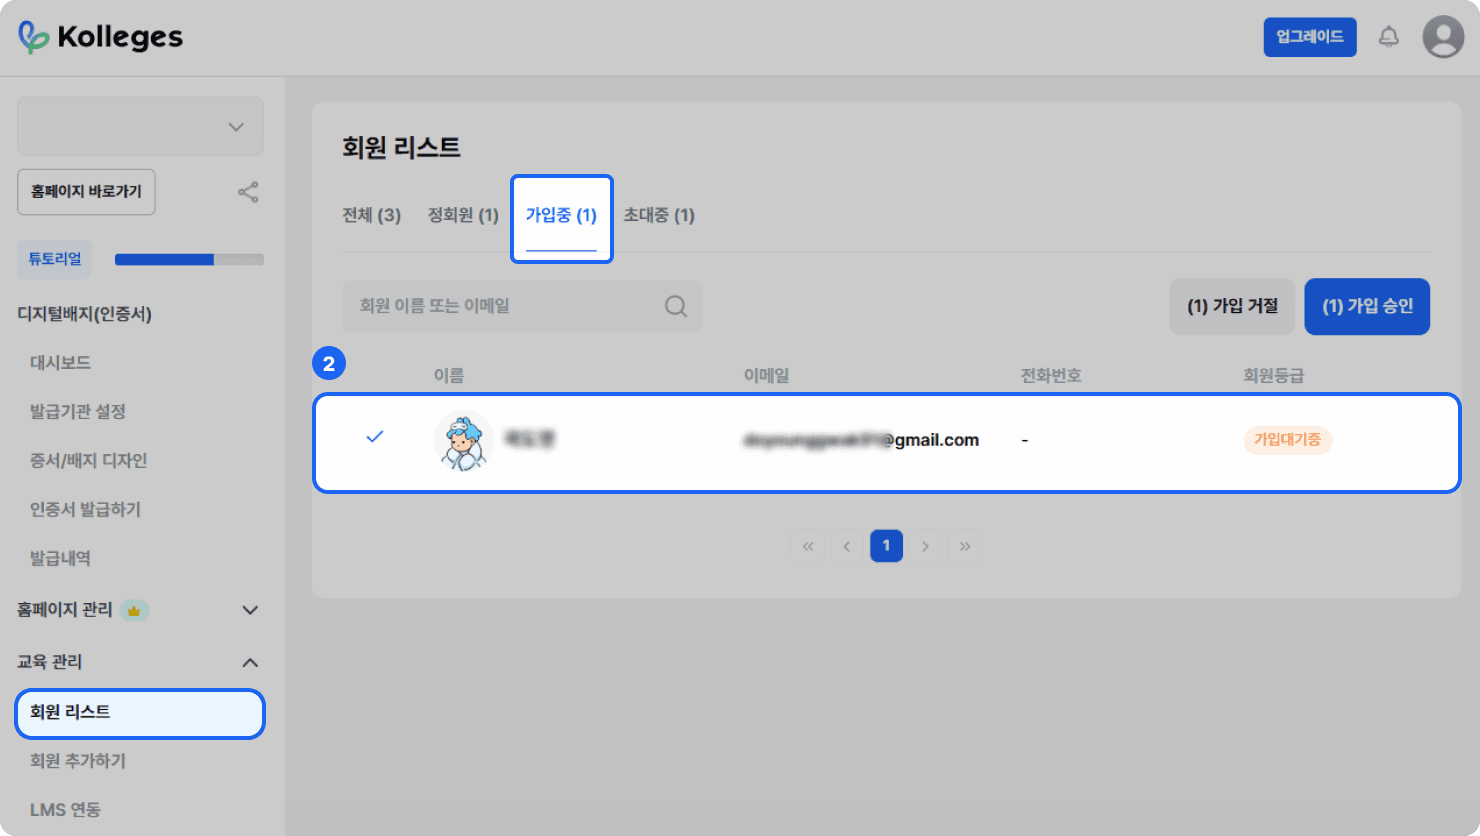
- Check the list of members who requested to join in the [Manage Education] > [Member List] > [Joining] tab.
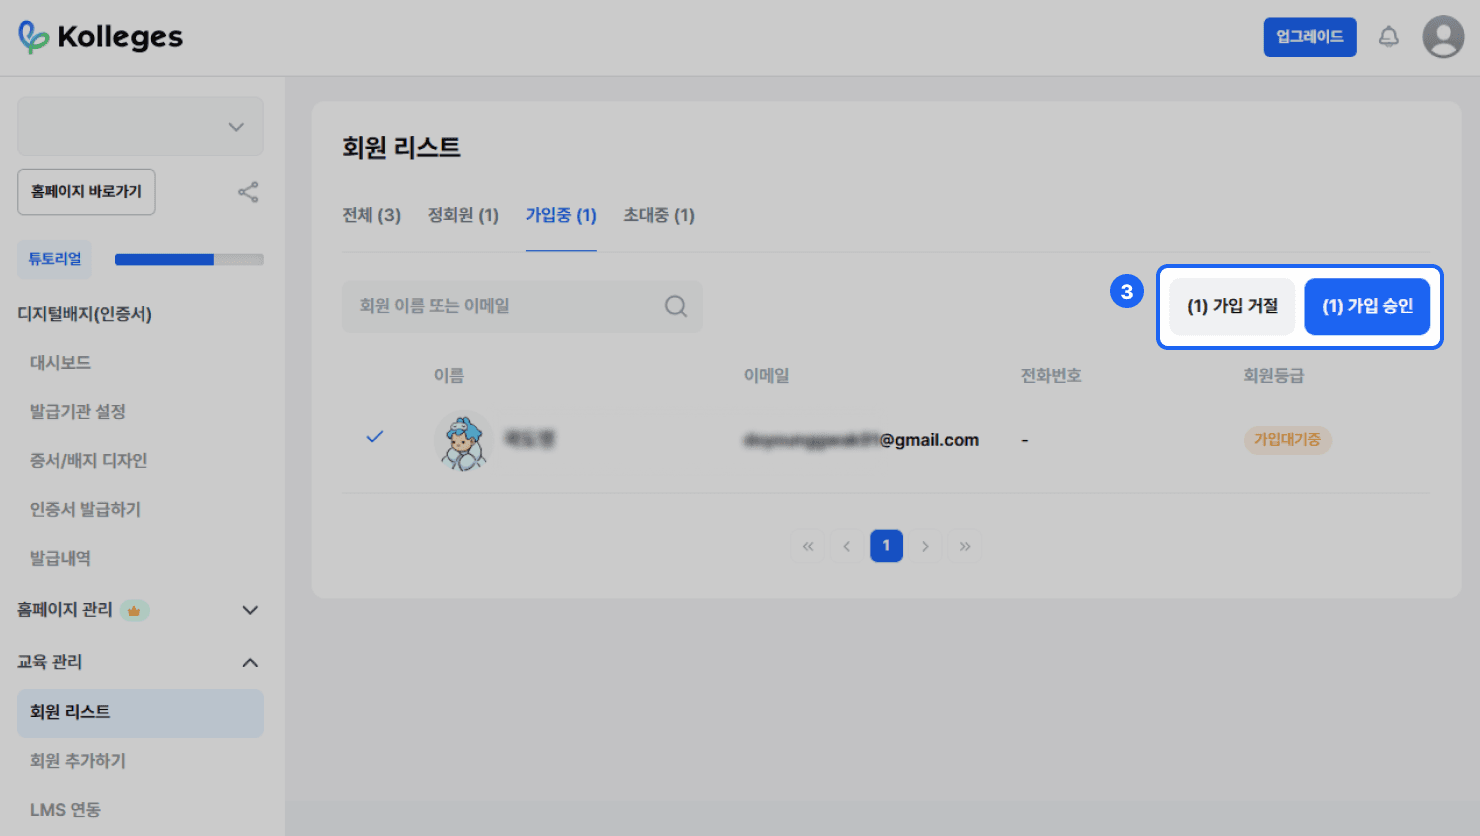
- You can reject sign-ups with the {Reject (n) Sign-ups} button or approve sign-ups with the {Approve (n) Sign-ups} button.
Frequently asked questions
Want to turn learning outcomes into verifiable assets?
From issuing to verifying and amplifying, see it for yourself with Kolleges.
Request a Kolleges demo Related posts

Add/Remove Admin Accounts
A step-by-step guide to inviting and removing admins by email in your Kolleges workspace, and adjusting permissions by enabling or disabling them without deleting the account.

Payment & Application Management Guide: How to Manage Enrollment Applications and Payment History
A clear overview of the practical workflow every Kolleges operator should know, covering payment and application history lookups, partial and full refund processing, and Excel settlement exports.
Creating a Class
A step-by-step guide that walks you through configuring a class's basic information, the four curriculum mission types, and tuition, all the way to automatically issuing digital badges based on a mission completion rate threshold.