
A step-by-step guide that walks you through configuring a class's basic information, the four curriculum mission types, and tuition, all the way to automatically issuing digital badges based on a mission completion rate threshold.
Kolleges guide: Learn how to create a new course.
Creating a Class
With the Class feature, you can freely design and run classes tailored to the courses you operate.
Follow the steps below to create a class and complete everything from the curriculum to the reward settings.
The [Class Management] menu will not appear until your request has been completed.
- After your request is submitted, the feature is activated following an internal review, after which you can create and manage classes.
- If you would like to activate the Class feature, please contact our [Customer Center].
Creating a Class
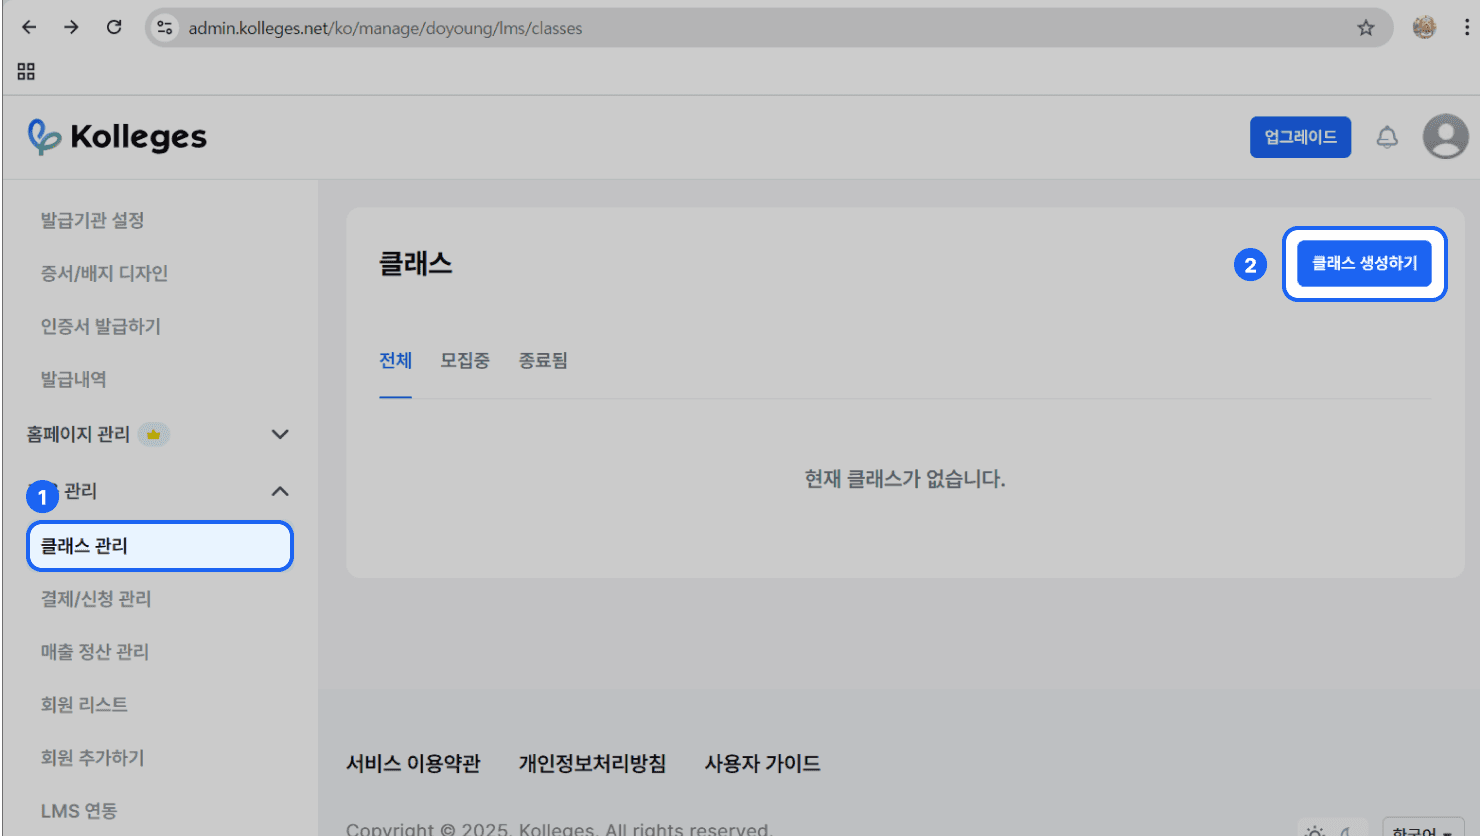
- In the left side menu, click [Class Management].
- Click the {Create Class} button to go to the [Create Class] page.
Configuring the Class Basic Information
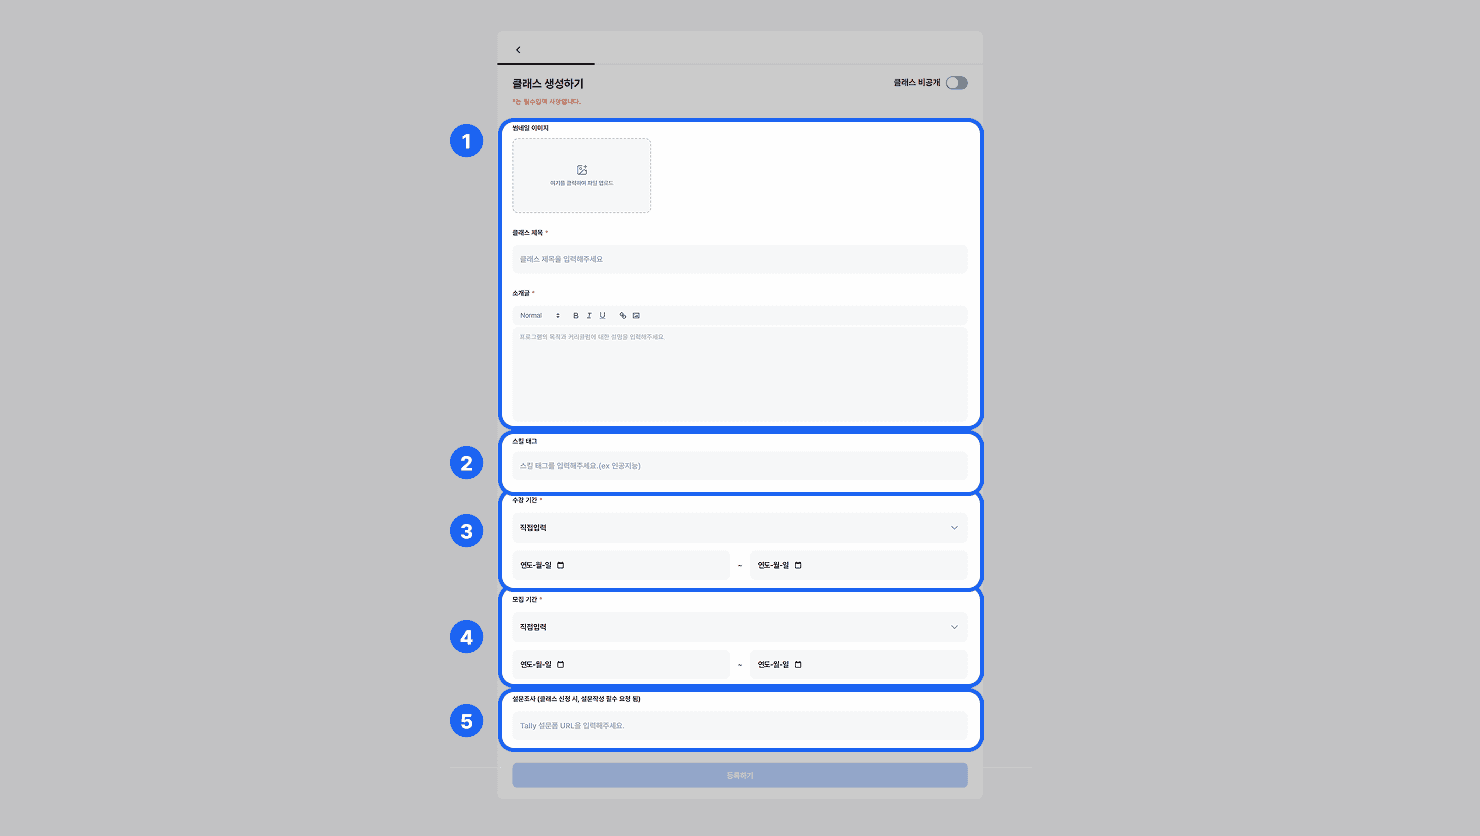
Enter the overall information about the class.
- Thumbnail image: Upload a representative image.
- Class title: Enter the class name that will be shown to learners.
- Description: Write a brief description of the class. It is also used when sharing a link.
- Skill tags: Enter the main technical keywords related to the class.
- e.g., Artificial Intelligence, Design, Project Management, etc.
- Enrollment period: Enter the period during which learners can study.
- Recruitment period: Enter the period during which you accept enrollment applications.
- Survey: You can require learners to fill out a survey when applying for the class.
- You need to create a form in Tally and generate a URL.
Registering the Curriculum
Register the lectures or assignments (missions) that learners who join the class will take.
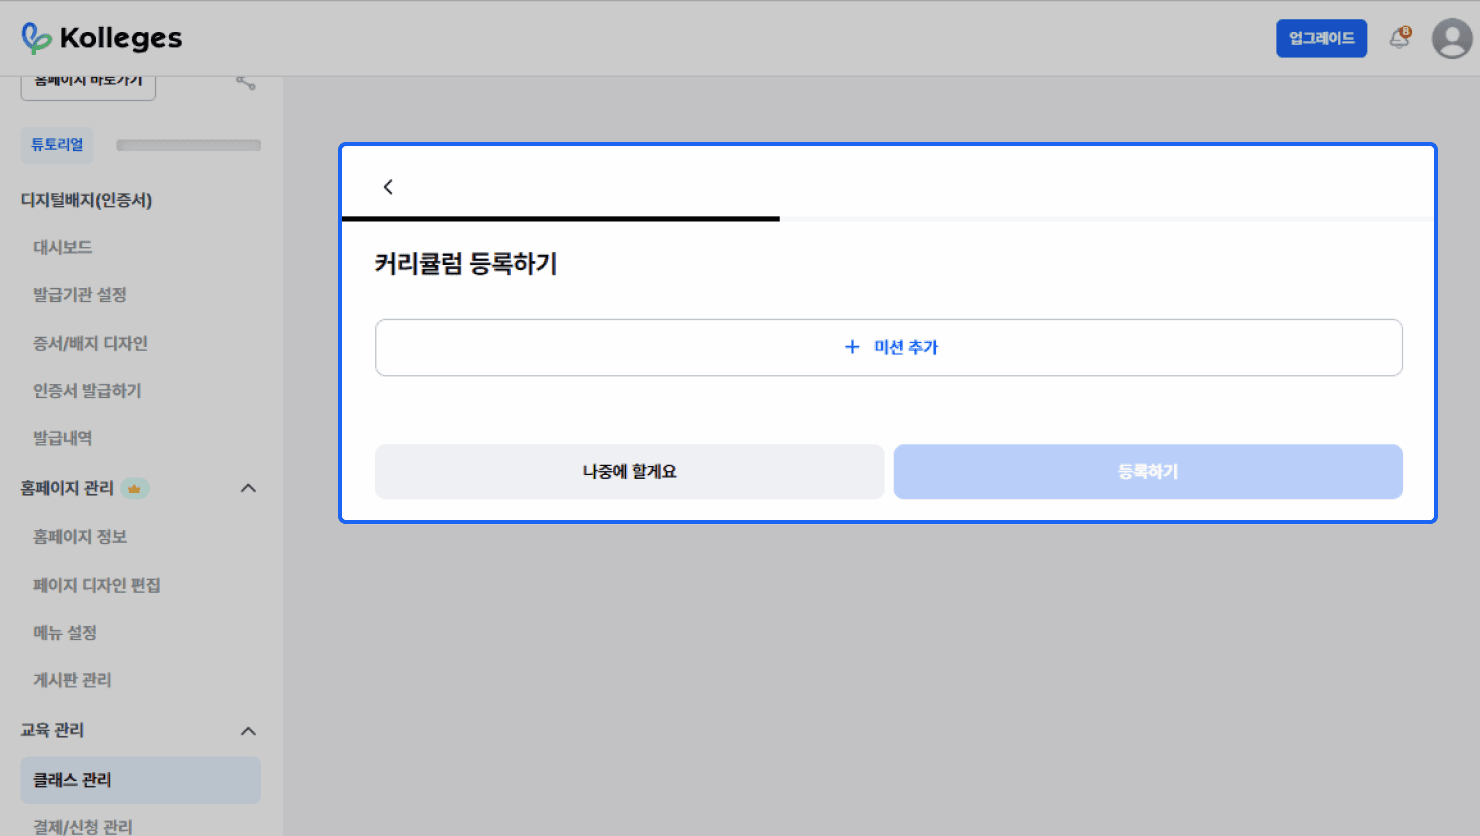
- Click the {+ Add Mission} button to open the [Add Mission] popup.
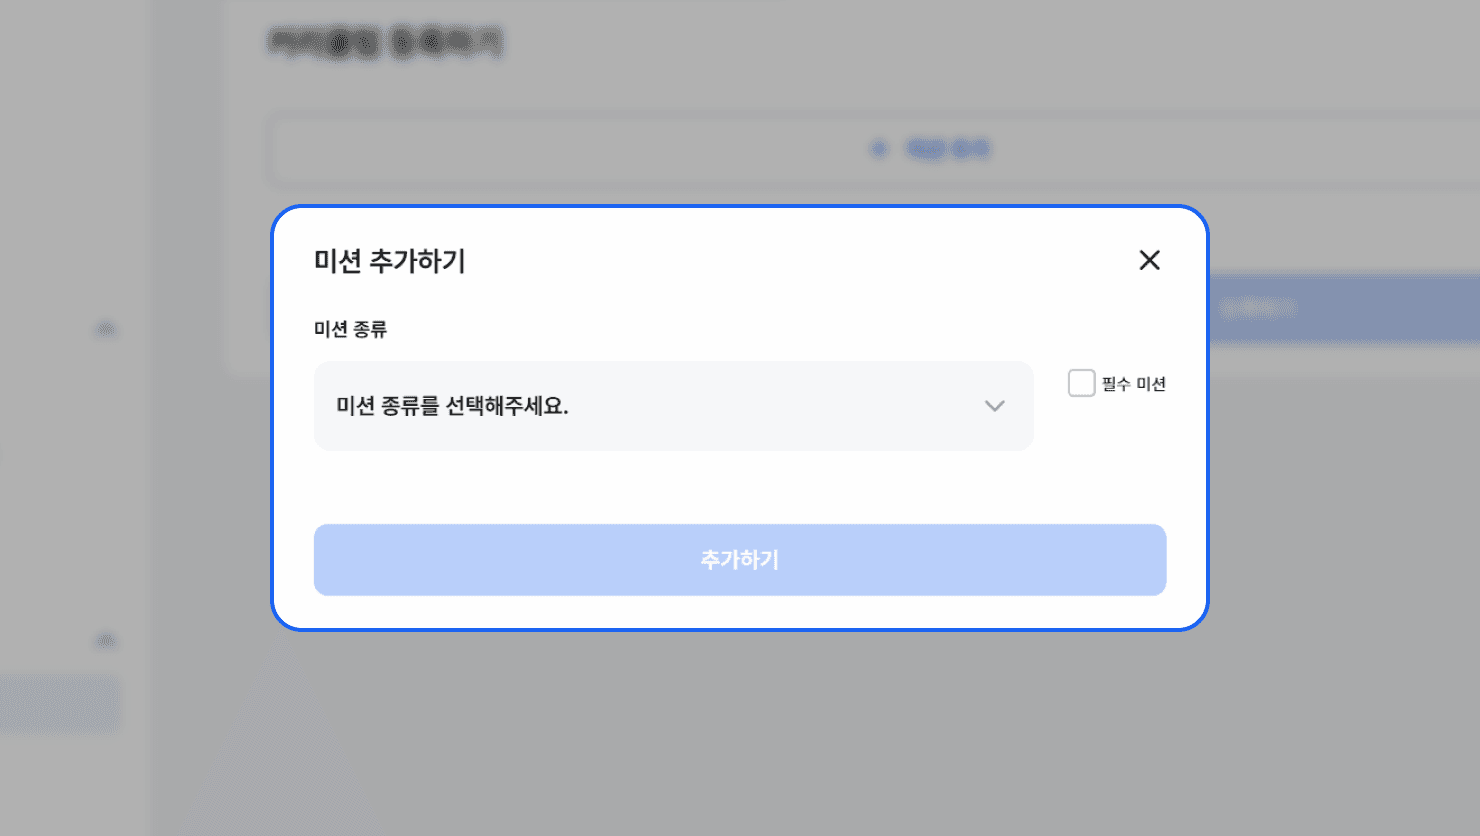
- Use the {Please select a mission type.} dropdown menu to select a mission type.
Mission Types
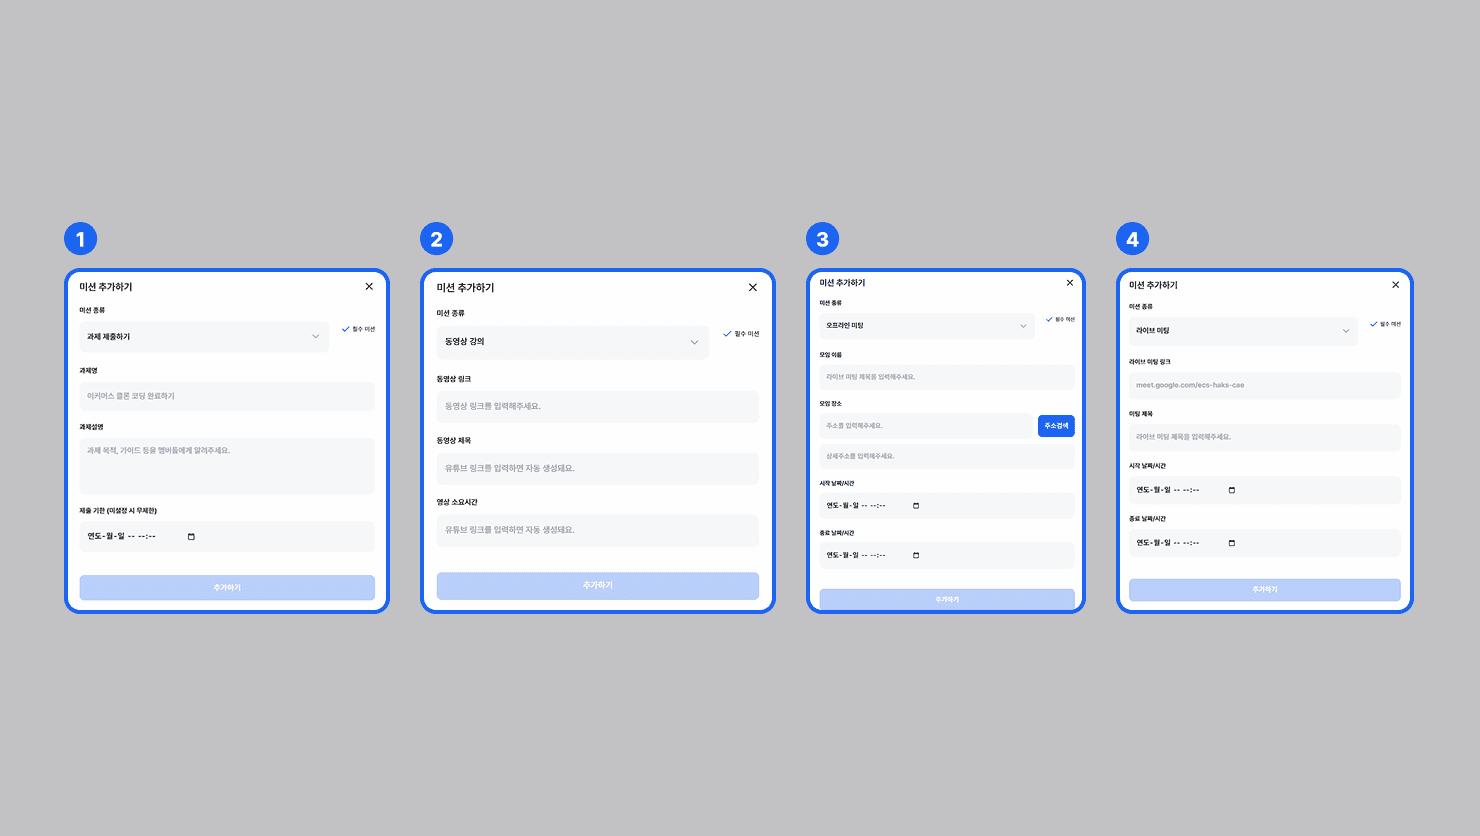
- ① Assignment Submission
- Assignment name: Enter the name of the assignment.
- Assignment description: Enter the assignment’s purpose, guidelines, and so on.
- Submission deadline (unlimited if not set): The deadline for submitting the assignment.
- ② Video Lecture
- Video link: Enter the link to the video lecture.
- Video title: Generated automatically when you enter a YouTube link.
- Video duration: Generated automatically when you enter a YouTube link.
- ③ Offline Meeting
- Meeting name: Enter the title of the offline meeting.
- Meeting location: Enter the address of the offline meeting location.
- Start date/time: Enter the start date and time of the offline meeting.
- End date/time: Enter the end date and time of the offline meeting.
- ④ Live Meeting
- Live meeting link: Enter the link to the live meeting.
- Meeting title: Enter the title of the live meeting.
- Start date/time: Enter the start date and time of the live meeting.
- End date/time: Enter the end date and time of the live meeting.
- Click the {Add} button to add the mission.
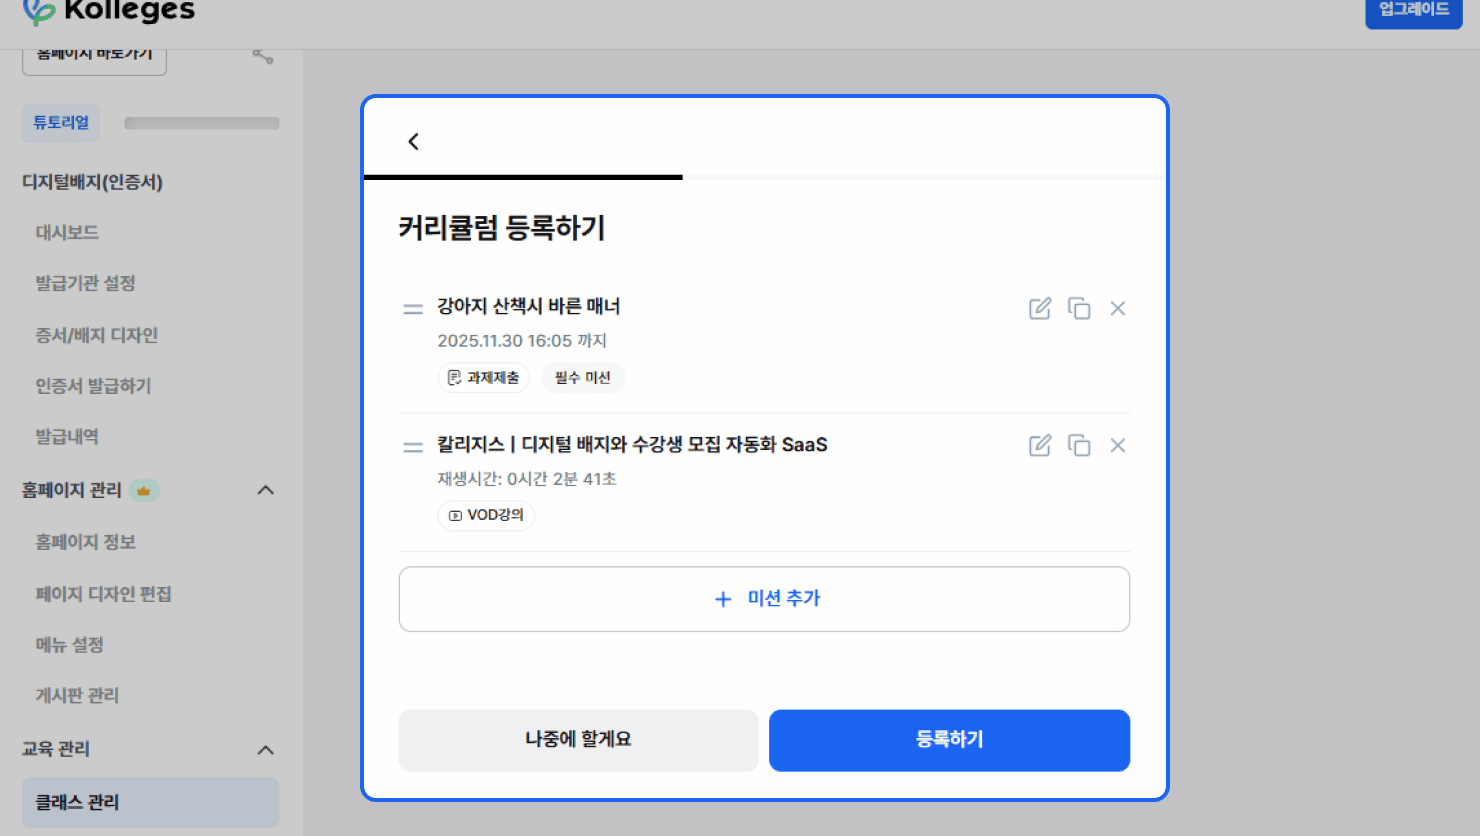
- Click the {+ Add Mission} button to add multiple missions.
- Click the {Register} button to register the curriculum.
Setting the Tuition
Set the tuition for the curriculum.
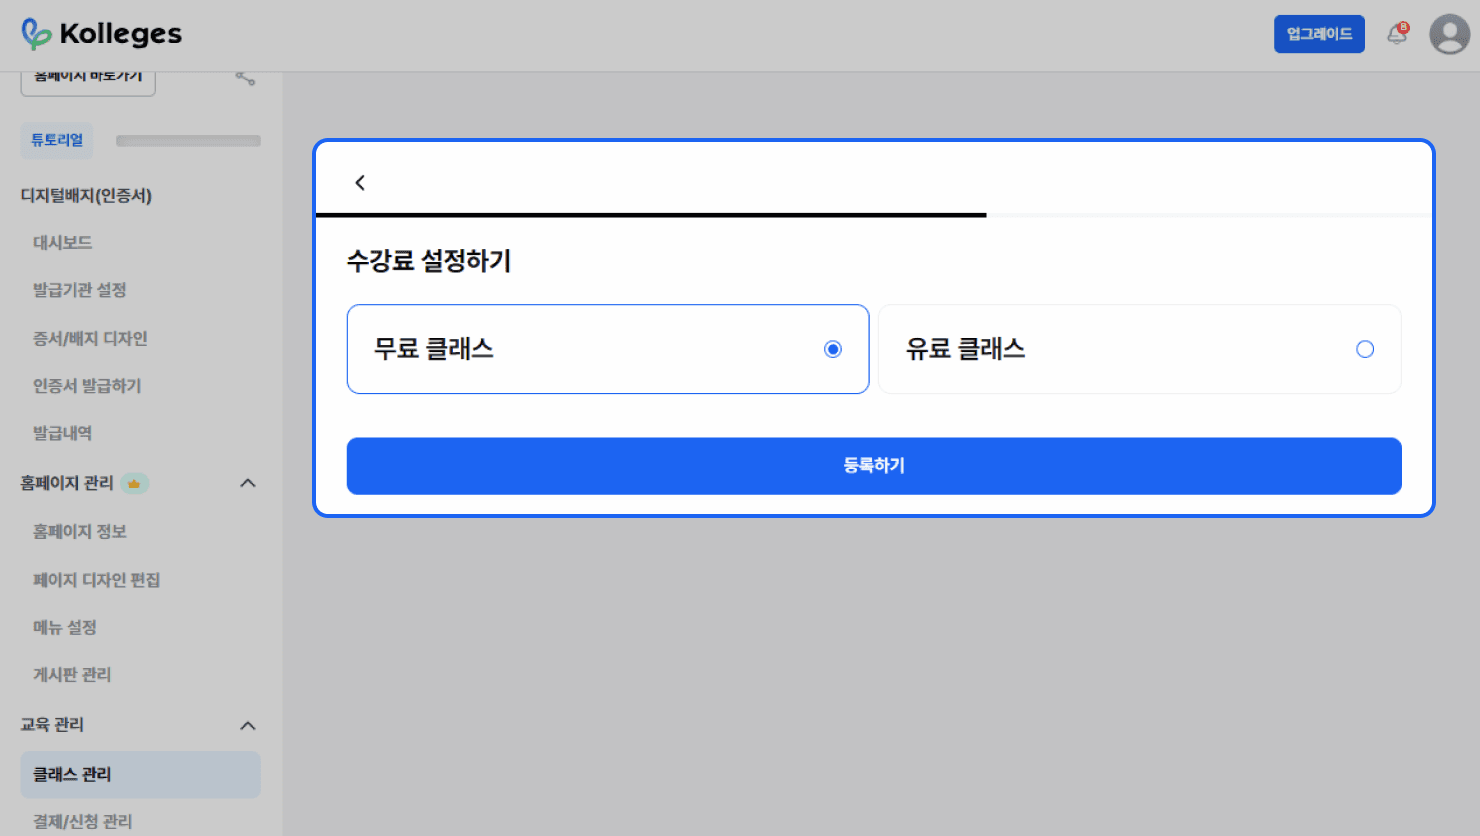
- Free class: A class that is run free of charge.
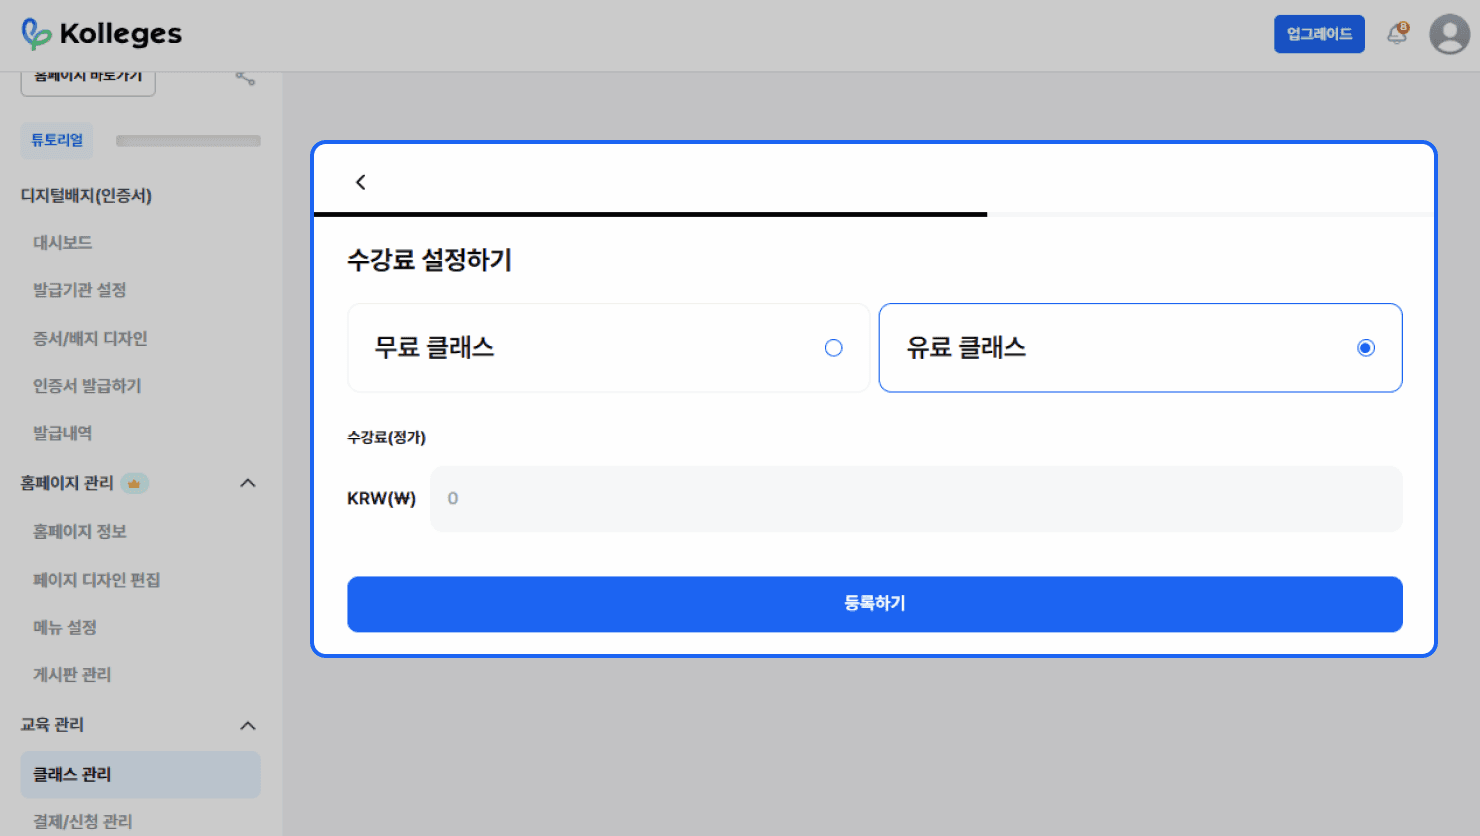
- Paid class: A class that is run for a fee.
- Tuition (list price) - KRW (₩)
- Click the {Register} button to register the class tuition settings.
Registering Automatic Digital Badge Issuance
You can set a digital badge to be issued when a learner completes the course at or above a certain threshold.
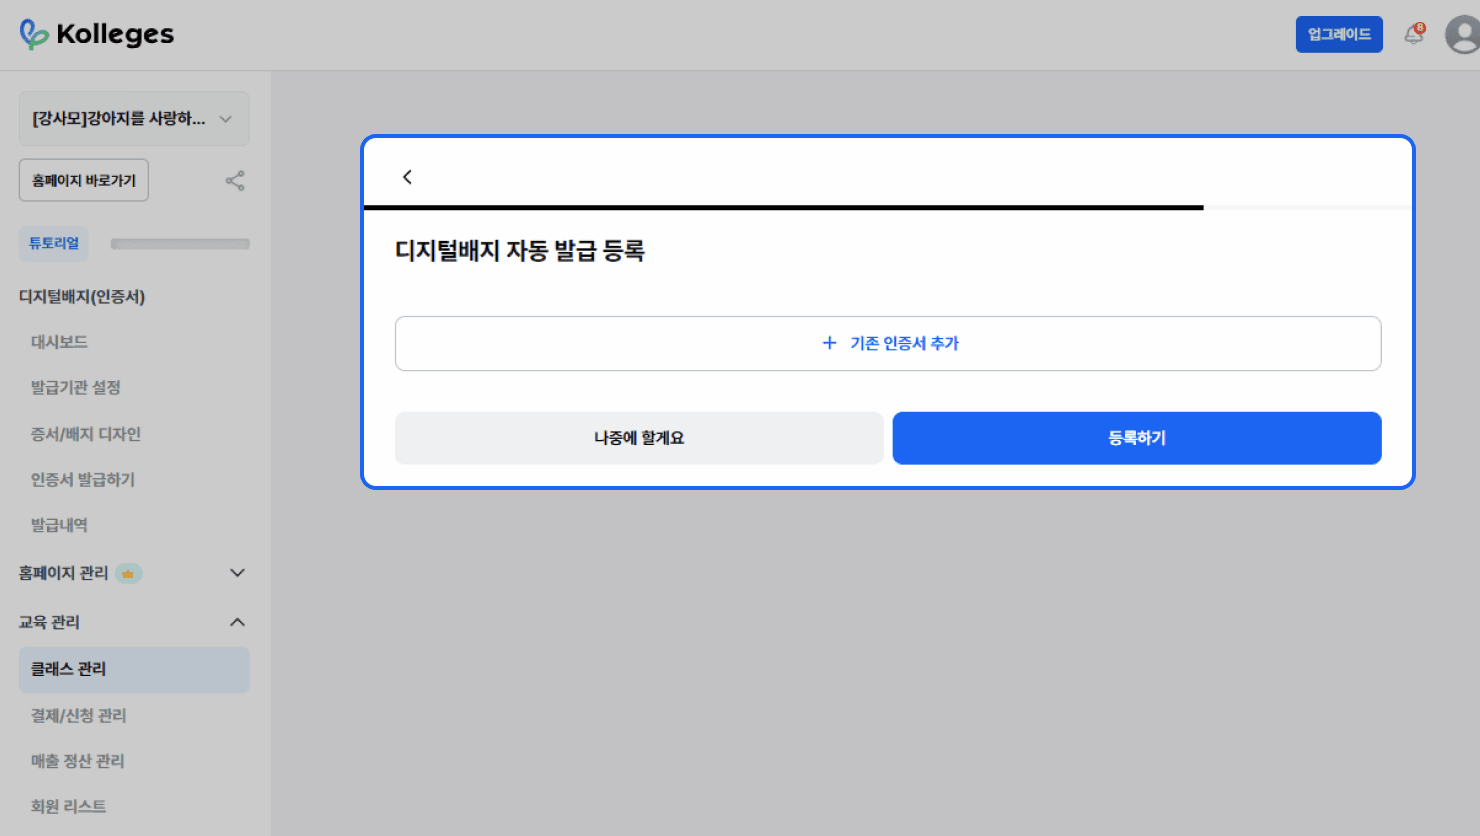
- Click the {+ Add Existing Certificate} button.
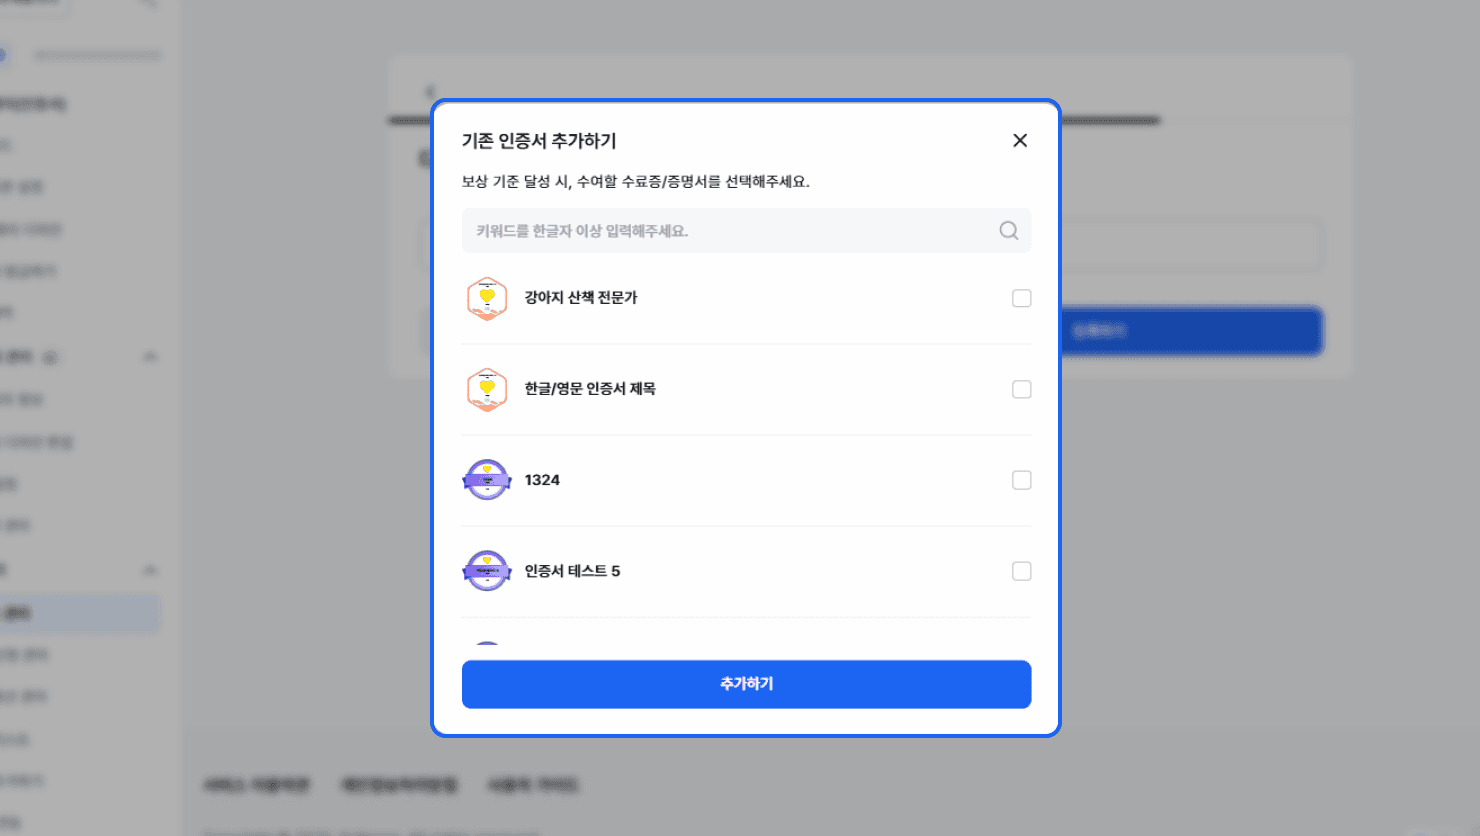
- In the [Add Existing Certificate] popup, select the digital badge to award when the reward threshold is met.
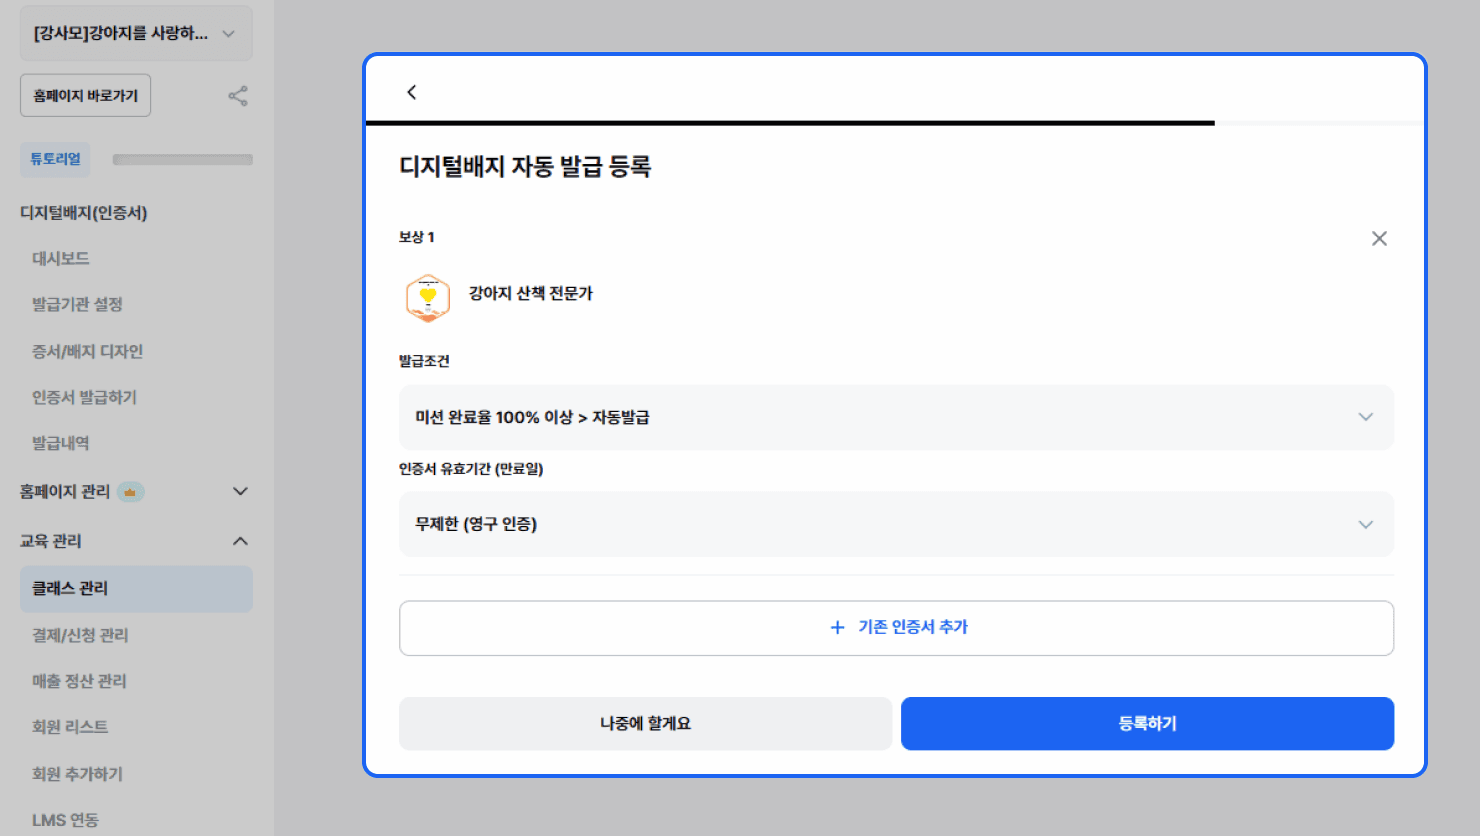
- Select the {Issuance condition} and the certificate {Validity period (expiration date)}.
- Issuance condition
- Automatically issued when the selected threshold within the 10%-100% mission completion rate range is met
- Issued manually by the admin
- Certificate validity period (expiration date)
- Unlimited (permanent), 90 days, 180 days, 1 year, 2 years, or enter a period manually
- Issuance condition
- Click the {Register} button to complete the registration of automatic digital badge issuance for the curriculum.
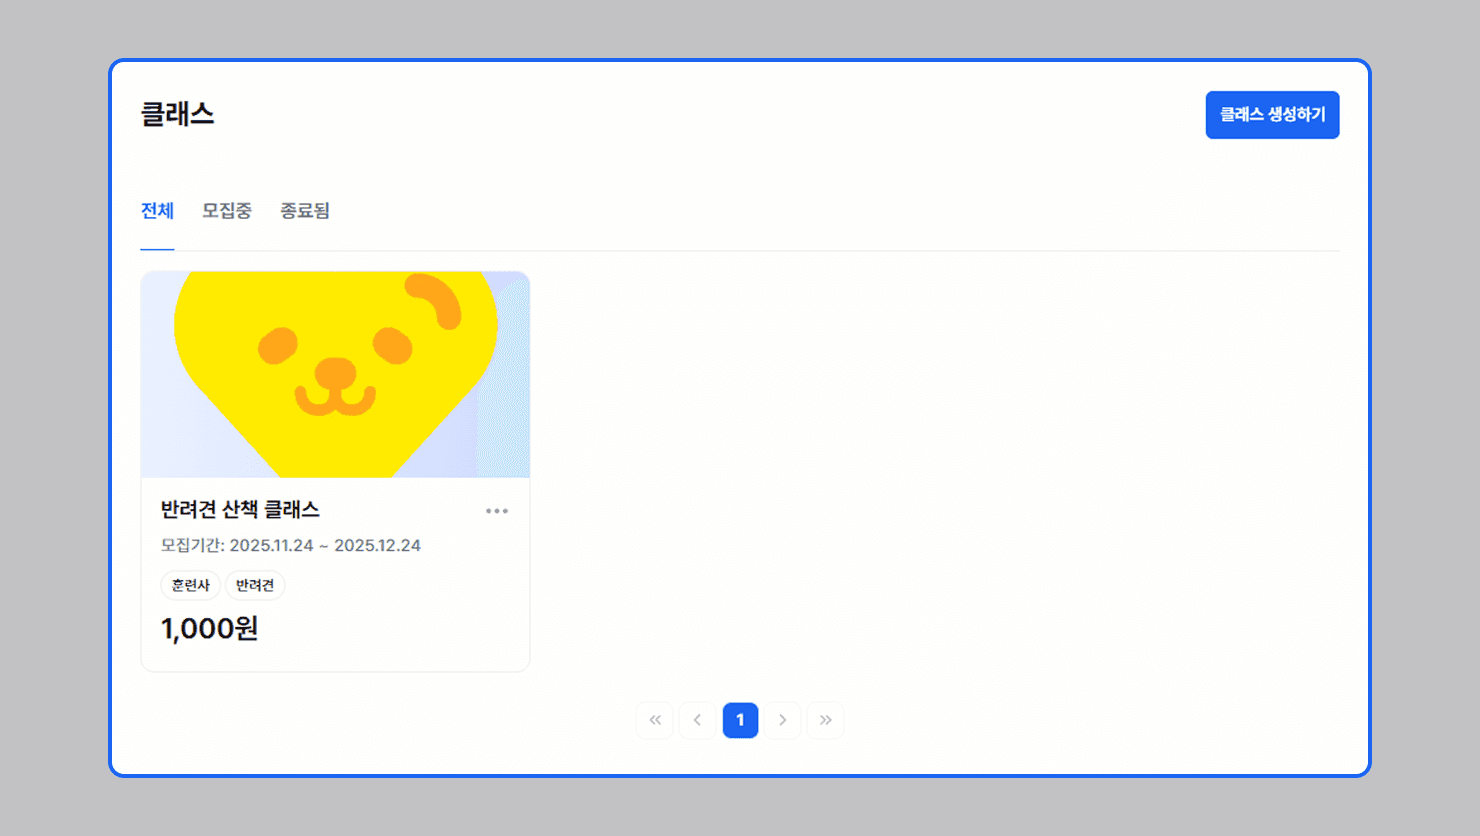
- The class creation is complete.
[Example Screen]
Frequently asked questions
Want to turn learning outcomes into verifiable assets?
From issuing to verifying and amplifying, see it for yourself with Kolleges.
Request a Kolleges demo
Related posts
Class Submissions
You can flexibly build your curriculum using four submission types (assignment, video, offline, live meeting) and their type-specific completion conditions.

Class Usage Guide: Key Features for Running Lessons and Courses
From the Class tab, apply for the class you want, and as you complete missions using the curriculum, assignments, and leaderboard, a badge is issued once you meet the reward conditions and can be viewed in your badge wallet.
Payment & Application Management Guide: How to Manage Enrollment Applications and Payment History
A clear overview of the practical workflow every Kolleges operator should know, covering payment and application history lookups, partial and full refund processing, and Excel settlement exports.