

This guide walks you step by step through the full flow of Kolleges certificate issuance, from individual entry and bulk Excel upload to scheduled issuance.
A guide on how to issue completion certificates. Certify learning achievements instantly with Kolleges.
Certificate Issuance
Once you have created a certificate, you can now issue it to users.
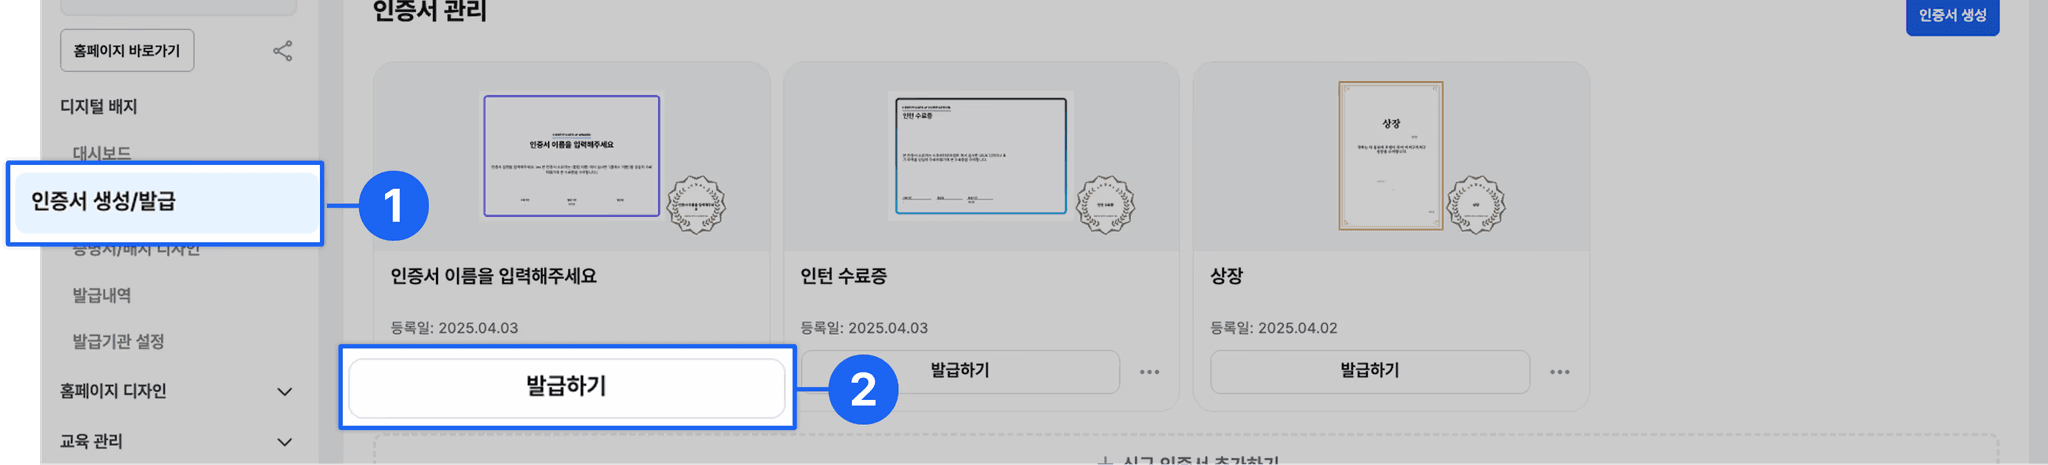
- Click [Create/Issue Certificate] in the left menu.
- Click [Issue] on the certificate management screen.
Entering Recipient Information
Now enter the information of the recipient who will receive the certificate.
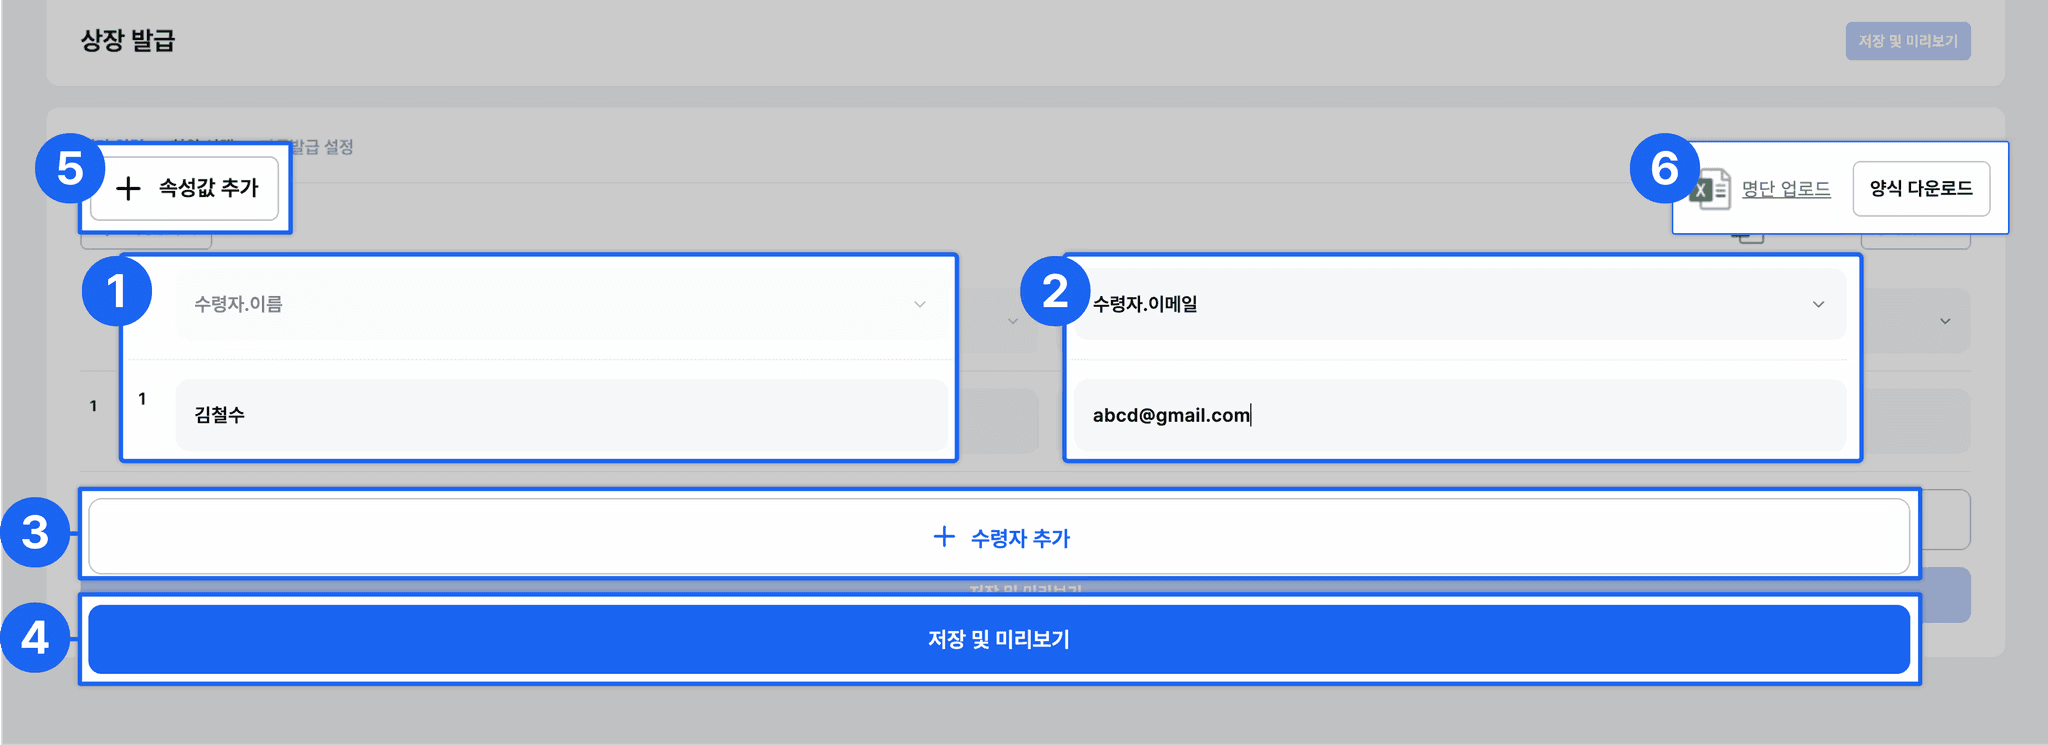
- Recipient name: Enter the name of the recipient who will receive the certificate.
- Set recipient contact method: Enter either the recipient’s email or phone number.
- This feature is only available in the Pro version or higher.
-
- Add recipient: You can issue the certificate to multiple recipients at once.
- Save and preview: Save the entered content and move to the preview screen before issuance.
-
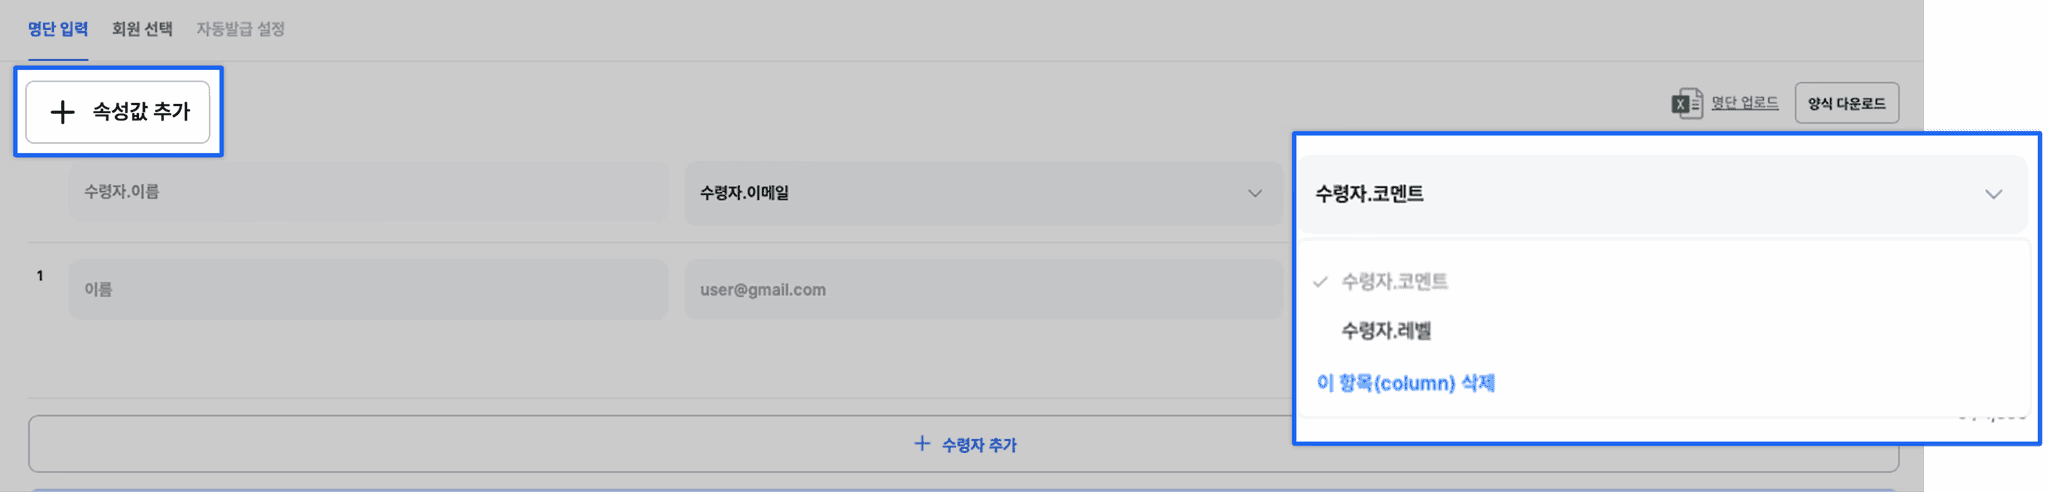
- Add attribute value button: A feature for adding attribute values other than name and contact method.
- Only items set when creating the certificate design can be added as attribute values.
- Roster upload: A feature for adding a bulk recipient roster at once.
- Click [Download Form] to fill in the list, then click [Upload Roster] to upload the file.
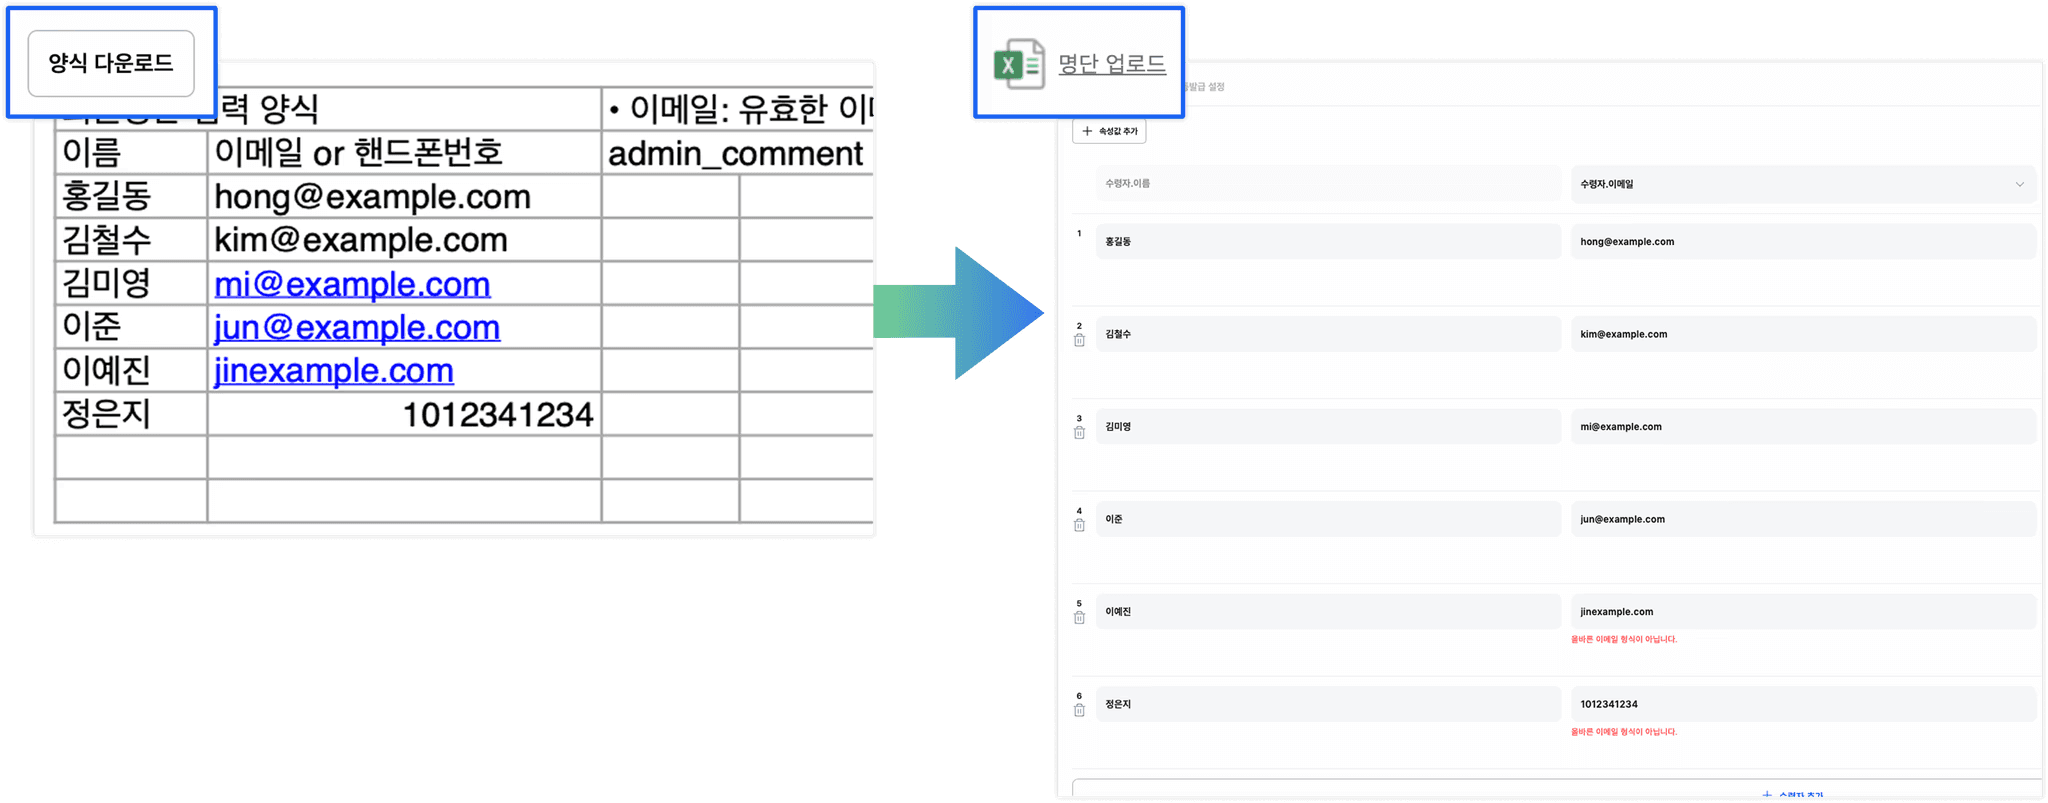
Issuing the Certificate
Before issuing the certificate, you can check the final content on the preview screen.
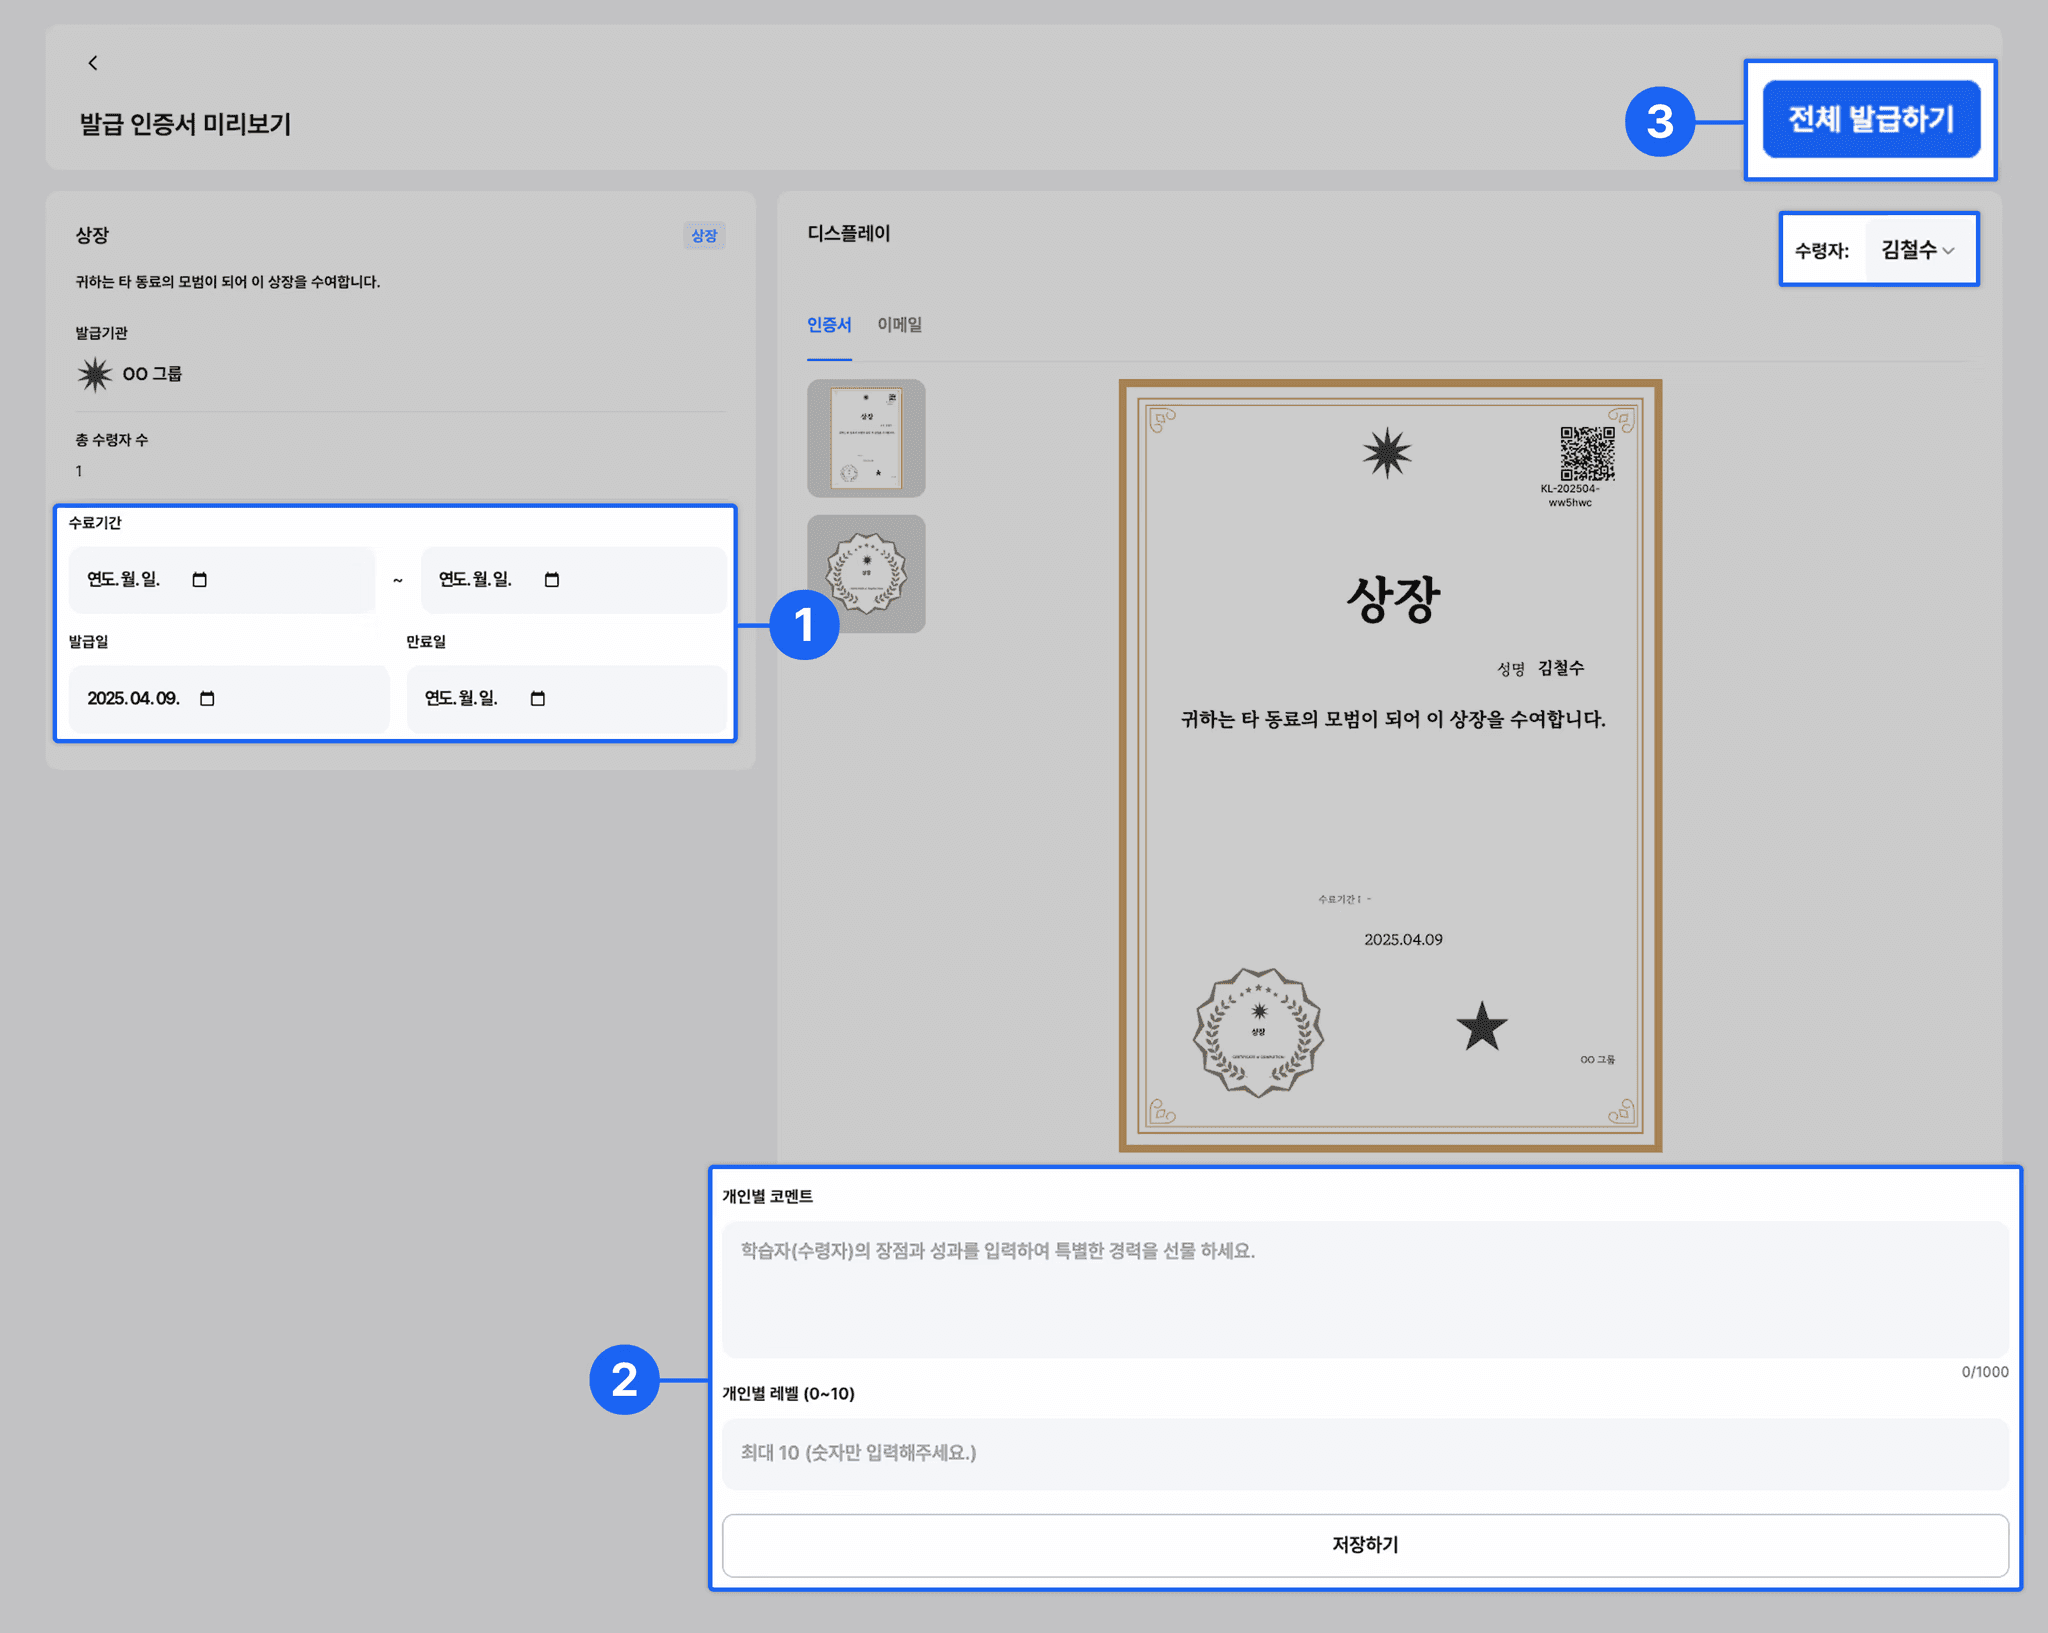
- Set the completion period and the issue date / expiration date.
- Completion period: Enter the program completion period.
- Issue date: The date the certificate is actually issued.
- Expiration date: Set the validity period of the certificate. * If you do not set an expiration date, the certificate will be marked as ‘permanent certification’.
- (Optional) You can enter a per-person comment and level, then save.
- You can enter a customized comment or certification level for each recipient.
- Be sure to check that the recipient name is correctly selected. Example) Recipient: Kim Chul-soo * You must click the [Save] button for the entered content to be applied.
- Once you have checked all items, click the [Issue All] button to send the certificates in bulk.
- After issuance, the certificate is delivered to the recipient via email or KakaoTalk.
- Issued certificates can be checked in the issuance history.
Scheduled Issuance
You can schedule a certificate to be issued automatically after a specified date and time.
A scheduled certificate is issued automatically at the set time.
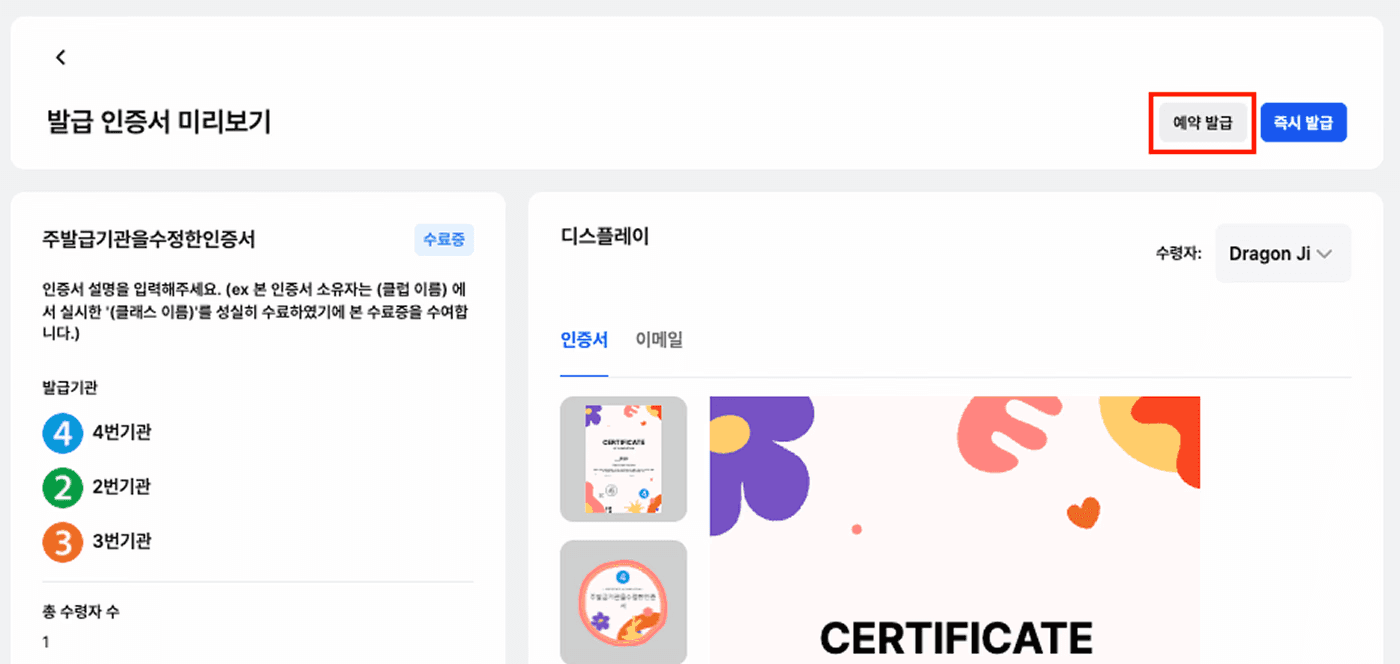
- Click the [Schedule Issuance] button on the certificate preview screen
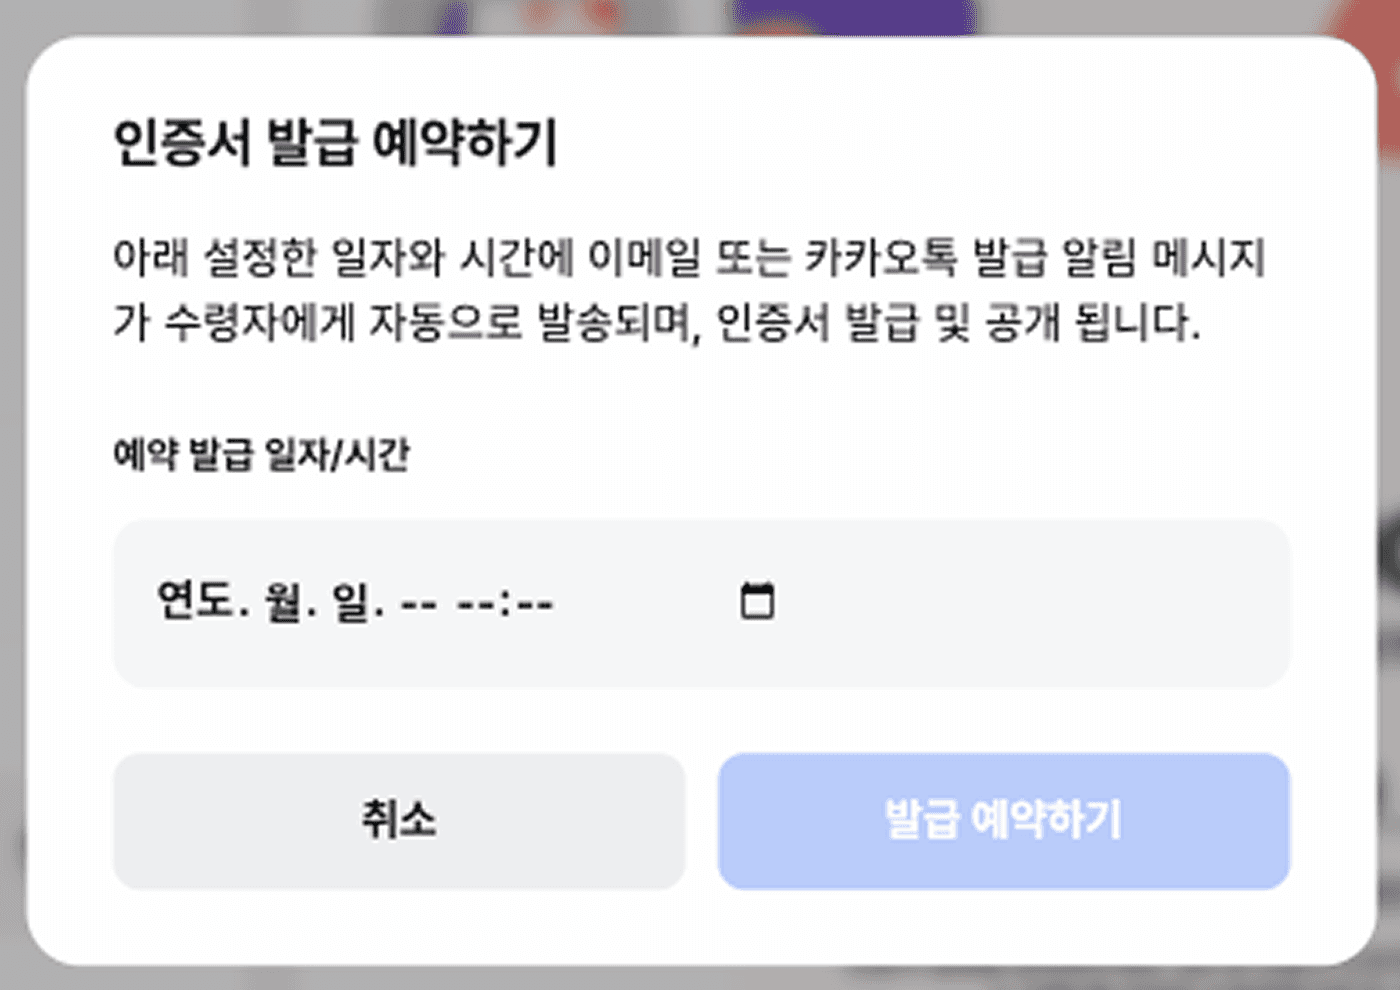
- Select the desired issuance date and time (date + time) in the displayed time input field
- Click the [Schedule Issuance] button to complete the schedule
Checking the Schedule Status
You can check scheduled certificates in the list on the [Issuance History] screen as follows.

Frequently asked questions
Want to turn learning outcomes into verifiable assets?
From issuing to verifying and amplifying, see it for yourself with Kolleges.
Request a Kolleges demo
Related posts
Creating a Digital Badge
A step-by-step guide to the entire Kolleges certificate creation process, from entering basic information, skill tags, and acquisition conditions to adding co-issuers and enabling English certificates.

Checking Digital Badge Issuance History
From the Kolleges issuance history screen, you can see the receipt status, share status, and expiration date of badges and certificates at a glance, and manage and export them in bulk.
Certificate Advertising Settings Guide: Adding Promotional Content to Verification Pages
From the Targeted Advertising tab on the certificate creation page, you can set up badge acquisition programs, related badges, and ad banners to drive re-enrollment and re-application conversions from verification page visitors.