
Custom Attribute Value Pseudonymization Guide: Safely Protecting Personal Information on Badges
 Robin Yoon · Customer Success Team Published
When you set the pseudonymization switch to ON for a digital badge custom attribute, sensitive information such as name and date of birth is masked on the public verification page, safely protecting personal information.
This guide explains how to set up ‘custom attribute value pseudonymization’ to prevent the exposure of sensitive information when issuing digital badges. It explains the process step by step so that organization administrators can safely manage badge data in line with personal information protection standards.
What Is Pseudonymization?
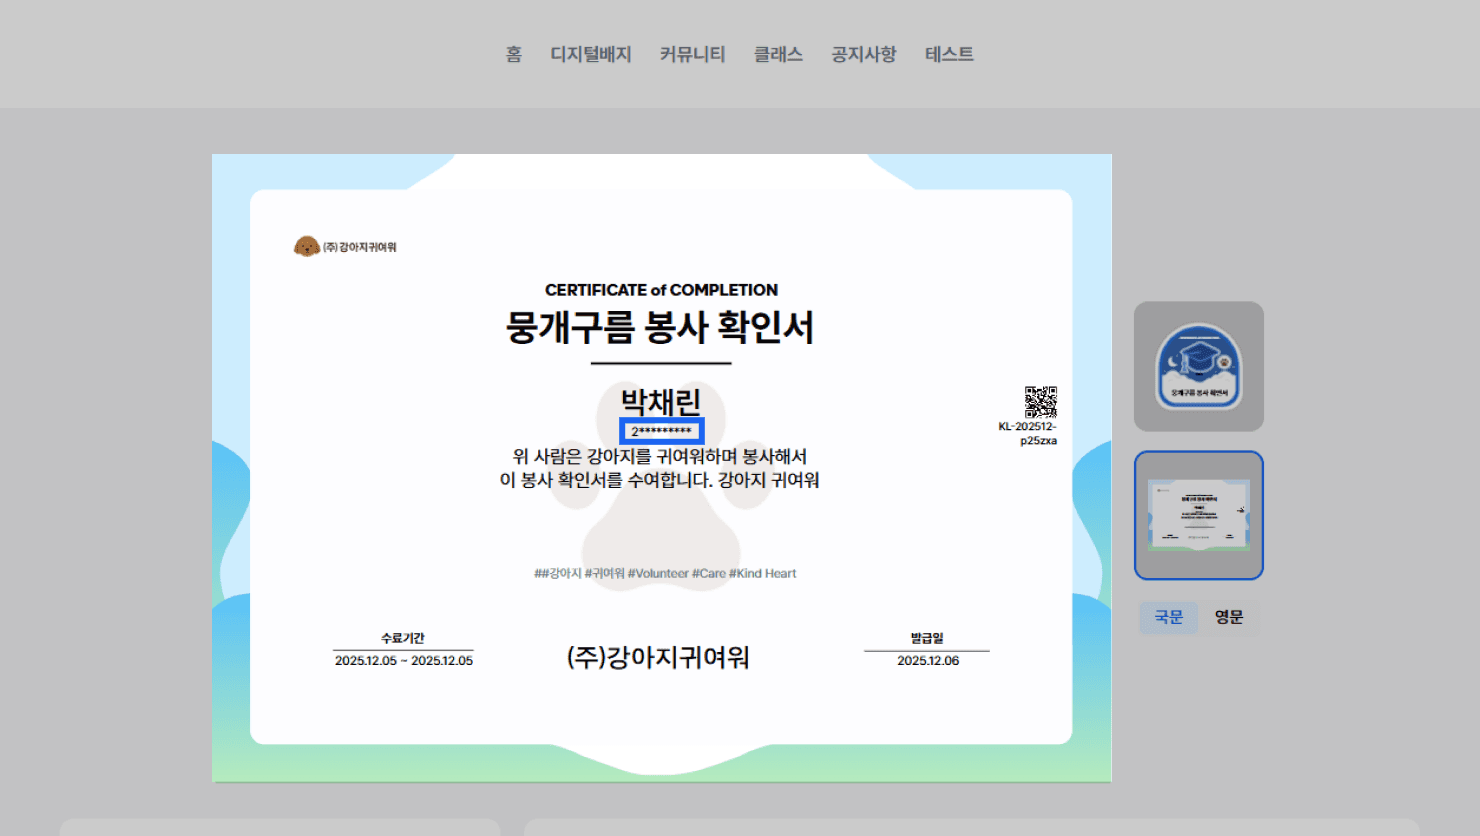
When a certificate is issued, it may include personal or sensitive information such as name, date of birth, and address.
To prevent this information from being exposed as-is to anyone other than the certificate recipient, applying the “pseudonymization” feature masks the information so it is safely protected.
For attribute values that have pseudonymization applied, only the admin, the recipient, and people the recipient has approved to view can see the unmasked value.
To third parties, it is displayed as a masked value.
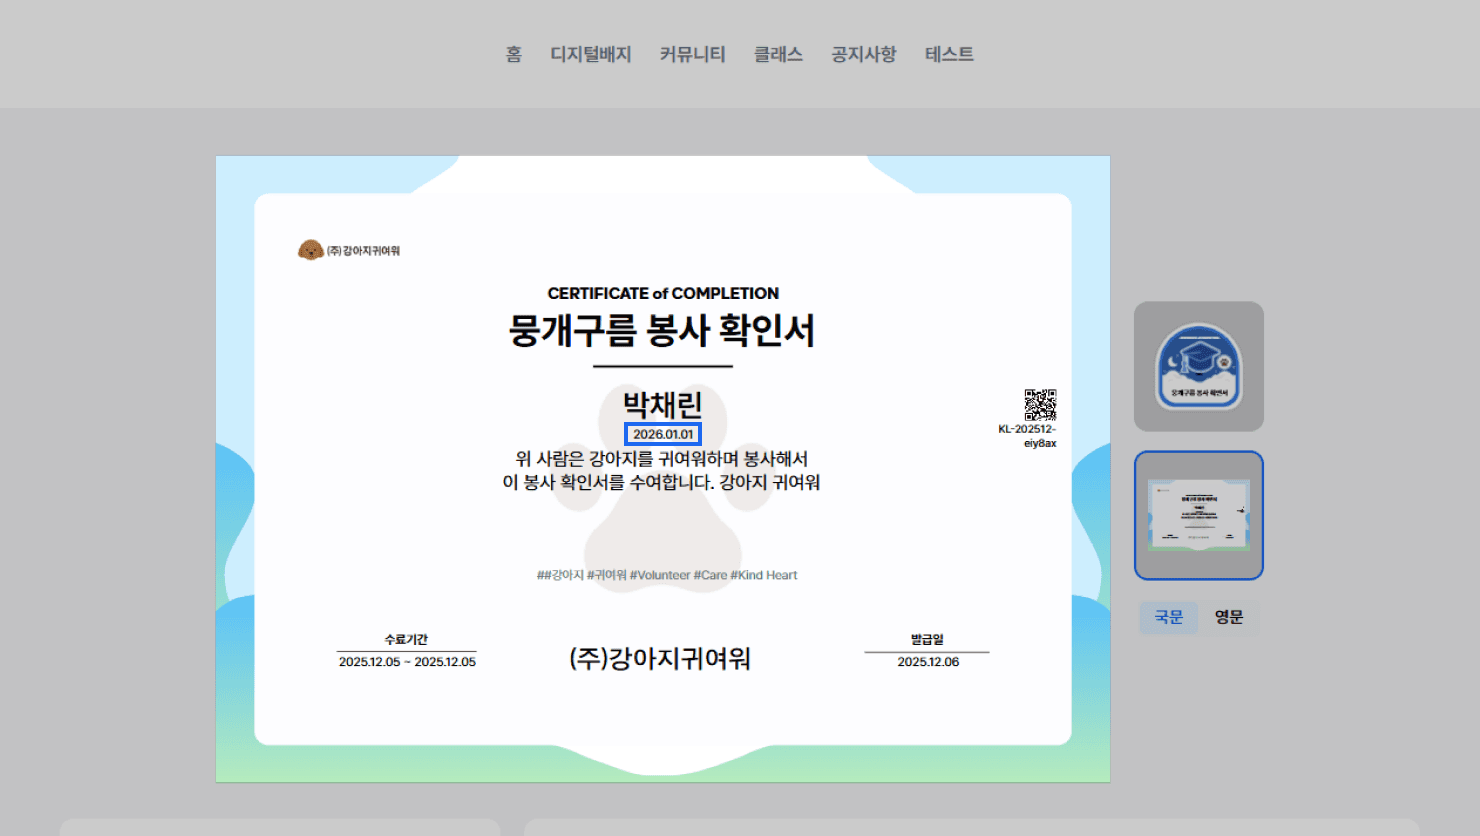
Example) On the certificate image, information such as the date of birth is shown in the form ‘2*********’.
Related guide: Pseudonymization Release
How to Set Up Custom Attribute Value Pseudonymization
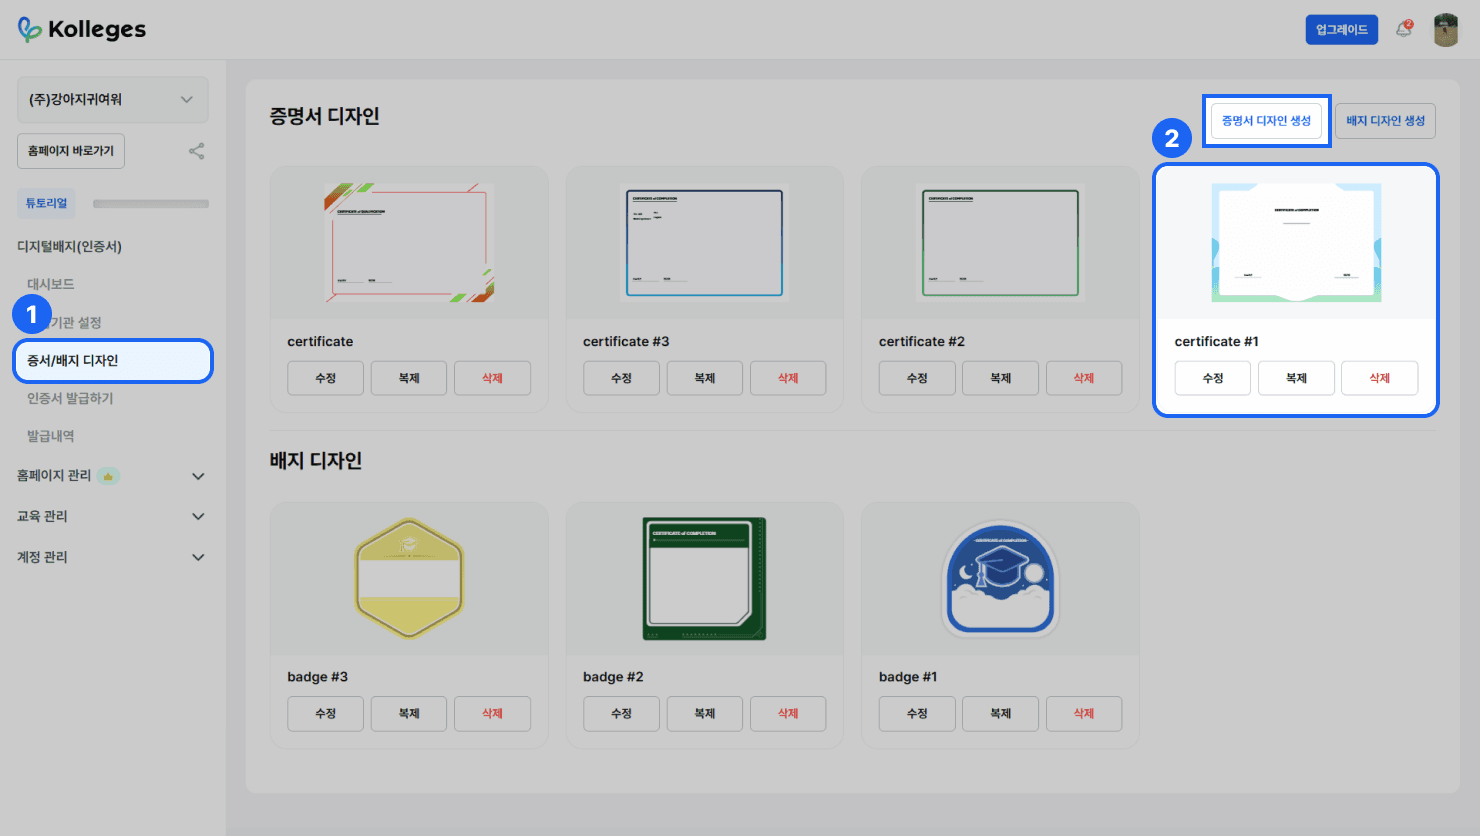
- In the left side menu, click [Digital Badge (Certificate)] > [Certificate/Badge Design].
- Select a certificate (or badge) from the list, then click the {Edit} button or the relevant area to move to the [Edit Certificate Design] screen.
- Related guide: Certificate Design
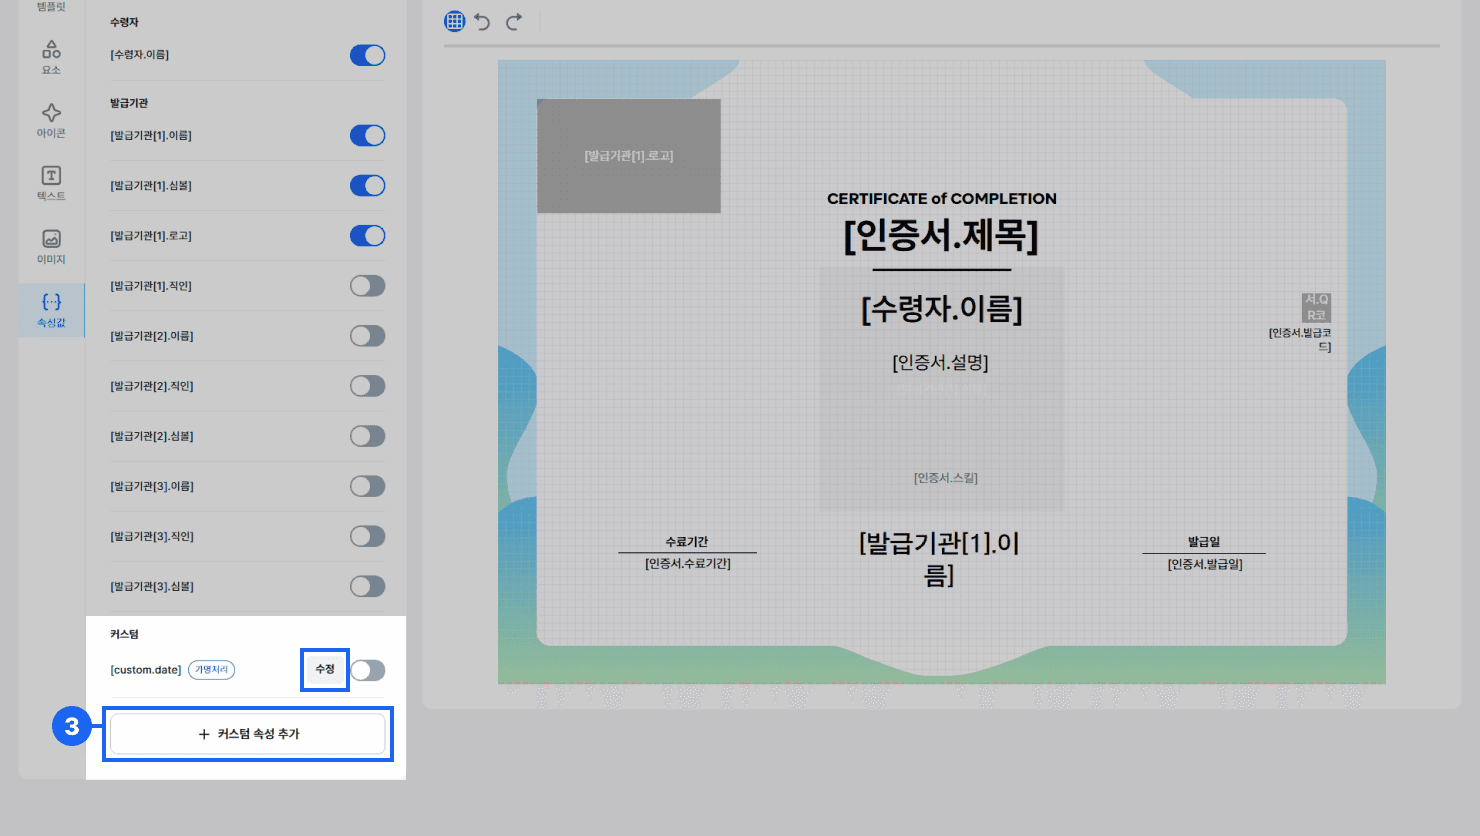
- Click the {+ Add Custom Attribute} button at the bottom of the Edit Certificate Design screen, and the [Add Custom Attribute] popup appears.
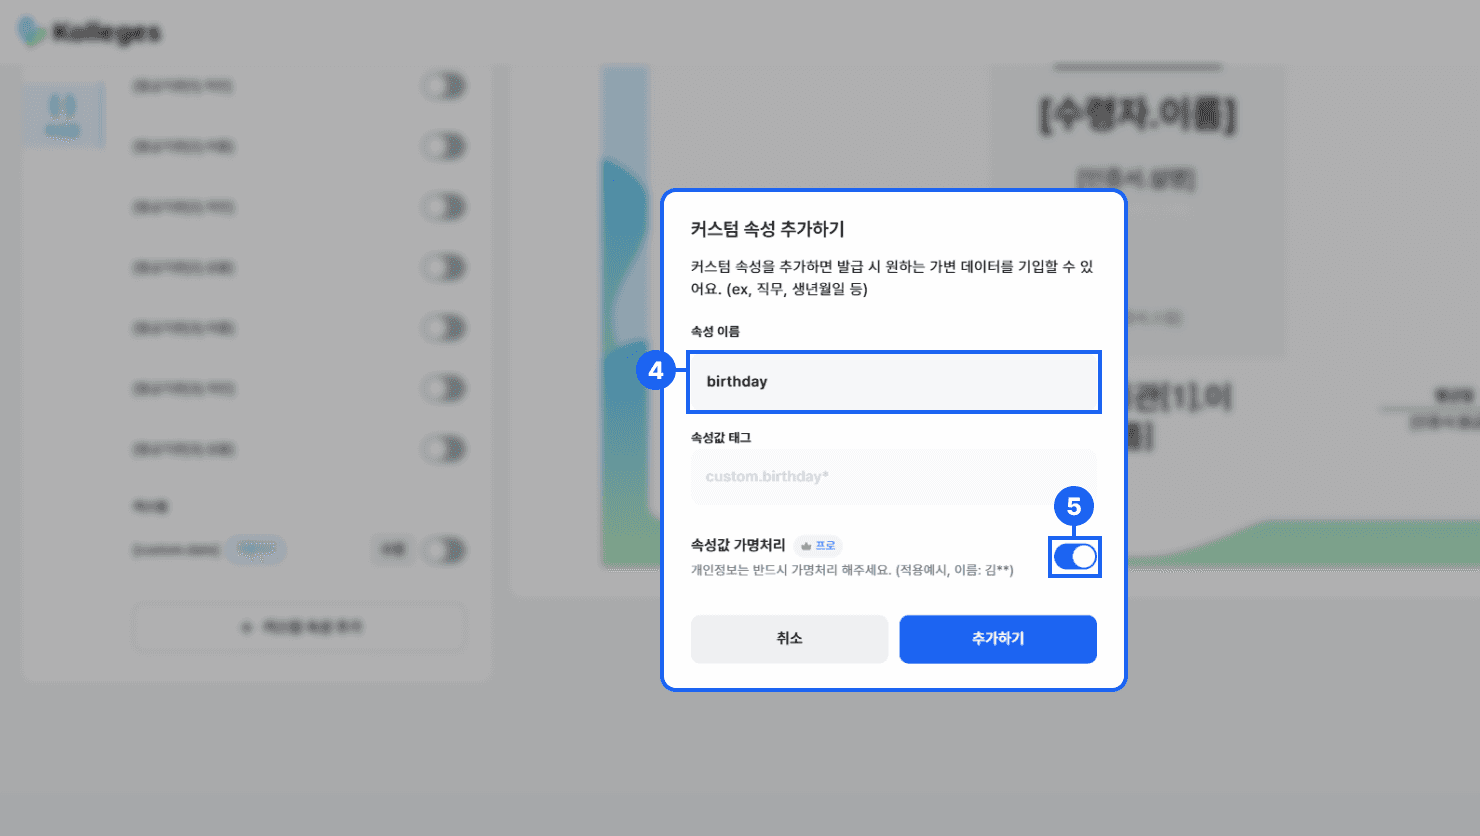
- In the [Add Custom Attribute] popup, enter the attribute name.
- If the value is personal or sensitive information, change the “Attribute Value Pseudonymization” switch button to {ON}.
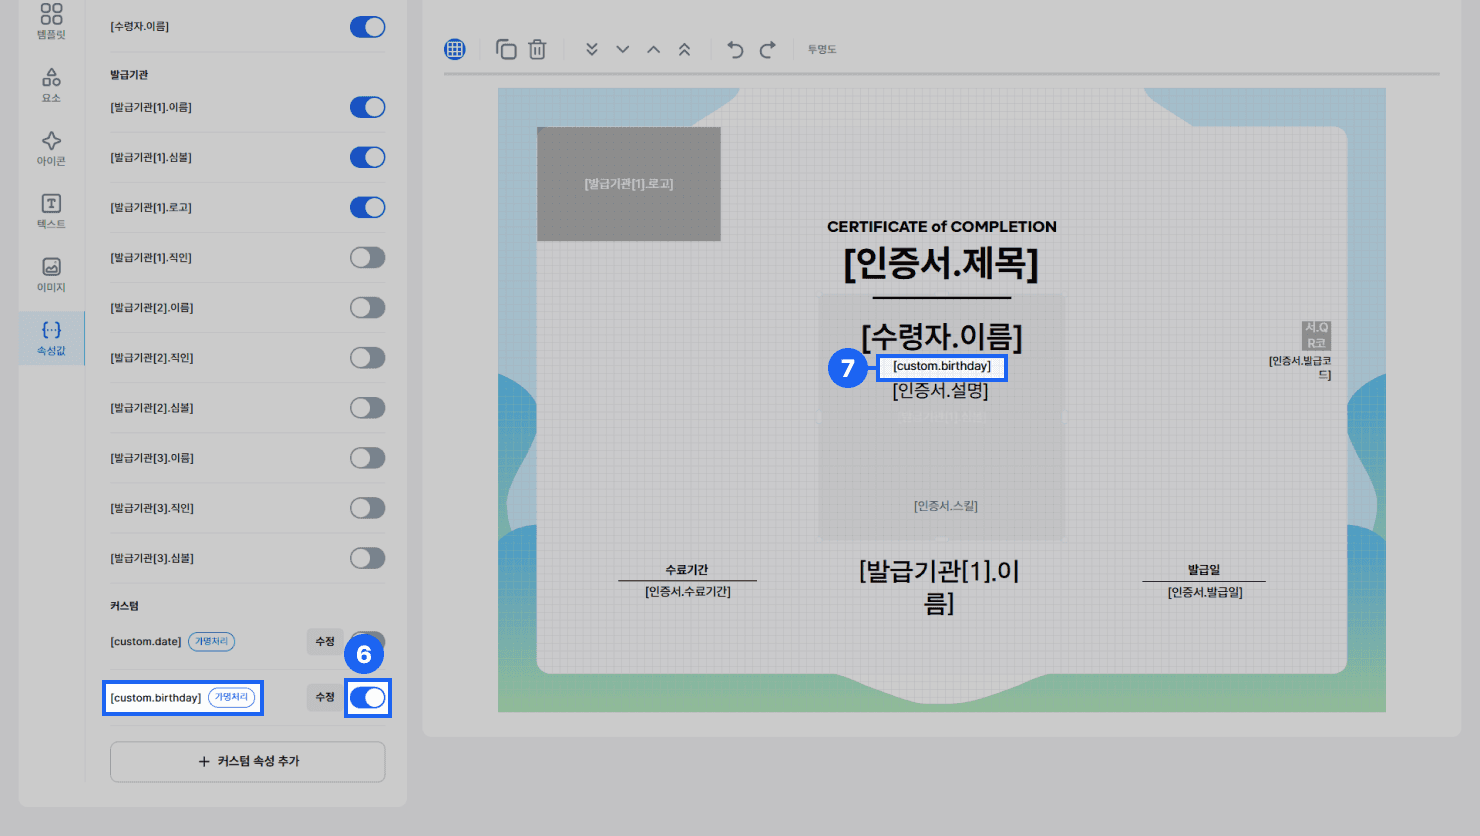
- To display the custom attribute value on the certificate, change the switch button for that attribute to {ON} in the custom attribute list on the left.
- When you change the switch to {ON}, that custom attribute is added to the certificate design area, and you drag it to place it in the position you want.
How to Release Pseudonymization
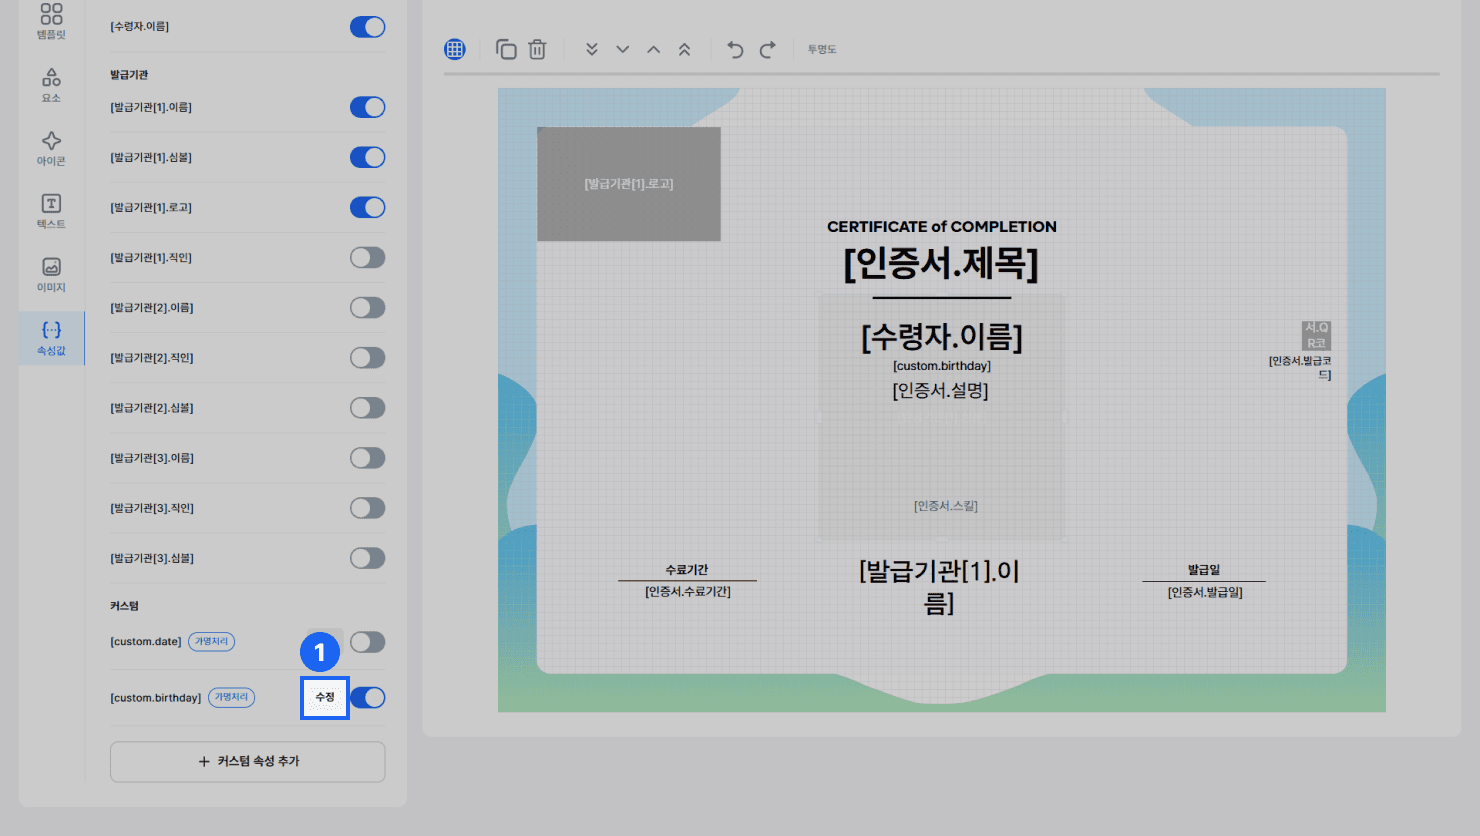
- Click the {Edit} button to the right of the custom attribute item, and the [Edit Custom Attribute] popup appears.
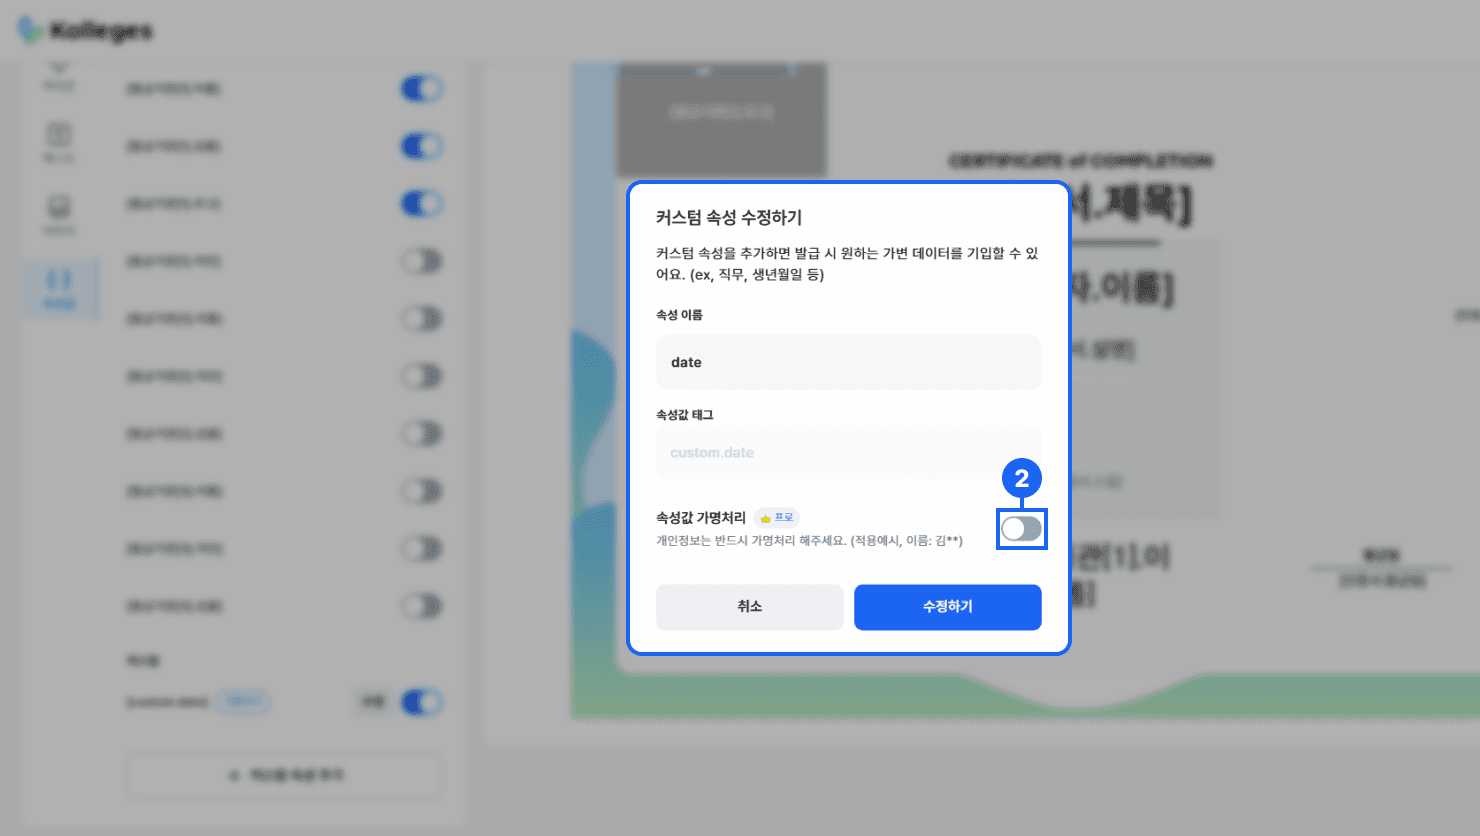
- In the [Edit Custom Attribute] popup, change the [Attribute Value Pseudonymization] switch button to {OFF}.
[Example Screen]
Frequently asked questions
Want to turn learning outcomes into verifiable assets?
From issuing to verifying and amplifying, see it for yourself with Kolleges.
Request a Kolleges demo Related posts
Pseudonymization Release Guide: Restoring Original Custom Attribute Values
This guide explains the procedure where, once the recipient approves a pseudonymization release request, the requester can view the original information for 24 hours, after which it is automatically restored to the pseudonymized state.
Issuer Settings
[Primary] issuer information (institution name, symbol, official seal, logo) and the LinkedIn code must be registered first before you can officially issue badges and certificates.
Creating a Digital Badge
A step-by-step guide to the entire Kolleges certificate creation process, from entering basic information, skill tags, and acquisition conditions to adding co-issuers and enabling English certificates.