

The name shown on your digital badge is changed from the display name in your badge wallet. A three-step guide to replacing the email in the recipient field with your real name.
You open your digital badge certificate and, where your name should be, you find an email address instead. The Recipient field under Issue details reads something like minjun@example.com rather than your real name.
The short answer: you do not need to ask the issuer to reissue it. As the recipient, you can fix this yourself in about a minute. Once you fill in the display name in your badge wallet, the recipient name on the certificate changes to your real name.
This guide walks through why this happens and exactly where and how to change your display name, with screenshots for each step.
Why does the certificate show an email instead of my name?
Your certificate shows an email instead of your name because your display name was empty when the badge was issued. The recipient name on a certificate is filled automatically from the display name saved on your account, and when that value is empty, it falls back to your sign-in email. Once you set your display name, your real name appears on the certificate too.
Badges are usually issued to an email address. So if you receive a badge before you have set your name, that email goes straight into the Recipient field on the badge detail page in place of a name. Nothing was issued incorrectly; there simply was no name to show yet.
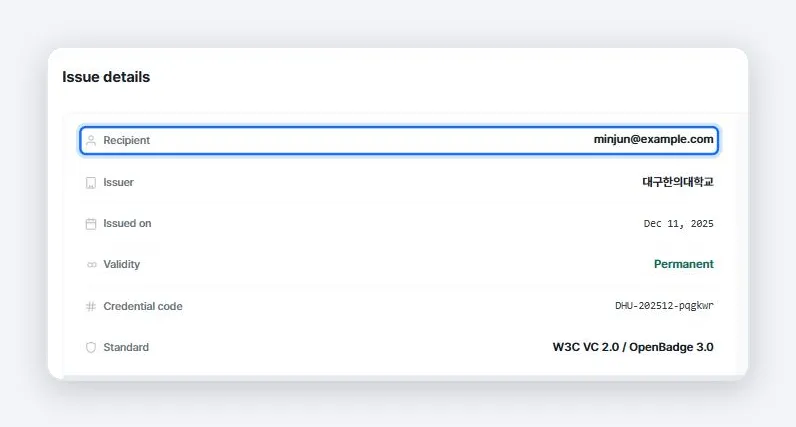
Figure 1. Before you set a display name, the Recipient field shows your email as is.
Display name The name shown on your public profile and on your certificates. You can save a Korean name and an English name separately, and each is shown to match the viewer’s language.
Change your certificate name in 3 steps
You change the certificate name under Account and security, then Edit profile, which opens Public profile settings and its Display name section. Enter your Korean name and English name and click Save, and your real name shows in the Recipient field from then on. You can do this yourself, with no reissue request to the issuer.
Set your display name
- Sign in - Go to kolleges.net and sign in with the email that received the certificate
- Open Account and security - Click your profile icon at the top right, choose Account and security, then click Edit profile
- Save your display name - On the Public profile settings screen, enter your Korean name and English name, then click Save

Figure 2. Click Edit profile on the Account and security screen to reach your display name settings.
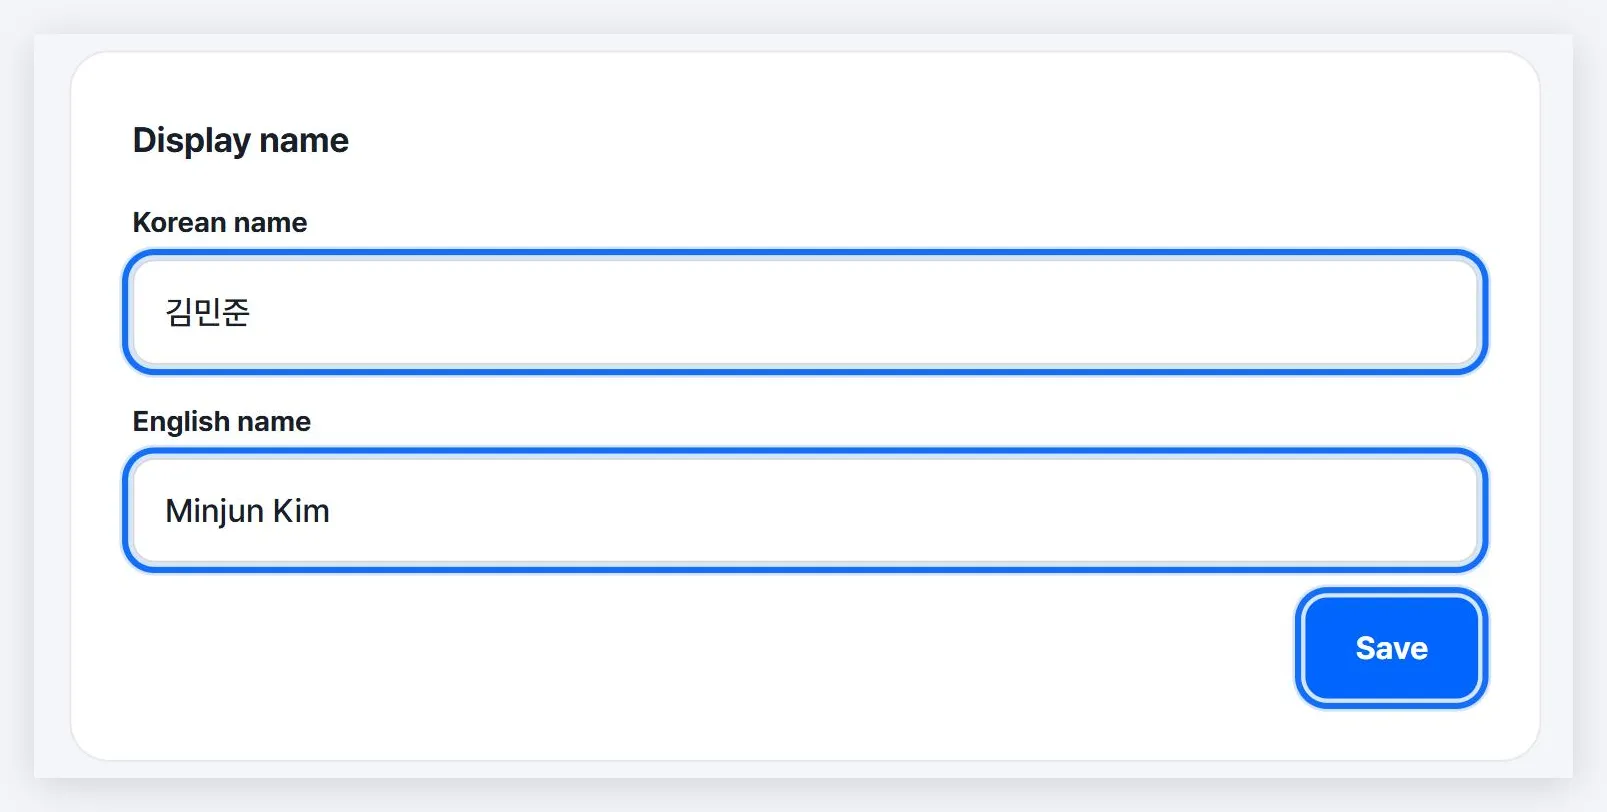
Figure 3. Enter your Korean name and English name under Display name and save to update your certificate.
Check the new name and download again
After you save your display name, open the badge detail page and confirm that the Recipient field under Issue details now shows your real name. Files you already downloaded as a PDF or shared keep the old name, so it is safest to download the certificate again or refresh your share link. The online verification link and QR always show the latest information.
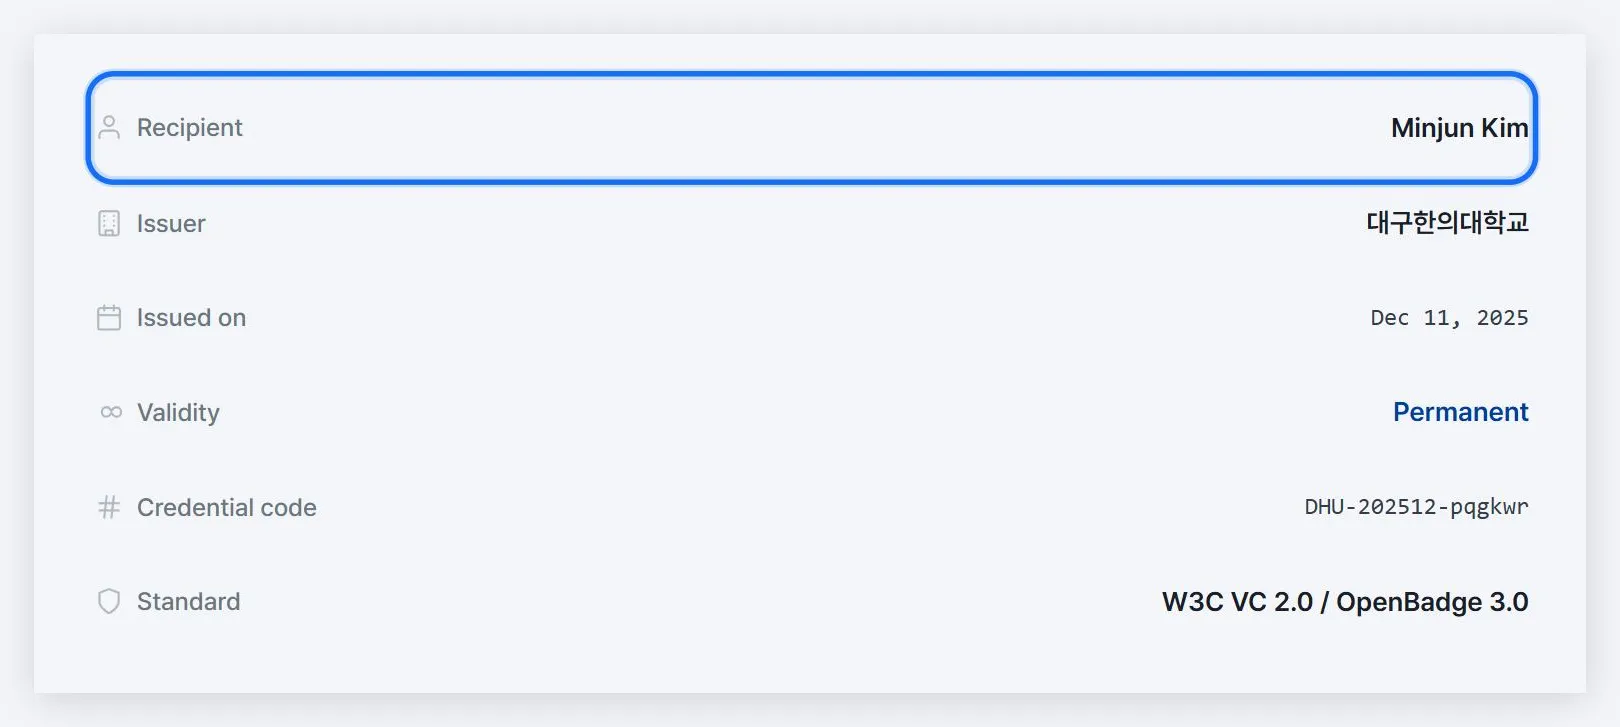
Figure 4. Once you save your display name, the Recipient field shows your real name.
Remember to download it again If you attached a certificate PDF to a resume or portfolio, replace it with a fresh file after you change your name. The file keeps whatever name was set at the moment you downloaded it.
The name in the Recipient field sits on a different layer from the core data recorded with the W3C Verifiable Credentials 2.0 standard, such as the issuance record, the issuer, and the issue date. That is why tidying your name to your real name keeps the same verification result you get from the credential code and the verification QR.
Related guides
Frequently asked questions
Want to turn learning outcomes into verifiable assets?
From issuing to verifying and amplifying, see it for yourself with Kolleges.
Request a Kolleges demo
Related posts

Creating a Public Profile and Setting Its Visibility
A public profile is a page that gathers multiple badges into a single link. In the settings you can choose the visibility (Public, Anyone with the link, Private), the profile address, per-badge visibility, and your display name.
Checking the Badge Detail Page
The badge detail page shows every piece of information about a certificate: issuer, issue date, issuing criteria (earning criteria), skills, and co-issuers. Use the [Certificate] / [Badge] tabs on the left to switch between the two images.

Recipient FAQ
The questions recipients ask most often, gathered in one place: what a digital badge is, whether it is secure, whether it expires. For the detailed steps, see the guide linked from each answer.