
Adding a Co-Issuer

From Add issuer on the issuer screen, choose one of three methods to register another institution as a co-issuer.
Key summary
From [+ Add issuer] on the issuer screen, choose one of three methods to register another institution as a co-issuer.
Permissions required Owner, Admin
When you need this
Register a co-issuer when you need to issue a single certificate under two institution names, or issue under an institution other than the primary one. Issuing with only the primary issuer is also possible.
1. Opening the add screen
In the Issuer menu, press [+ Add issuer] in the “Additional issuers” area toward the bottom.
2. Choosing how to add
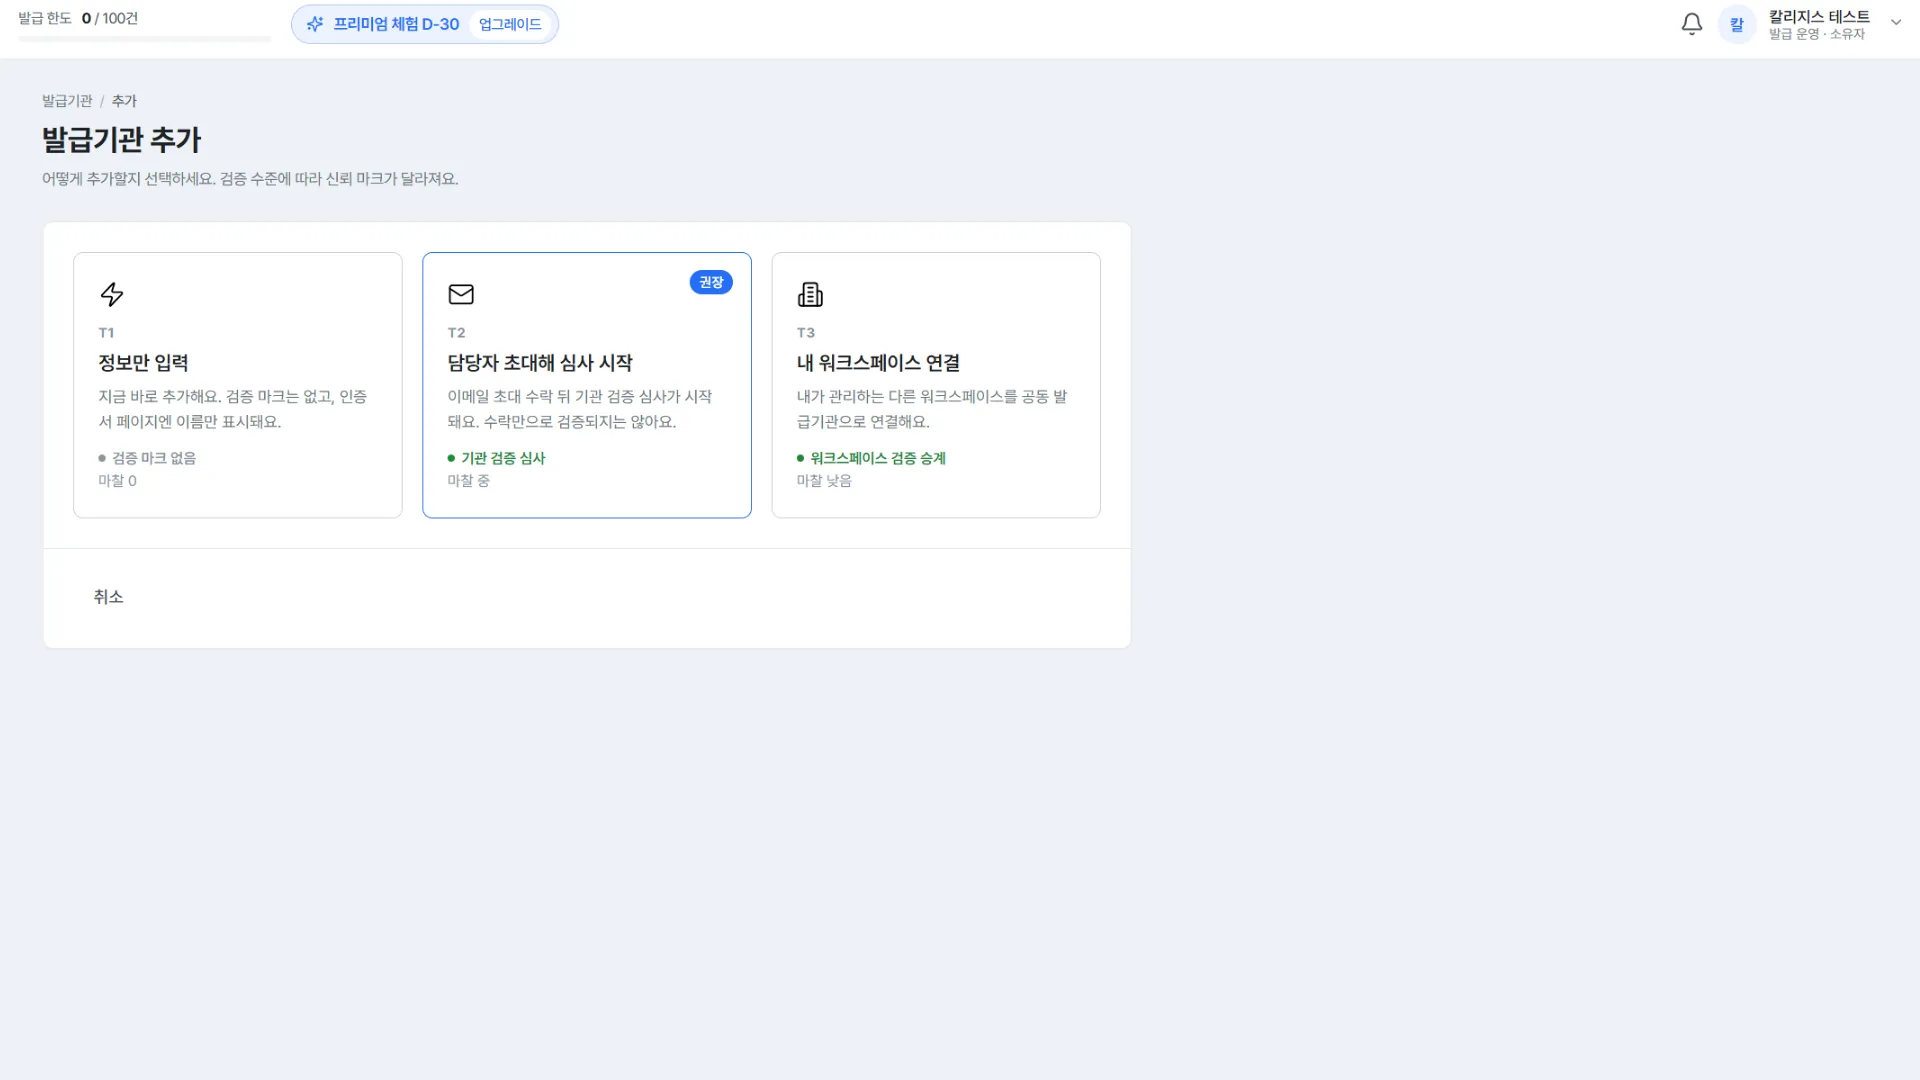
Select one of three methods. The level of verification and what you need to prepare differ.
| Method | When to use it | Verification mark |
|---|---|---|
| T1. Information only | When you just need the name listed right now. Only the institution name appears on the certificate page | None |
| T2. Invite a contact person and start review (recommended) | When you want to show the other institution’s trustworthiness as well. Accepting the email invitation starts the verification review | Institutional verification review |
| T3. Connect your own workspace | When connecting another workspace you manage. It inherits that workspace’s verification status | Workspace verification inherited |
Confirming completion
It is done once the institution you added appears in the “Additional issuers” list on the Issuer screen. From then on, you can select it as a co-issuing institution under advanced settings when creating a certificate.
Frequently asked questions
Which method should I choose?
Choose T1 if you just need the name shown quickly, T2 if you also want to show the other institution’s trustworthiness (it is marked “recommended” on screen), and T3 if it is another workspace within the same organization, which is the simplest.
If I invite via T2, is it verified right away?
No. As the screen states, “acceptance alone does not verify the institution.” After acceptance it goes through a separate institutional verification review.
Related guides
- Requesting issuer verification - Getting your primary issuer verified
- Creating a certificate - Designating the issuer
Frequently asked questions
Want to turn learning outcomes into verifiable assets?
From issuing to verifying and amplifying, see it for yourself with Kolleges.
Request a Kolleges demoRelated posts

Requesting Issuer Verification
Press Proceed with verification on the issuer screen, and once domain email authentication and institutional document submission are complete, your verification review is filed.

Creating a Certificate
Press Create certificate in the Certificates menu and fill in the basic information and advanced settings, and it is ready to issue. There is also a feature where AI drafts it for you from course information alone.

Creating a Certificate Design
Pick a template in the Design menu, set the color and institution brand, then save to complete your PDF certificate design. Logos and seals are placed automatically once registered in your issuer settings.