
Taking a Tour of the First Screen
When you first create a workspace, a five-step getting-started guide appears on the dashboard. Following it in order takes you from issuer verification through your first issuance to opening your institution page, all in one pass.
Key summary
When you first create a workspace, a five-step getting-started guide appears on the dashboard. Following it in order takes you from issuer verification through your first issuance to opening your institution page, all in one pass.
Permissions required All roles
What to check on the dashboard
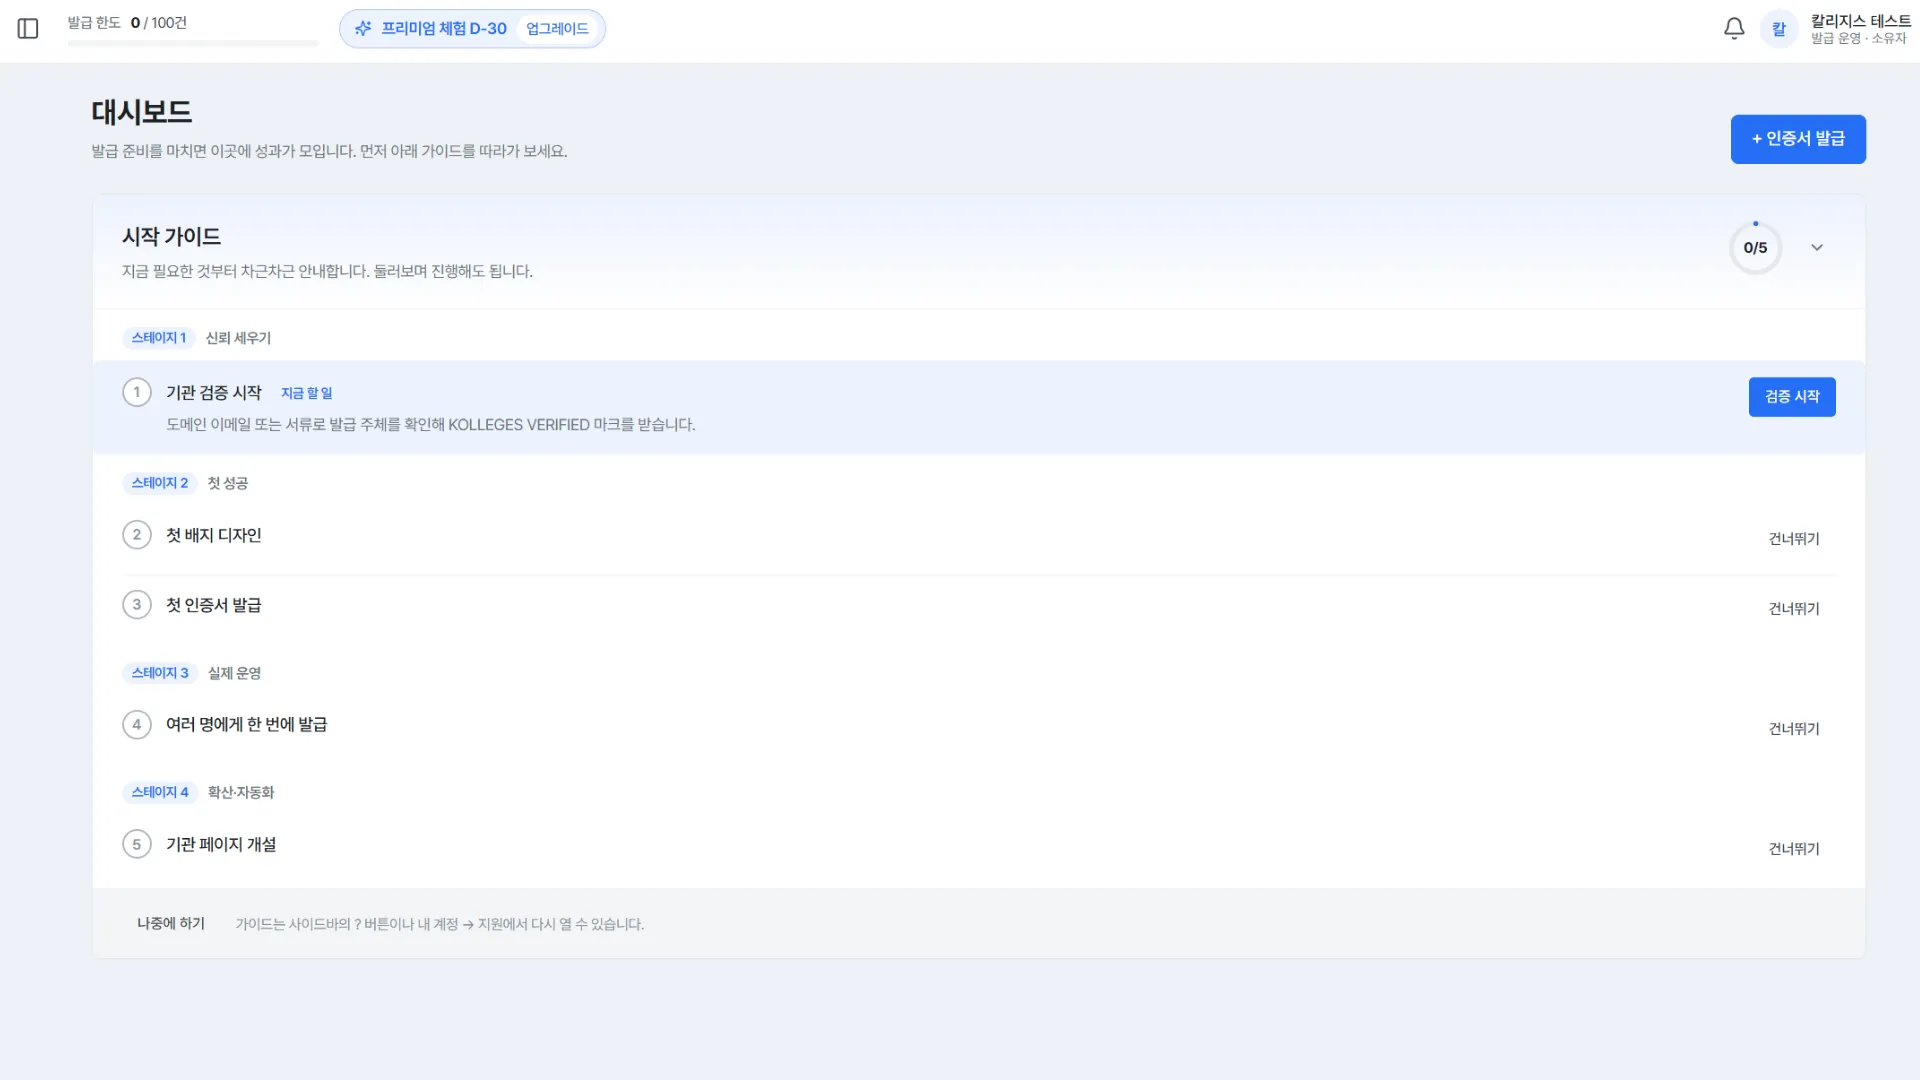
When you enter your workspace, the dashboard opens. Check two things at the top of the screen first.
- Issuance limit - Shows how many you have issued this year and what your limit is (for example, 0/100)
- [+ Issue certificate] - A button fixed to the top right of the screen, letting you start issuing from any screen
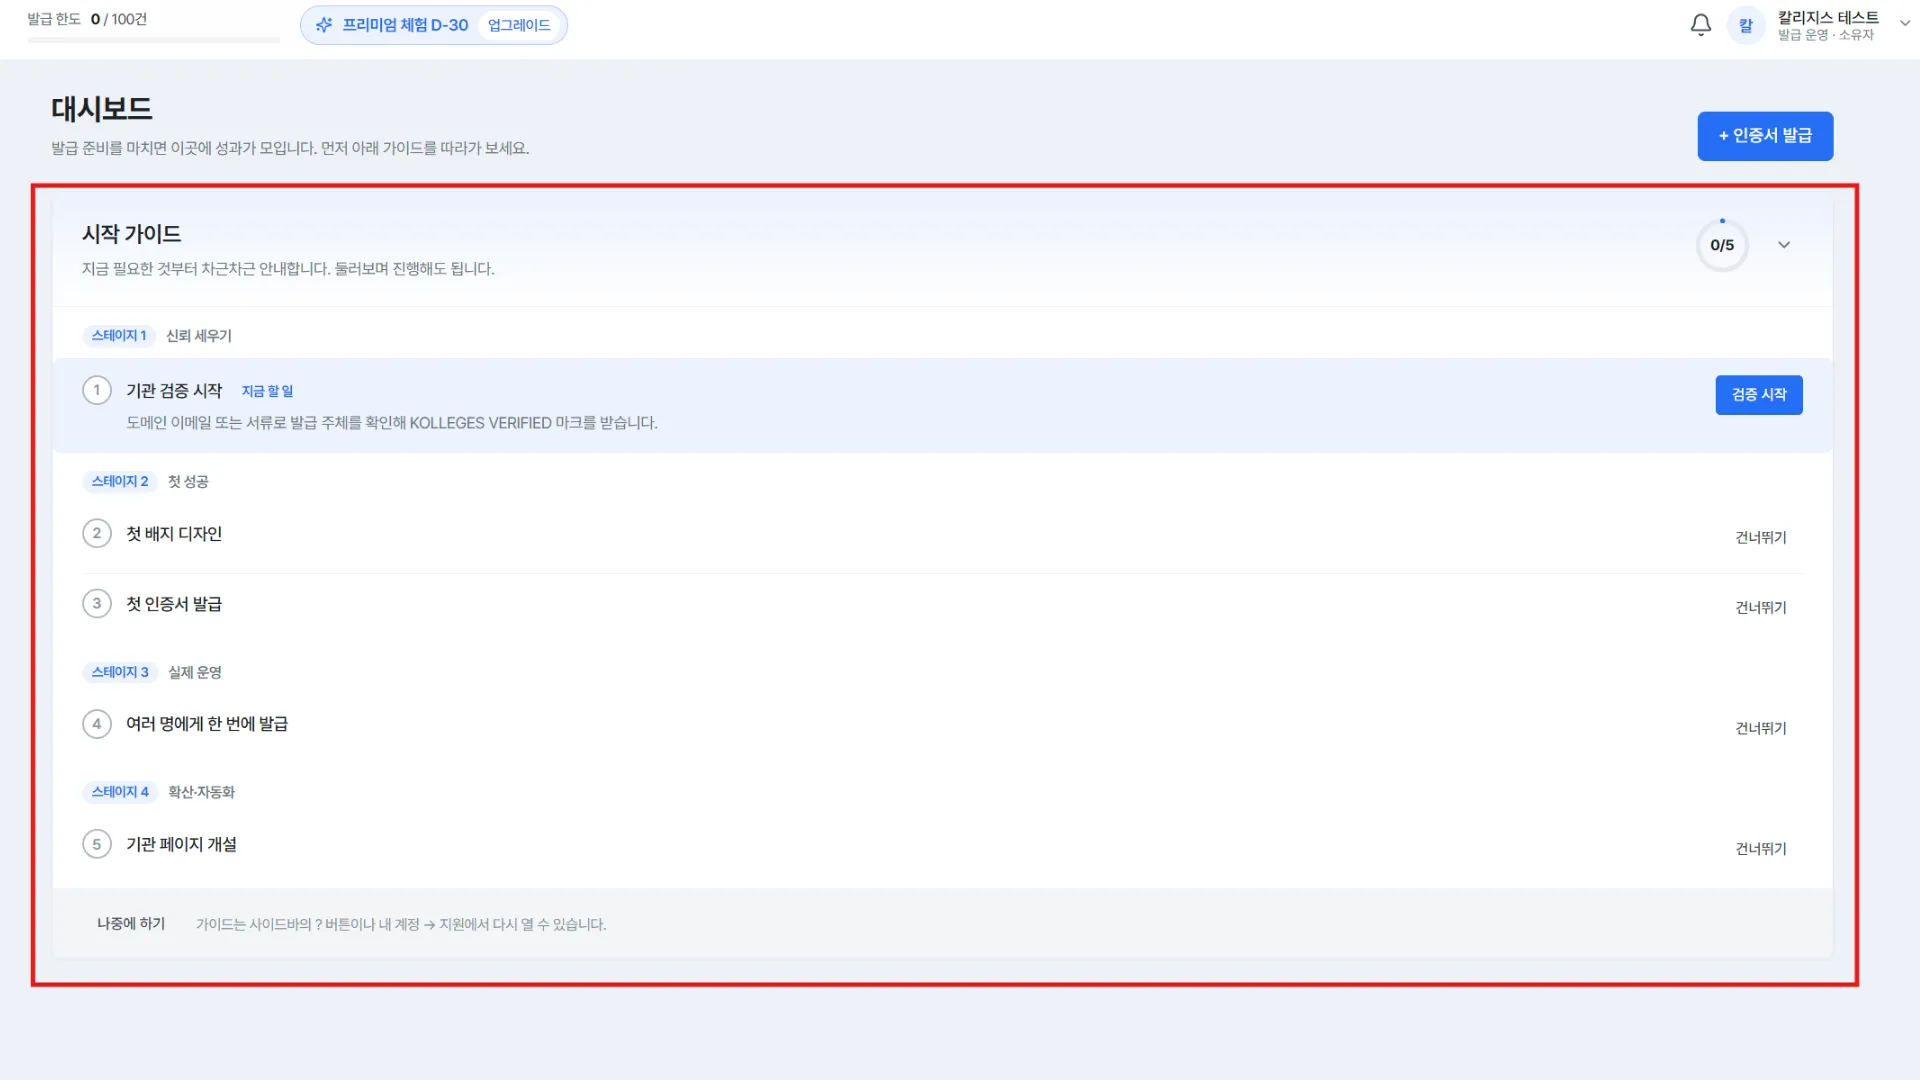
Following the five-step getting-started guide
The getting-started guide card in the body of the dashboard walks you through what to do in order, along with your progress (for example, 0/5).
| Stage | Step | What you do |
|---|---|---|
| 1. Building trust | Start issuer verification | Confirm who is issuing via domain email or documents to receive the KOLLEGES VERIFIED mark |
| 2. First success | First badge design | Pick a template and create a badge |
| 2. First success | First certificate issuance | Issue a certificate with the badge you made |
| 3. Real operations | Issue to several people at once | Try bulk issuance with a roster file |
| 4. Reach and automation | Open your institution page | Open a public page and showcase your badges |
You can carry out each step right away or postpone it with [Skip]. The order is only a recommended flow, so you can also go straight to the left menu and proceed in whatever order you like.
The menu matching the step currently being guided is marked with a blue dot in the left menu, so you can tell at a glance where to go.
Learning the menu layout
The left menu is divided into three groups.
| Group | Menus | What it does |
|---|---|---|
| Issuance operations | Dashboard, Issuer, Design, Certificates, Issuance status | Create badges, issue them, and check the results |
| Reach and growth | Homepage, Pathways and recommendations | Run your public page and connect learners to the next course |
| Account | Workspace, Plan and billing, Developer | Manage members, plans, and APIs |
Frequently asked questions
If I skip every step of the getting-started guide, can I never see it again?
No. You can reopen it at any time from the question mark button at the bottom of the left menu (Reopen the getting-started guide).
Where are my account settings?
You can go to your account screen from the user name area at the very bottom of the left menu.
Do I have to follow the steps in order?
No. It is only a recommended order, and you can go directly from the menu to whatever task you want.
Related guides
- Requesting issuer verification - Step 1 of the getting-started guide
- Creating a badge design - Step 2 of the getting-started guide
- Issuing badges and certificates - Steps 3 and 4 of the getting-started guide
- Admin FAQ - Finding answers quickly
Frequently asked questions
Want to turn learning outcomes into verifiable assets?
From issuing to verifying and amplifying, see it for yourself with Kolleges.
Request a Kolleges demoRelated posts

Creating a Workspace (Institution)
Fill in the two steps under Create a new institution and your workspace is created, with the person who created it as the owner. A 30-day free Premium trial begins at the same time.

Requesting Issuer Verification
Press Proceed with verification on the issuer screen, and once domain email authentication and institutional document submission are complete, your verification review is filed.
Creating a Badge Design
Pick a template in the Design menu, set the color and icon, then save to complete your badge design. On what you actually issue, the issuer symbol is placed in the center automatically.