

Pick a template in the Design menu, set the color and icon, then save to complete your badge design. On what you actually issue, the issuer symbol is placed in the center automatically.
Key summary
Pick a template in the Design menu, set the color and icon, then save to complete your badge design. On what you actually issue, the issuer symbol is placed in the center automatically.
Permissions required Owner, Admin, Issuance operator
Before you start
Prepare the institution symbol image that will go in the center of the badge. The symbol is registered in the issuer settings, not on this screen, and once registered it is reflected in the center of the badge automatically.
1. Picking a template
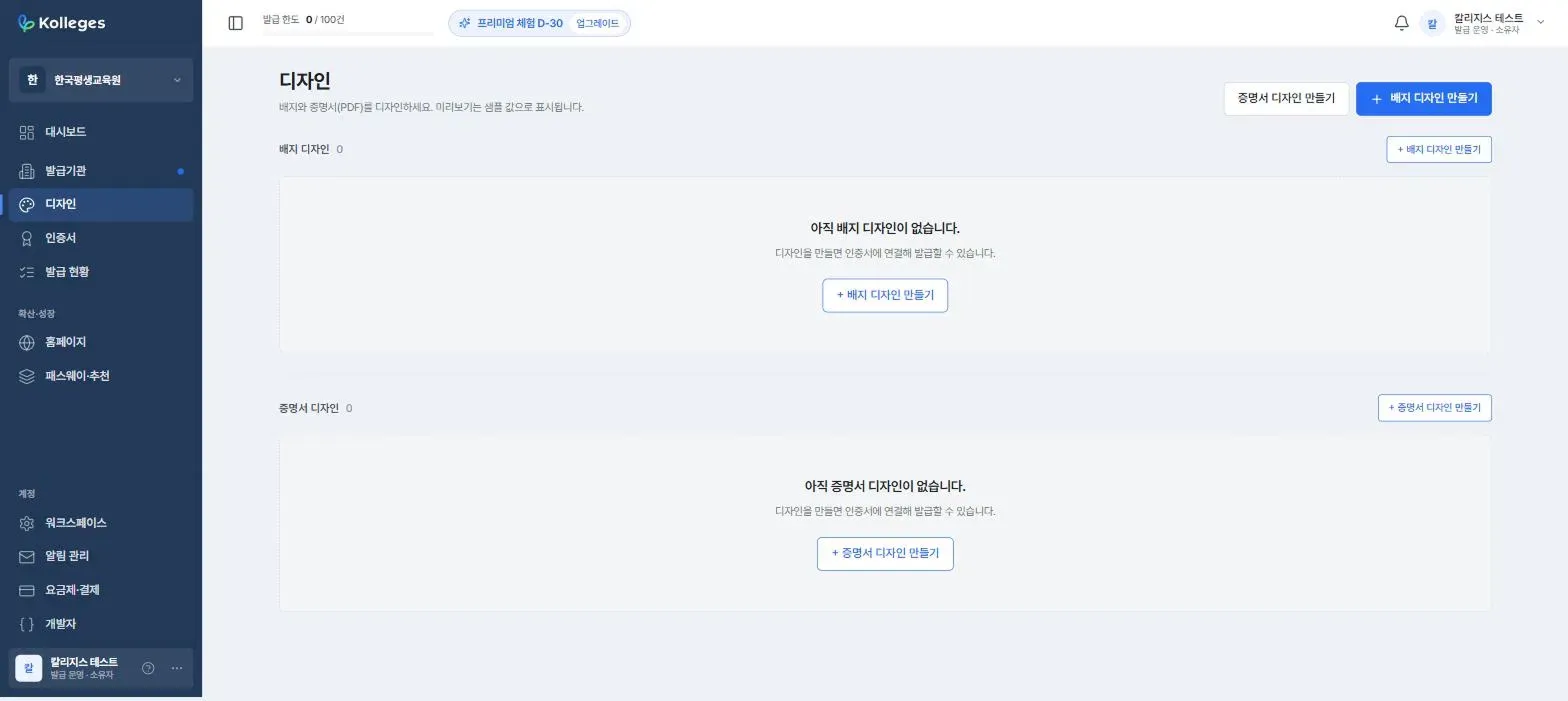
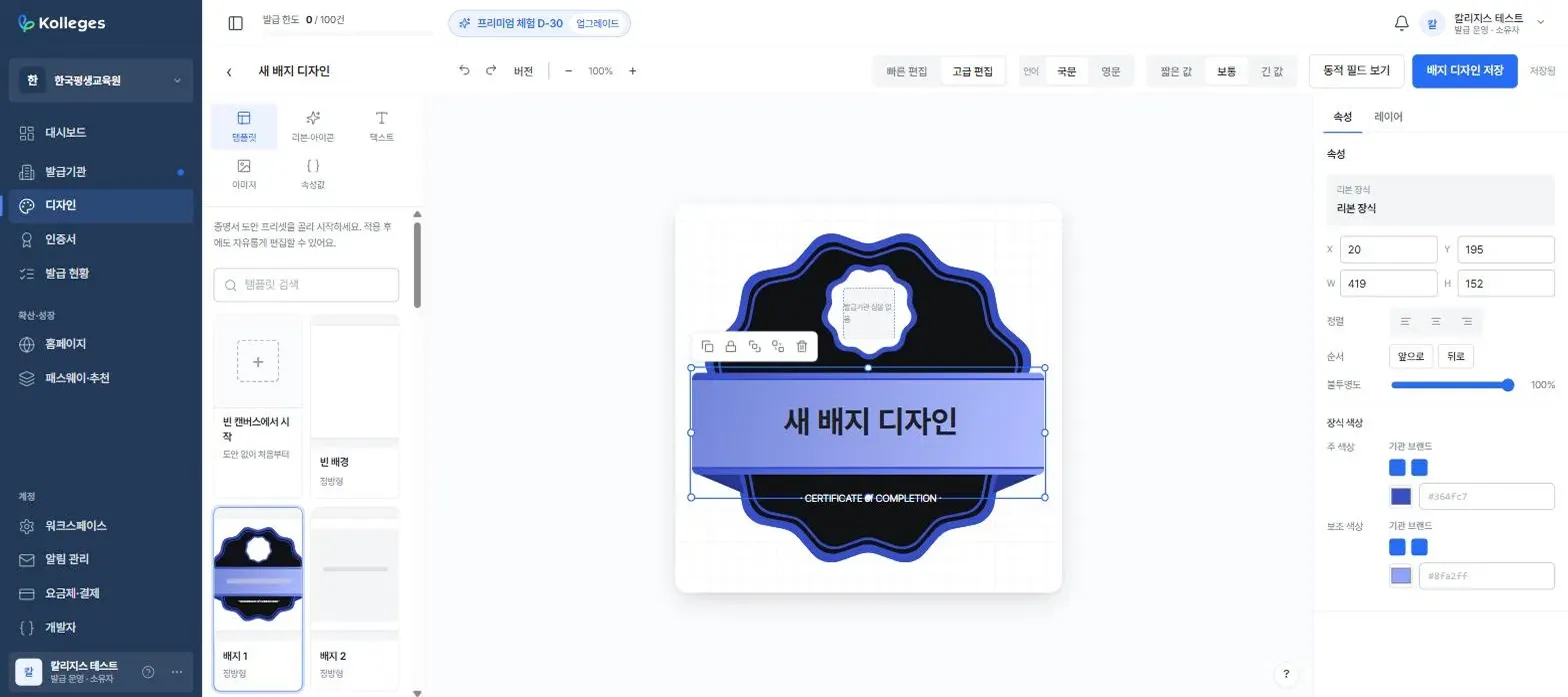
In the Design menu, press [+ Create badge design] to open the editor. In the 1 Template step on the left, choose a blank background or one of the prepared templates (121 of them). You can review them all with [View all].
2. Setting the color
In the 2 Color step, set the badge color. There are three ways.
- Institution brand - Use the brand colors registered for your institution
- Recently used - Reuse a color you used before
- Enter directly - Specify with a HEX code (for example,
#364fc7)
3. Checking the center icon placeholder
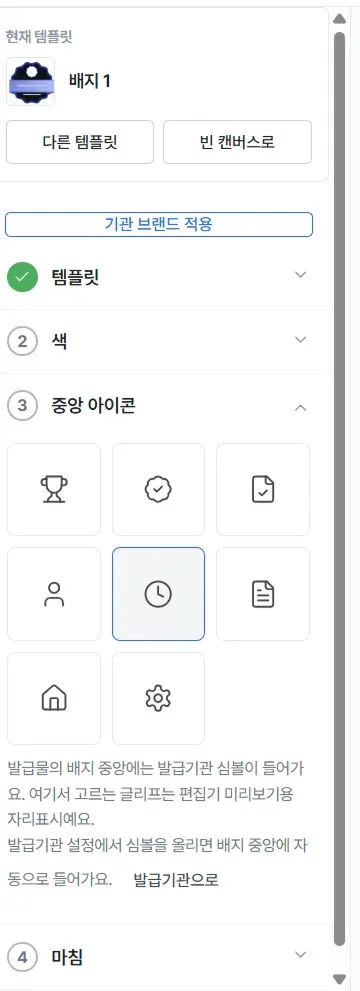
The 3 Center icon step offers eight icons, but the icon you choose here is a placeholder visible only in the editor.
Caution: In the center of the badge you actually issue, what appears is not the icon chosen here but the symbol registered in your issuer settings. To place the image you want, press the [Go to issuer] link and register the symbol first.
4. Saving
Move to the 4 Finish step and press [Save badge design] at the top right of the screen.
Confirming completion
It is done when the “Saved” message appears and a new card shows up in the design list. The card also displays the modification date and the number of dynamic attributes in use.
Refining it further (optional)
Pressing [Advanced editing] at the top of the screen opens a professional editor where you can arrange elements freely.
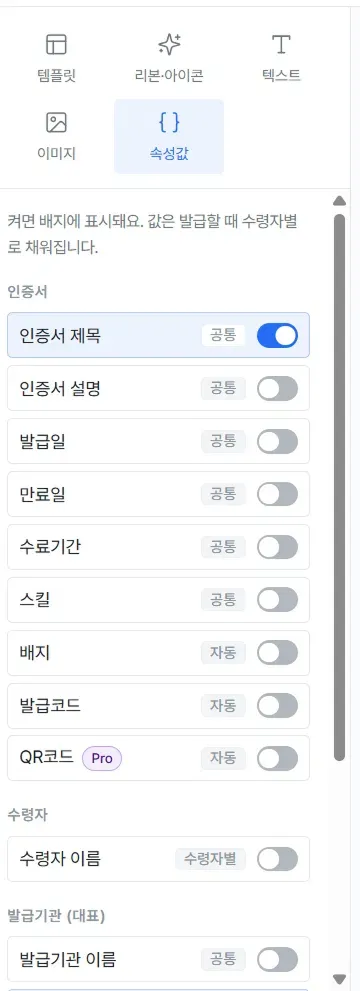
On the Attributes tab, you can turn each piece of information on or off to control what is displayed on the badge.
- Certificate information - Title, description, issue date, expiry date, completion period, skills, badge, issuance code, QR code (Pro plan only)
- Recipient information - Recipient name
- Issuer information - Institution name, symbol, seal, logo
- [+ Add custom field] - Create the items you need yourself
- Pressing [View dynamic fields] switches the canvas text from actual values to variable names such as
[Certificate.Title], letting you check which values are filled in automatically. Next to it, Short value / Medium / Long value changes the length of the preview sample, so you can check before issuing whether text overflows and breaks the layout.
In these cases
The center of the badge looks empty
This is because no issuer symbol has been registered. The icon chosen in the editor is for preview only, so you must upload a symbol image in your issuer settings for it to appear on the actual badge.
I am worried text will overflow if the recipient name or certificate title is long
Press [Long value] at the top to switch the preview to the longest sample. You can check whether the layout breaks before issuing.
Frequently asked questions
Does the graphic I pick under center icon also appear on the actual badge?
No. It is a placeholder for preview purposes; what actually appears is the symbol registered in your issuer settings.
I want to put a QR code on the badge but it will not turn on.
The automatic QR code field is available from the Pro plan onward.
I am worried the text will overflow if a recipient has a long name.
In advanced editing, switch the preview value to Long value. You can check whether the layout breaks before you issue.
Related guides
- Creating a certificate design - Designing the PDF certificate
- Creating a certificate - Linking your design to a certificate
- Requesting issuer verification - Registering your symbol and seal
Frequently asked questions
Want to turn learning outcomes into verifiable assets?
From issuing to verifying and amplifying, see it for yourself with Kolleges.
Request a Kolleges demo
Related posts

Creating a Certificate Design
Pick a template in the Design menu, set the color and institution brand, then save to complete your PDF certificate design. Logos and seals are placed automatically once registered in your issuer settings.
Creating a Certificate
Press Create certificate in the Certificates menu and fill in the basic information and advanced settings, and it is ready to issue. There is also a feature where AI drafts it for you from course information alone.

Requesting Issuer Verification
Press Proceed with verification on the issuer screen, and once domain email authentication and institutional document submission are complete, your verification review is filed.