

On the Members tab of the Workspace menu, invite colleagues by email and check or adjust how far each role can reach.
Key summary
On the Members tab of the Workspace menu, invite colleagues by email and check or adjust how far each role can reach.
Permissions required Owner, Admin
Before you start
Decide the work email address of the colleague you are inviting and the role you will give them. Permissions by role are shown in the table below.
Understanding the four roles
| Feature | Owner | Admin | Issuance operator | Issuance operator (institution-limited) |
|---|---|---|---|---|
| Issuance, issuance status, recipients | O | O | O | Own institution only |
| Viewing and editing certificates | O | O | O | Own institution only |
| Creating certificates | O | O | O | X |
| Designs, pathways, recommendations | O | O | O | X |
| Institution page and education management | O | O | X | X |
| Issuer settings and member management | O | O | X | X |
| Plan, billing, and workspace deletion | O | X | X | X |
Only the owner can change the plan or delete the workspace. For a workspace shared by several institutions, you can give each institution’s contact the issuance operator (institution-limited) role to prevent access to other institutions’ recipient information.
You can also see this table on screen by expanding [View permissions by role] below the Members tab.
1. Opening the invitation screen
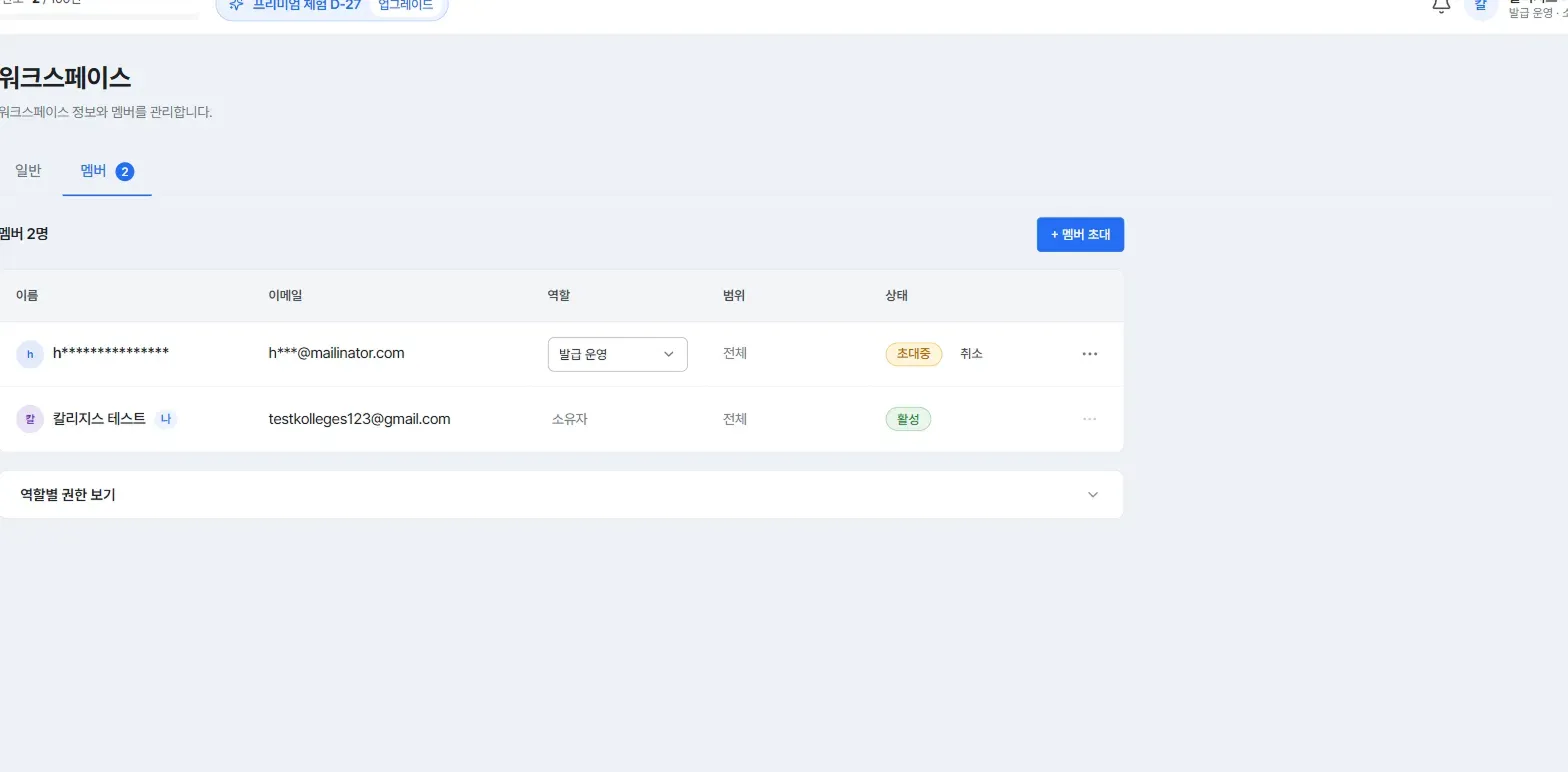
In the Workspace menu, go to the Members tab and press [+ Invite member].
2. Entering invitation details
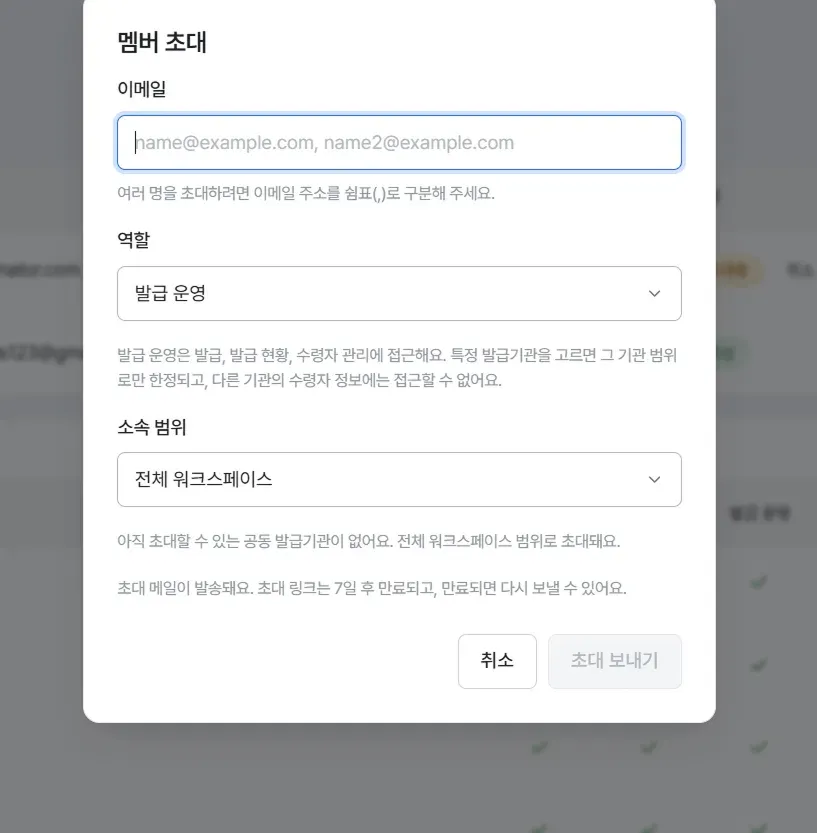
- Enter the email. To invite several people at once, separate addresses with commas.
- Choose the role. The default is issuance operator.
- Set the scope. You can choose the whole workspace or a specific issuer. If no co-issuer is registered, the invitation is for the whole workspace only.
- Press [Send invitation].
Confirming completion
It is done when the notice “Invitation emails sent to N people” appears and those people show up in the member list with the status “Invited.” Once they accept, the status changes to “Active.”
Canceling invitations and changing roles
- Cancel invitation - Press [Cancel] next to the Invited status to withdraw it
- Change role - Change to a different role directly in the role column of the member list
In these cases
They say the invitation email never arrived
Invitation links expire after seven days. If it expired or they cannot find the email, cancel the invitation and send it again. Also ask them to check their spam folder.
I want to change the owner
You can hand it over with [Transfer ownership] on the General tab of the Workspace menu.
Frequently asked questions
Can one person be given permissions for several institutions?
Setting the scope to the whole workspace gives access to every issuer.
Where is the guidance for the person being invited?
Send them the Joining an existing workspace guide.
Related guides
- Joining an existing workspace - Guidance to pass to the person invited
- Editing workspace information - Transferring ownership
- Admin FAQ - Permission-related questions collected
Frequently asked questions
Want to turn learning outcomes into verifiable assets?
From issuing to verifying and amplifying, see it for yourself with Kolleges.
Request a Kolleges demo
Related posts

Joining an Existing Workspace
Open the link in the invitation email sent by an admin and press Accept invitation to become a member of that workspace. You must be logged in with the account that was invited.

Editing Workspace Information
On the General tab of the Workspace menu, rename your institution or hand ownership to another member. Changing the address requires contacting customer support.

Checking and Changing Your Plan
In the Plan and billing menu, check this year's issuance volume and move the slider to the annual volume you need, and the matching plans and prices are compared immediately.