

Press Proceed with verification on the issuer screen, and once domain email authentication and institutional document submission are complete, your verification review is filed.
Key summary
Press [Proceed with verification] on the issuer screen, and once domain email authentication and institutional document submission are complete, your verification review is filed.
Permissions required Owner, Admin
Before you start
Prepare your institutional or business registration documents as PDF, JPG, or PNG files. You can upload up to 10MB.
1. Checking your current verification status
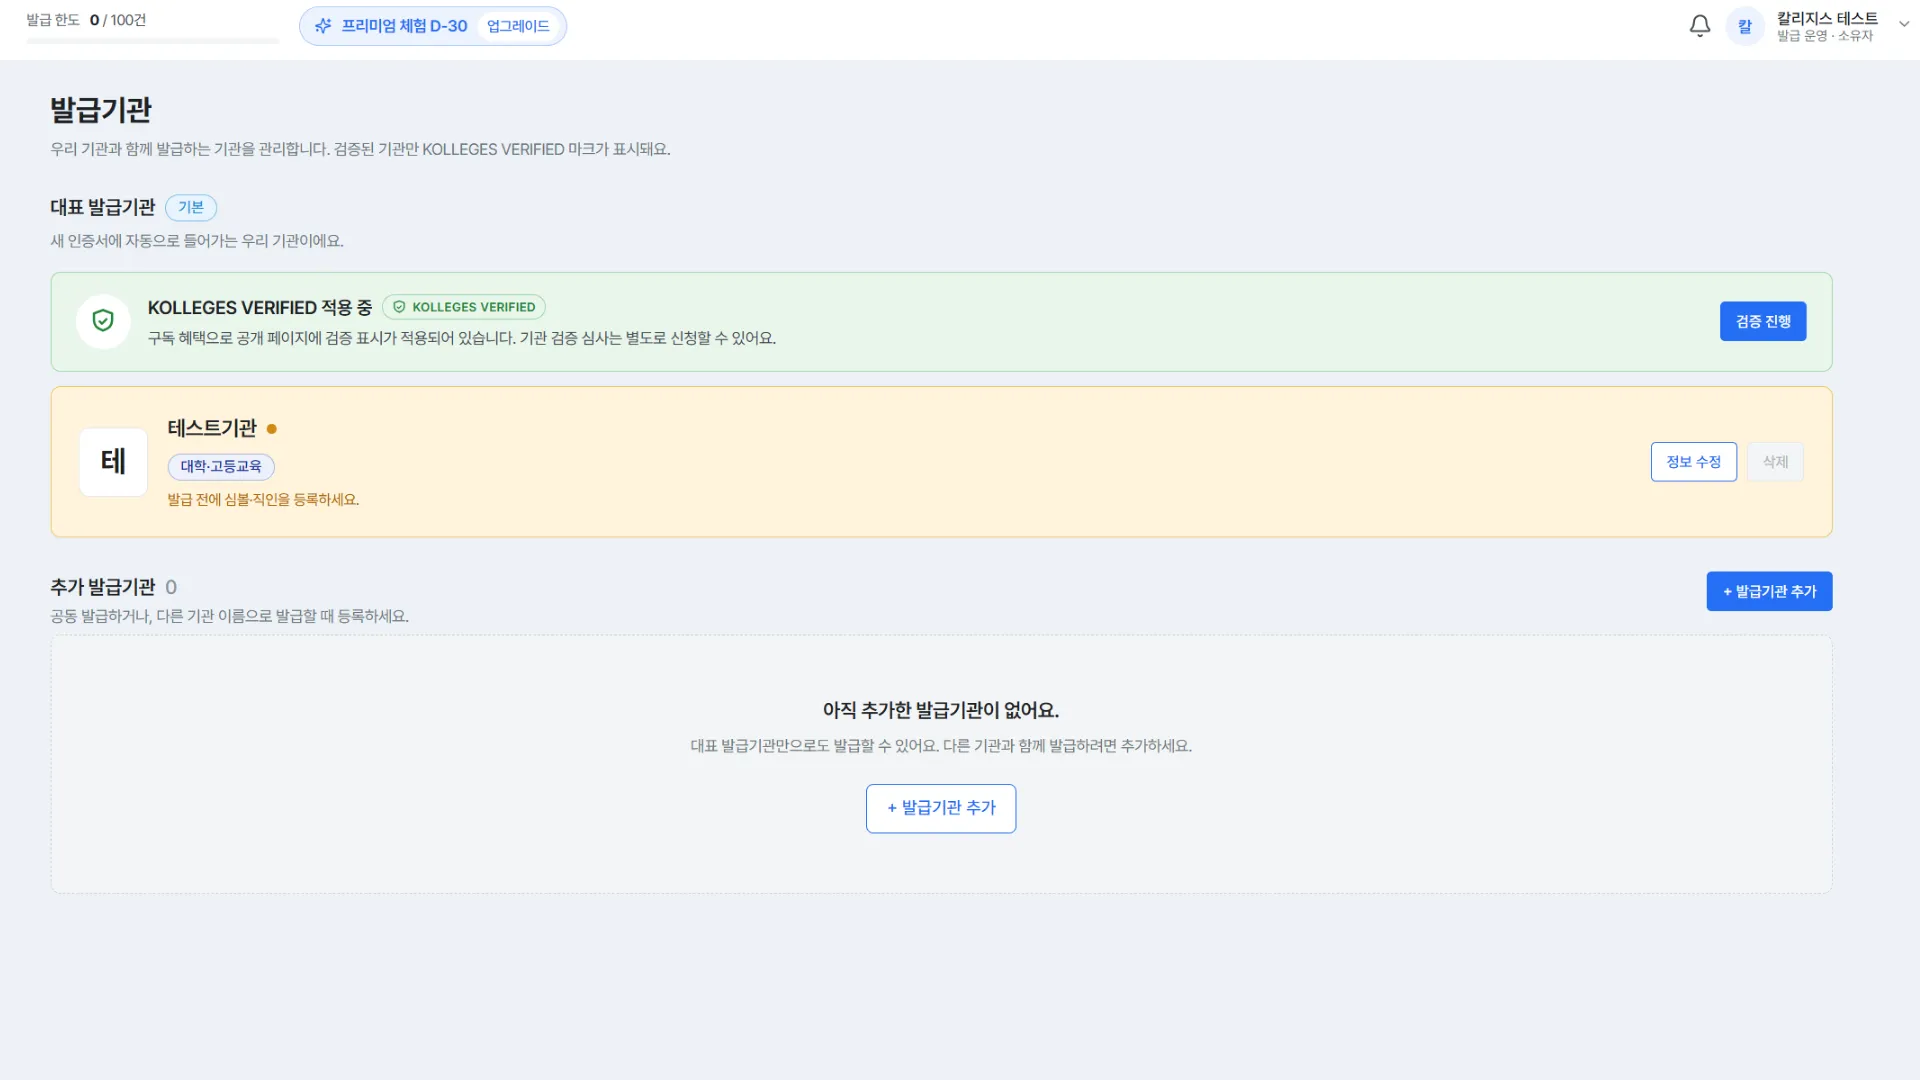
When you enter the Issuer menu, your current verification status is shown above the primary issuer card.
Caution: Even if the card shows a “KOLLEGES VERIFIED applied” badge, that does not mean you have passed review. In some cases only the verification display is applied to your public page as a plan subscription benefit. The screen also states that “Institutional verification review can be requested separately.” Remember that the verification display and the actual verification review are separate things.
2. Starting the verification request
Press [Proceed with verification] on the right of the card to open the institutional verification dialog.
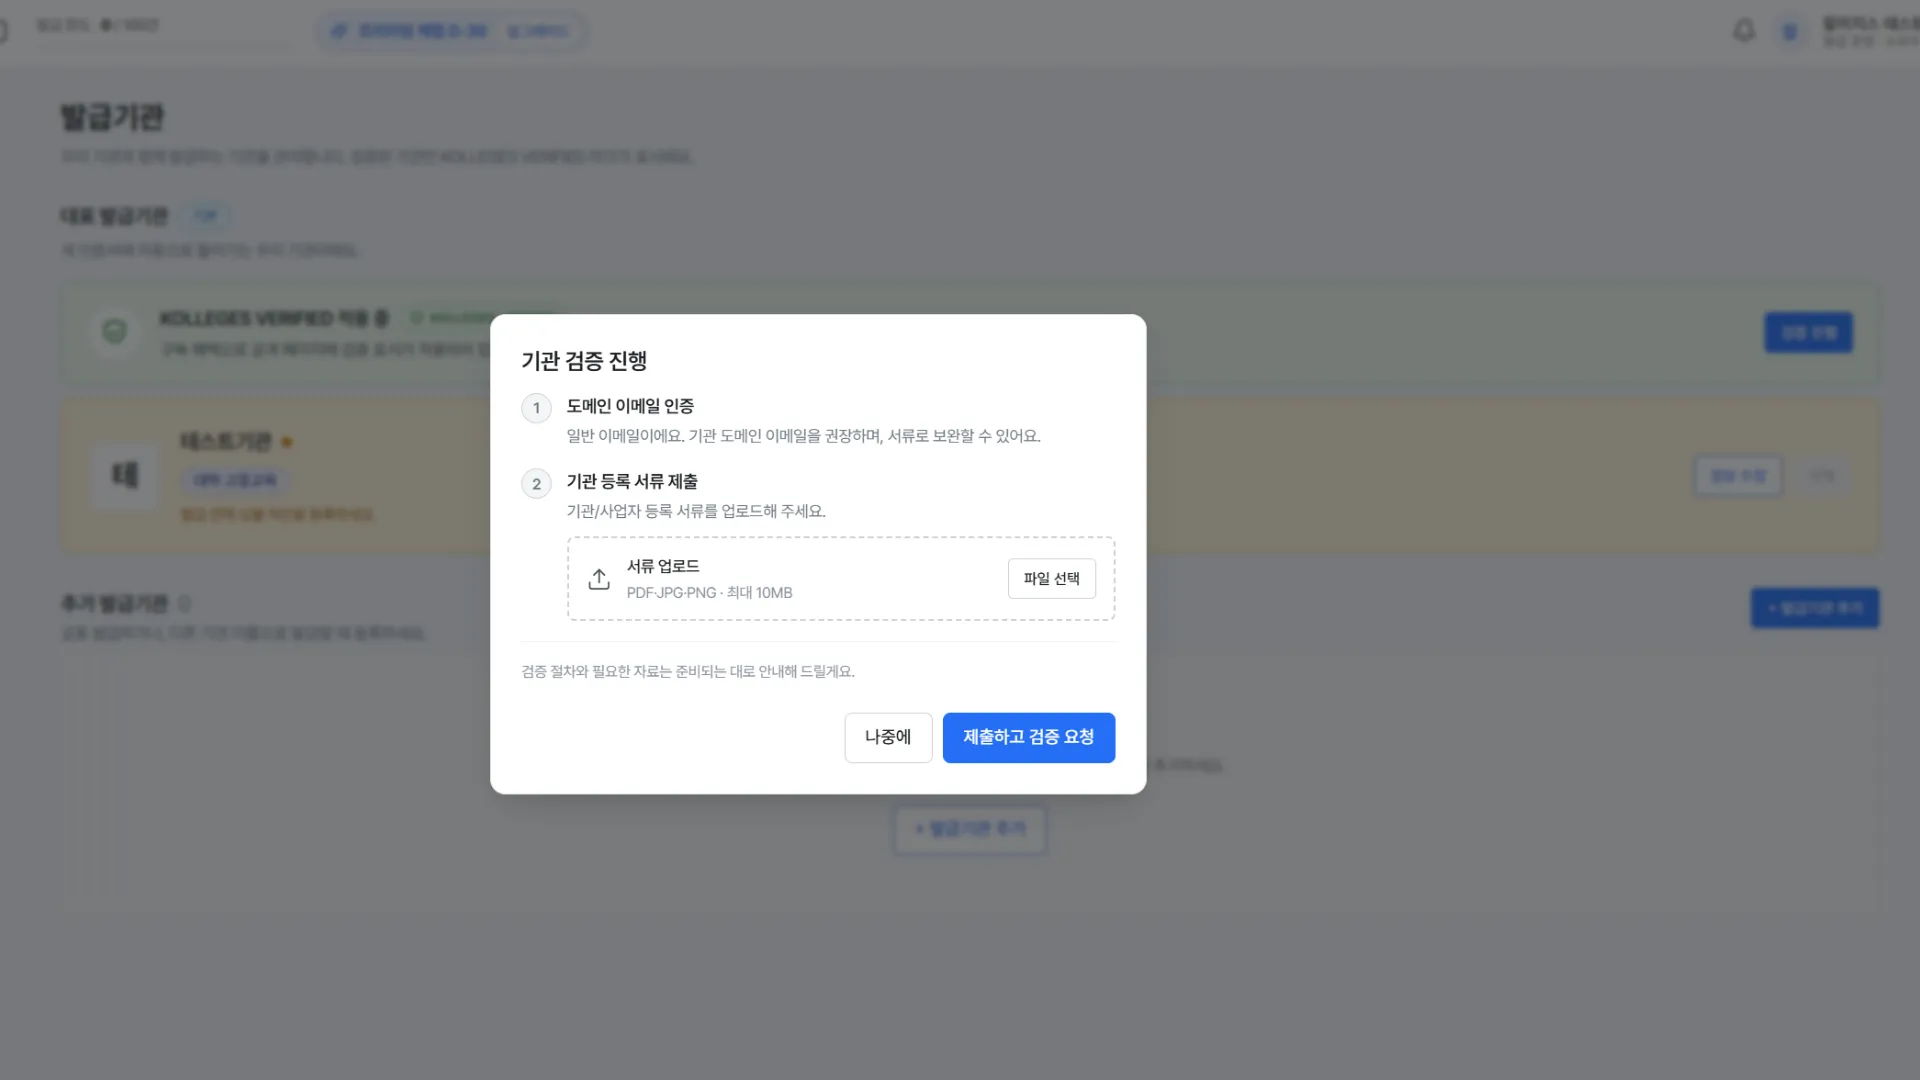
3. Checking domain email authentication
The first item, domain email authentication, is confirmed automatically when the contact person’s email is on an institutional domain, and is marked with a green check once complete.
4. Uploading your institutional registration documents
Under the second item, institutional registration document submission, press [Choose file] and upload the documents you prepared.
5. Requesting verification
- Press [Submit and request verification] to file the review. If your documents are not ready yet, you can close the dialog with [Later] and come back to it.
Caution: Pressing [Submit and request verification] actually files the review.
Confirming completion
After submission, the display on the verification status card changes, and you are notified by email at the contact address if the review process requires any additional materials.
In these cases
Domain email authentication does not complete automatically
Check whether the contact person’s email is on an institutional domain. If you signed up with a personal email, automatic confirmation may not work, in which case verification proceeds via your institutional registration documents.
The document file will not upload
Check that it is in PDF, JPG, or PNG format and that its size does not exceed 10MB.
Frequently asked questions
The KOLLEGES VERIFIED mark appears even though I never requested verification. Why?
In some cases the mark is applied automatically as a plan subscription benefit, so the badge shown on screen does not always match whether you have actually passed review. To prove your issuer trustworthiness accurately, we recommend requesting verification yourself.
Do other institutions that issue jointly with us also need verification?
Co-issuers are added and verified separately from the primary issuer. Refer to the Adding a co-issuer guide.
Can I issue before verification?
Yes. However, before verification the institutional trust mark is not formally attached to what you issue, so we recommend completing verification before you issue anything for real.
Related guides
- Adding a co-issuer - Issuing together with another institution
- Creating a workspace (institution) - Registering issuer information for the first time
Frequently asked questions
Want to turn learning outcomes into verifiable assets?
From issuing to verifying and amplifying, see it for yourself with Kolleges.
Request a Kolleges demo
Related posts

Adding a Co-Issuer
From Add issuer on the issuer screen, choose one of three methods to register another institution as a co-issuer.

Creating a Workspace (Institution)
Fill in the two steps under Create a new institution and your workspace is created, with the person who created it as the owner. A 30-day free Premium trial begins at the same time.

Taking a Tour of the First Screen
When you first create a workspace, a five-step getting-started guide appears on the dashboard. Following it in order takes you from issuer verification through your first issuance to opening your institution page, all in one pass.