

Fill in the two steps under Create a new institution and your workspace is created, with the person who created it as the owner. A 30-day free Premium trial begins at the same time.
Key summary
Fill in the two steps under Create a new institution and your workspace is created, with the person who created it as the owner. A 30-day free Premium trial begins at the same time.
Permissions required Any logged-in user
There are two possible starting screens
When you log in, the screen differs depending on whether you belong to an institution.
| Situation | Screen you see | What to do |
|---|---|---|
| You belong to no institution | Goes straight to Create a new institution | Start from step 1 below |
| You already belong to an institution | The workspace selection screen | Press [+ Create a new institution] below the list, then proceed with step 1 |
If you have just signed up, the input form opens immediately without a selection screen. You cannot cancel on this screen, so you must create an institution to move on.
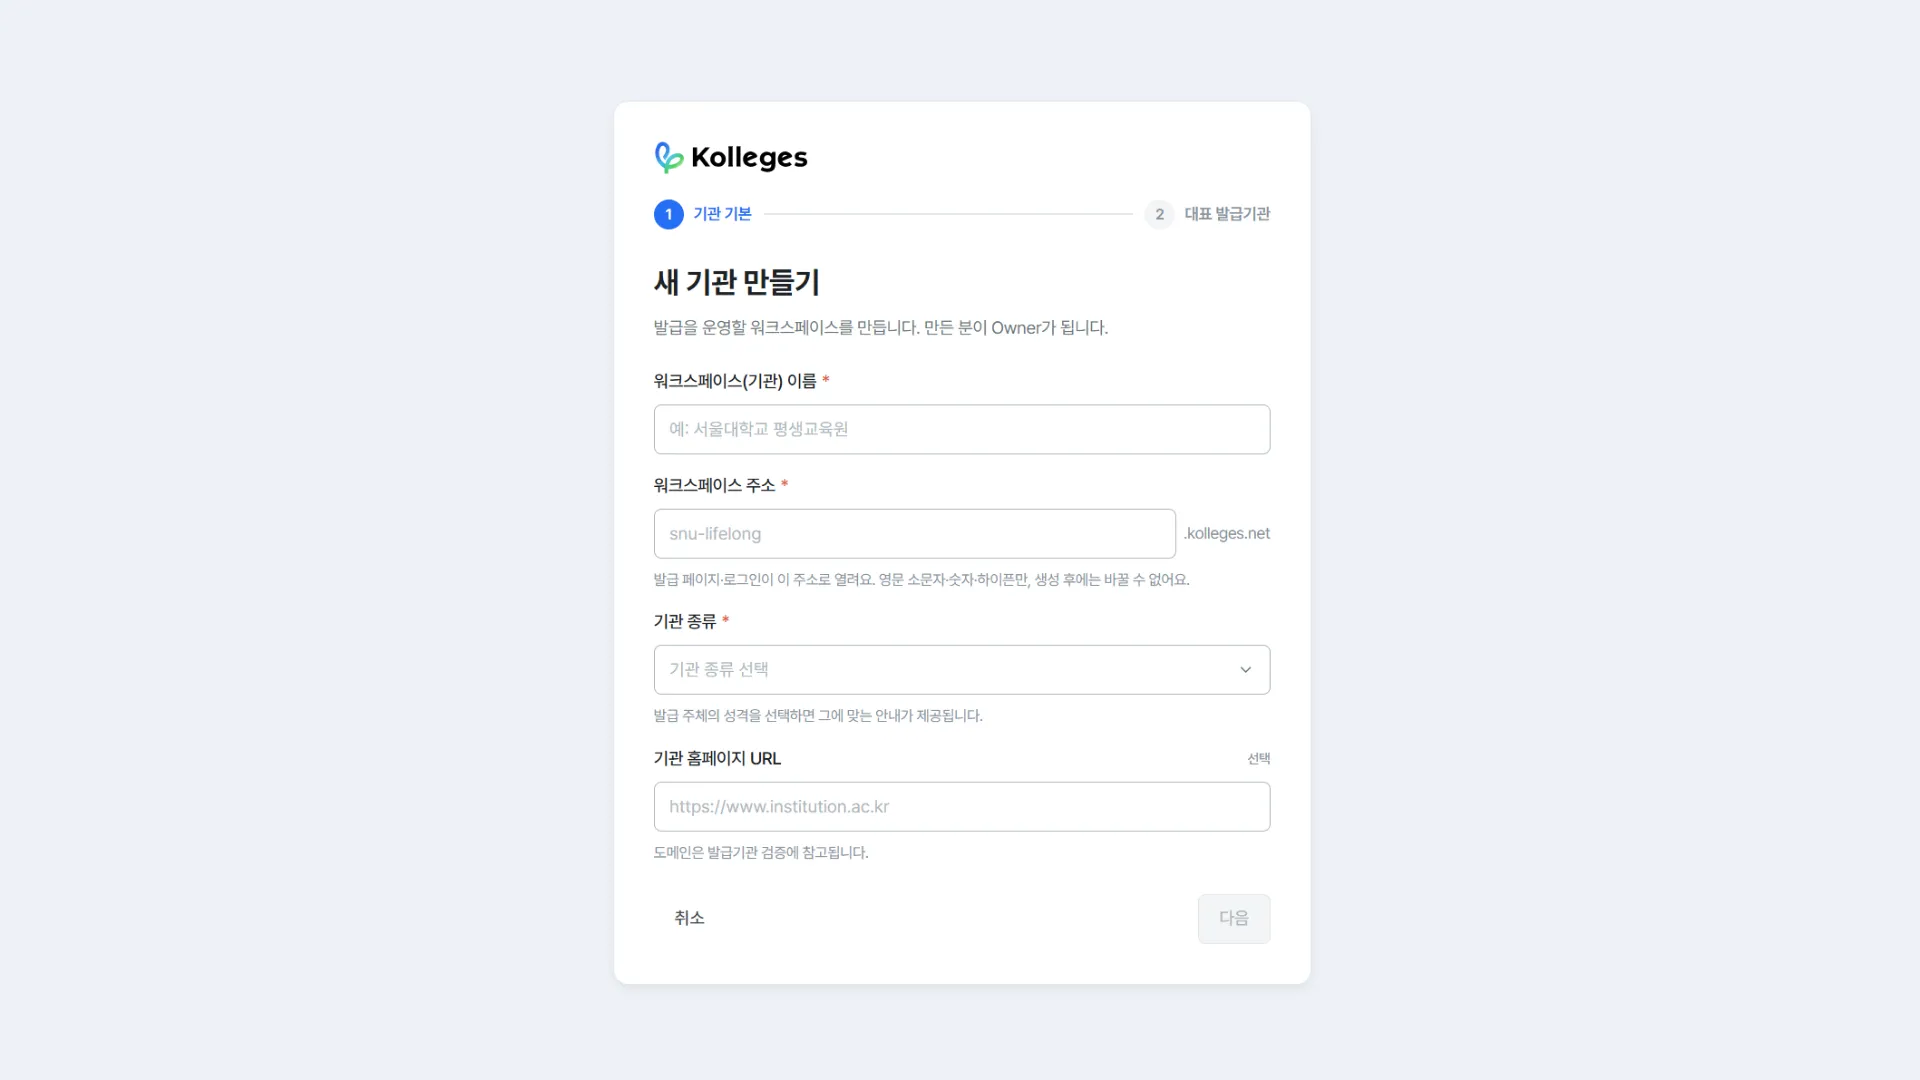
Step 1. Entering basic institution information
-
Enter the workspace (institution) name. Example: Seoul National University Center for Lifelong Education
-
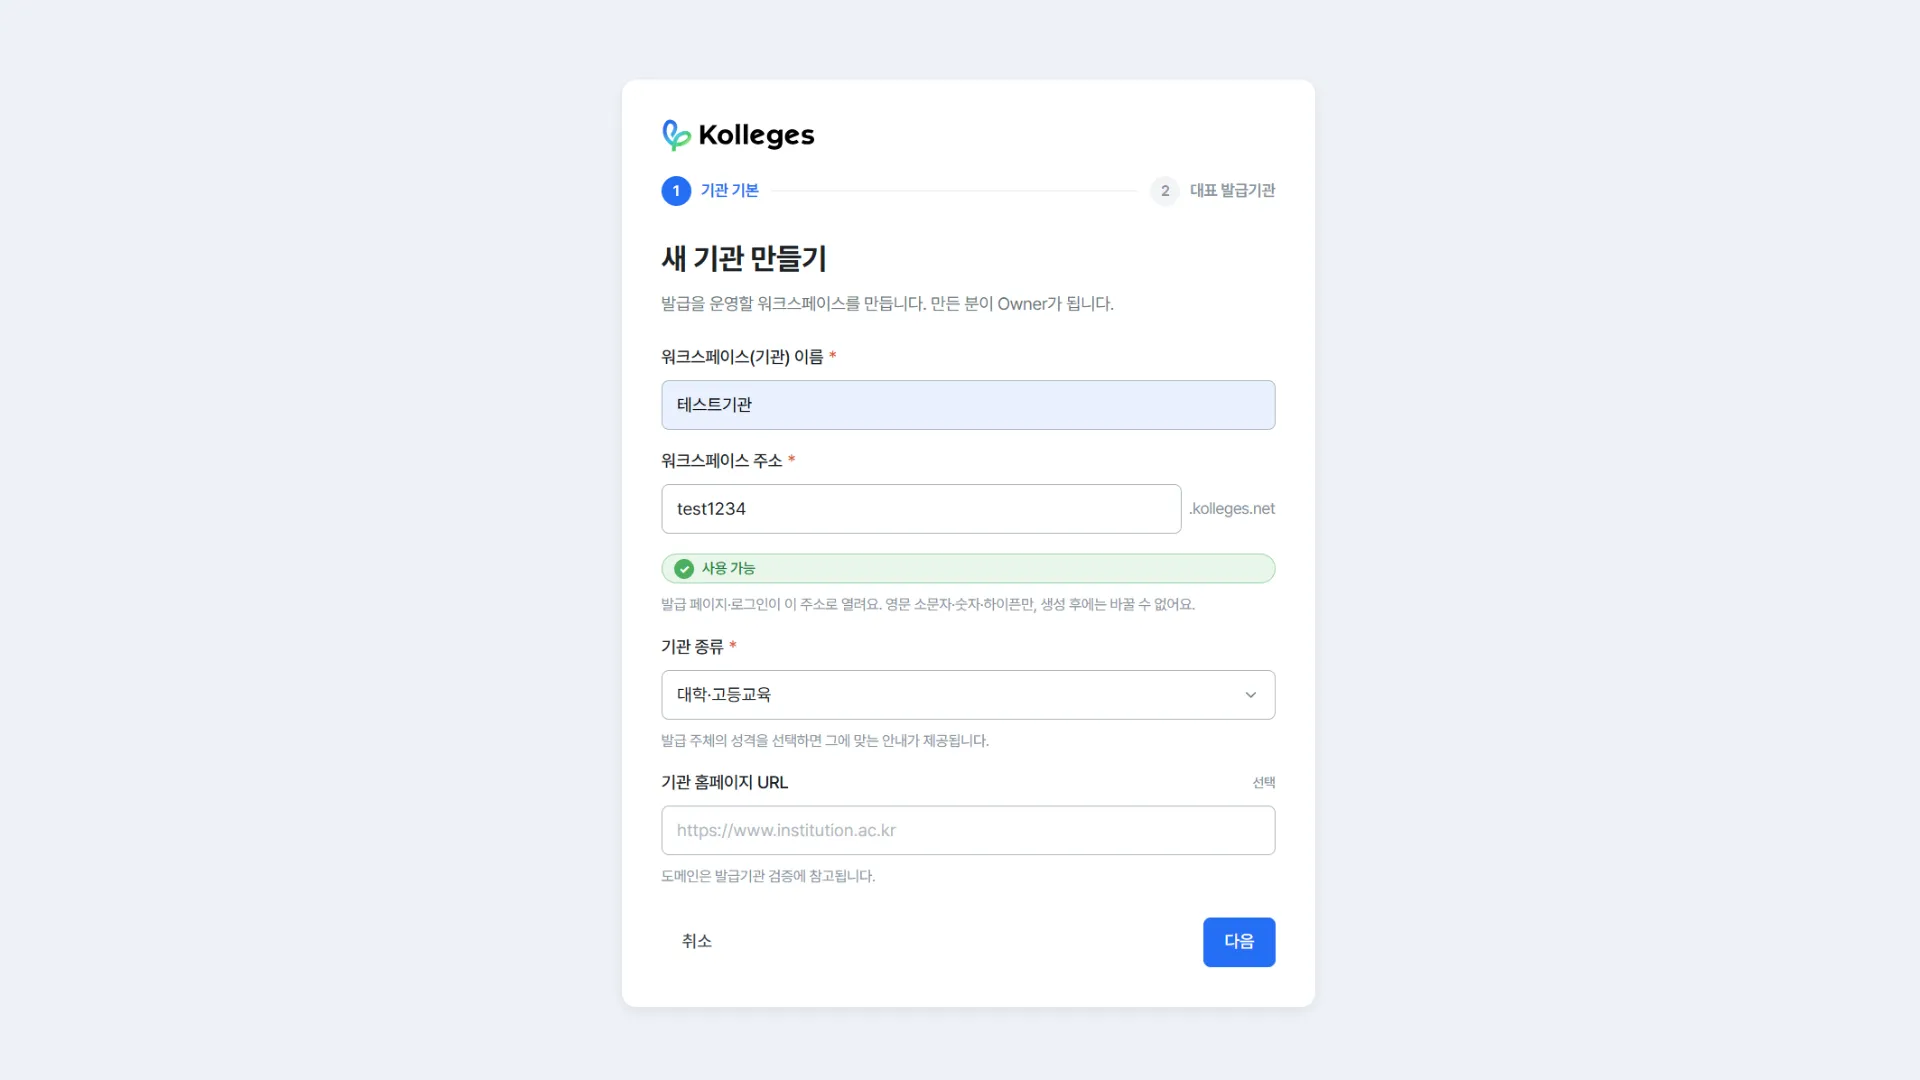
Enter the workspace address. Only lowercase letters, numbers, and hyphens can be used, and availability is checked as you type, showing “Available” in green.
Caution: The workspace address cannot be changed directly on screen once created. Changing it requires contacting customer support, so choose carefully when you first set it.
-
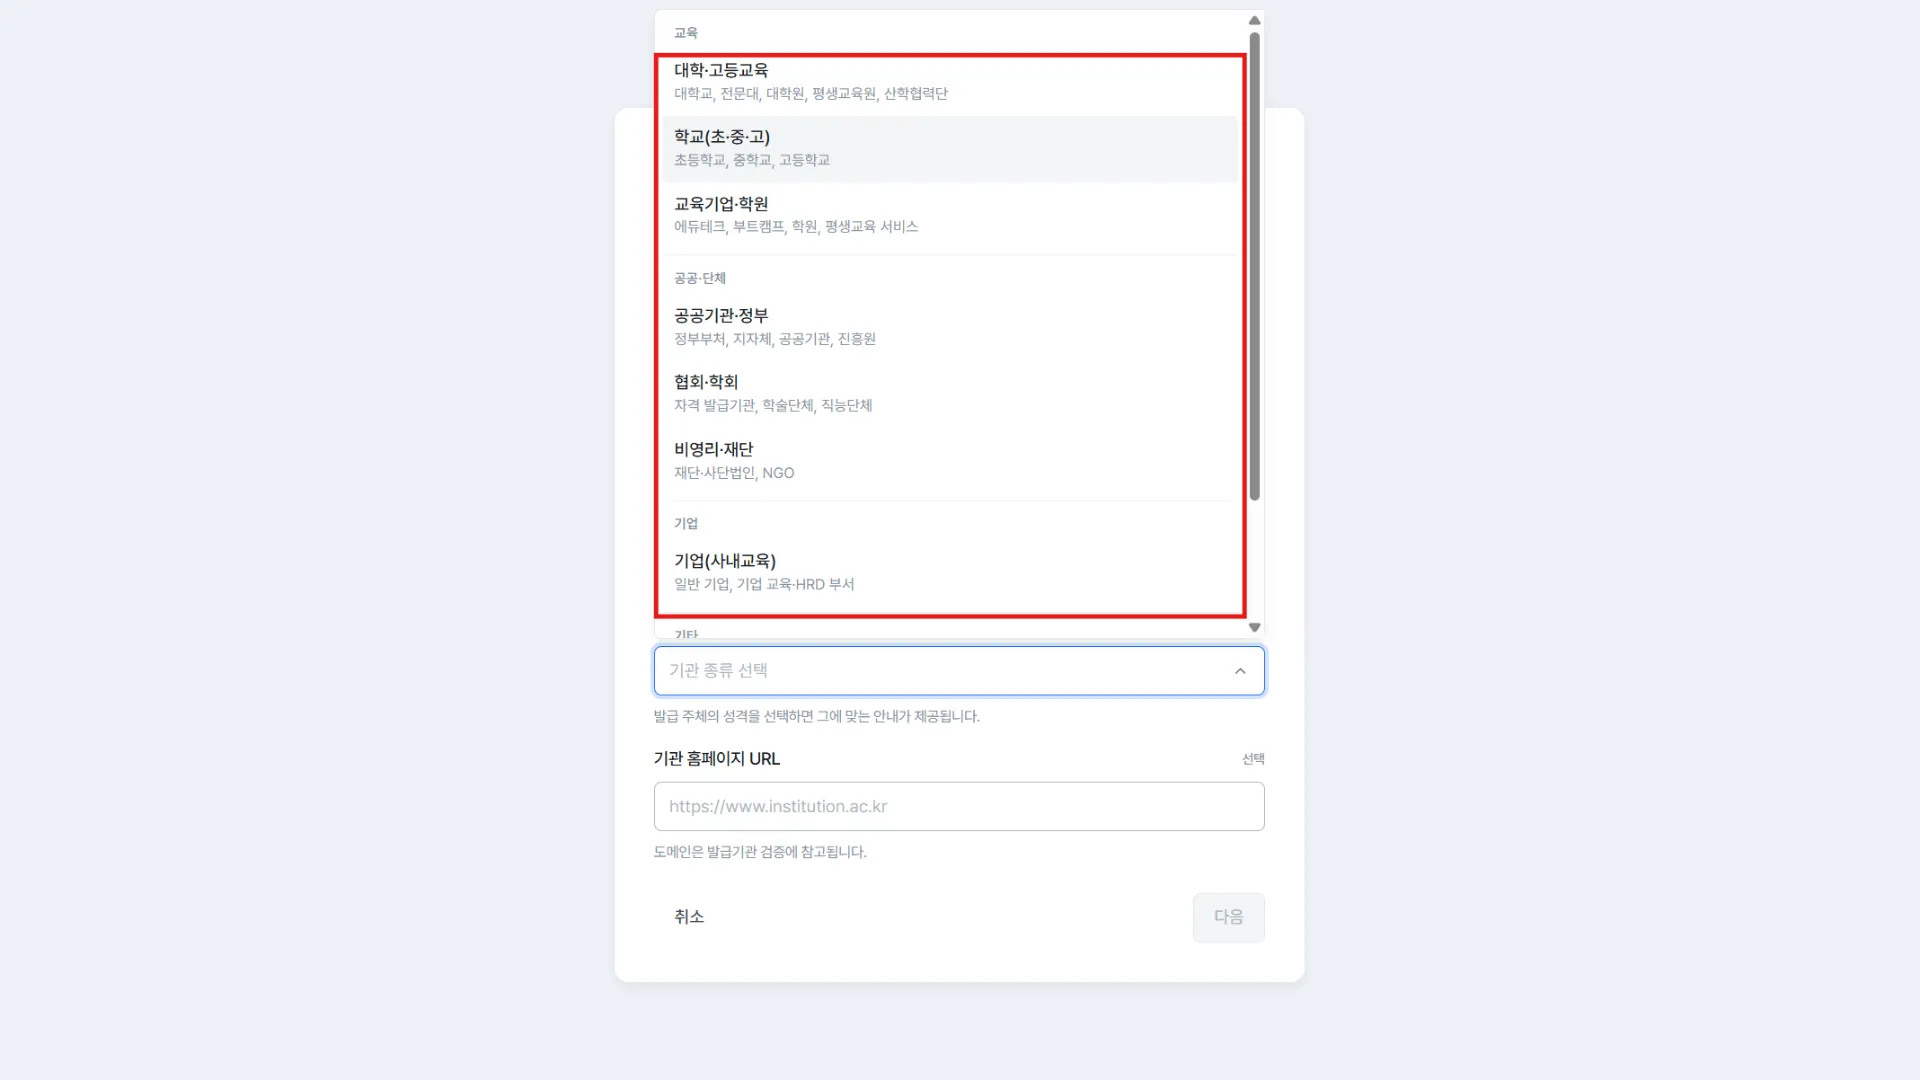
Choose the institution type. There are nine items across four groups, and examples of matching institutions are shown beneath each item.
| Group | Items |
|---|---|
| Education | Universities and higher education / Schools (elementary, middle, high) / Education companies and academies |
| Public and organizations | Public institutions and government / Associations and academic societies / Nonprofits and foundations |
| Business | Companies (in-house training) |
| Other | Communities and groups / Other |
- Enter the institution homepage URL. It is optional, but the domain you enter is referenced later during issuer verification.
- Press [Next]. The button becomes active once all required fields are filled.
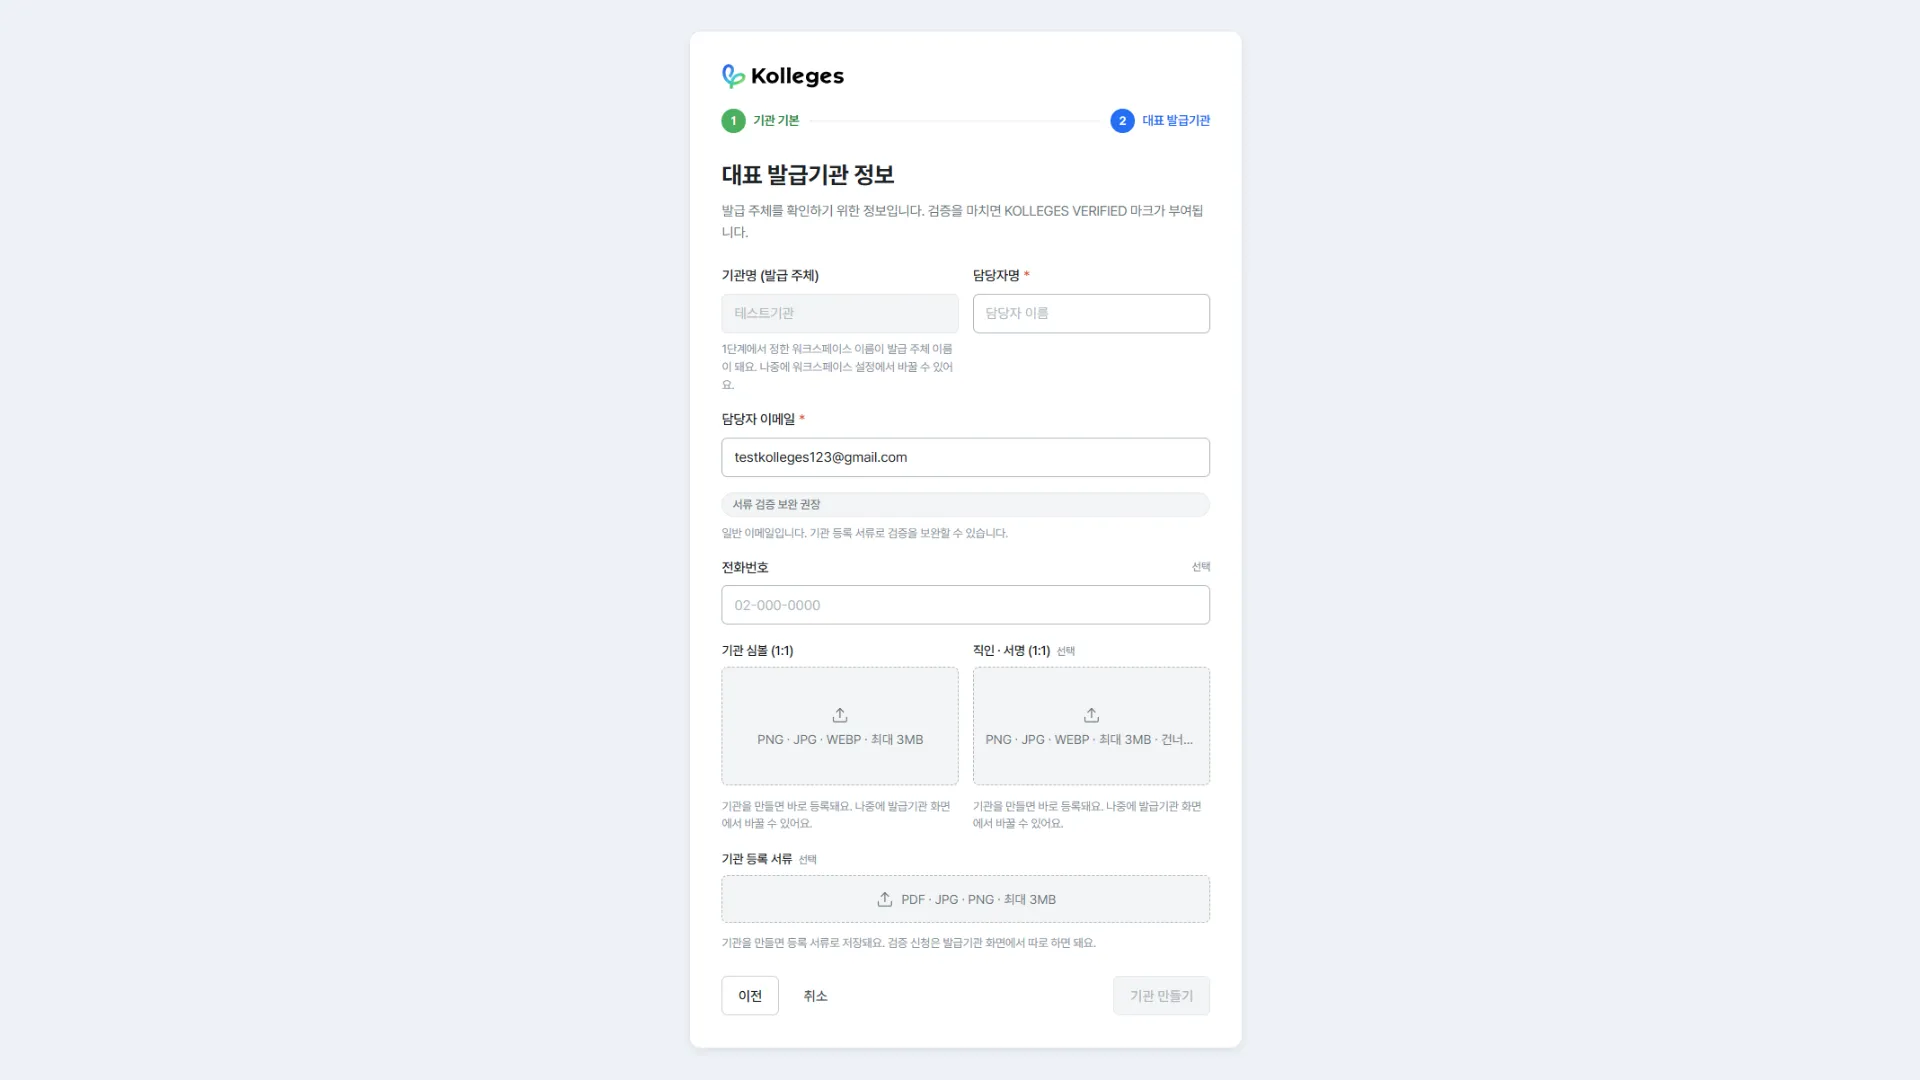
Step 2. Entering primary issuer information
The information you enter here is used to confirm who is issuing. Once verification is complete, the KOLLEGES VERIFIED mark is attached to what you issue.
-
The institution name is filled in automatically from the name set in step 1 and cannot be edited on this screen. You can change it later in the workspace settings.
-
Enter the name of the contact person. This is required.
-
Check the email of the contact person. Your login account email is filled in by default.
Note: If it is a general email (Gmail and the like) rather than an institutional domain email, a “Document verification recommended” notice appears below. Since it cannot be confirmed automatically by domain, you will supplement verification with institutional registration documents.
-
Enter a phone number if needed. This is optional.
-
Upload an institution symbol and a seal or signature if needed. You can register PNG, JPG, or WEBP files up to 3MB. Uploading here registers them as soon as the institution is created, and you can change them later on the issuer screen.
Note: The institution symbol is the image that goes in the center of the badge. If you do not register one, the center of the badge appears empty.
-
Upload your institutional registration documents if needed. PDF, JPG, and PNG up to 3MB are accepted. Uploading here only saves them as registration documents; the verification request must be made separately on the issuer screen.
-
Press [Create institution].
Caution: Pressing [Create institution] creates it immediately, with no separate confirmation dialog.
Confirming completion
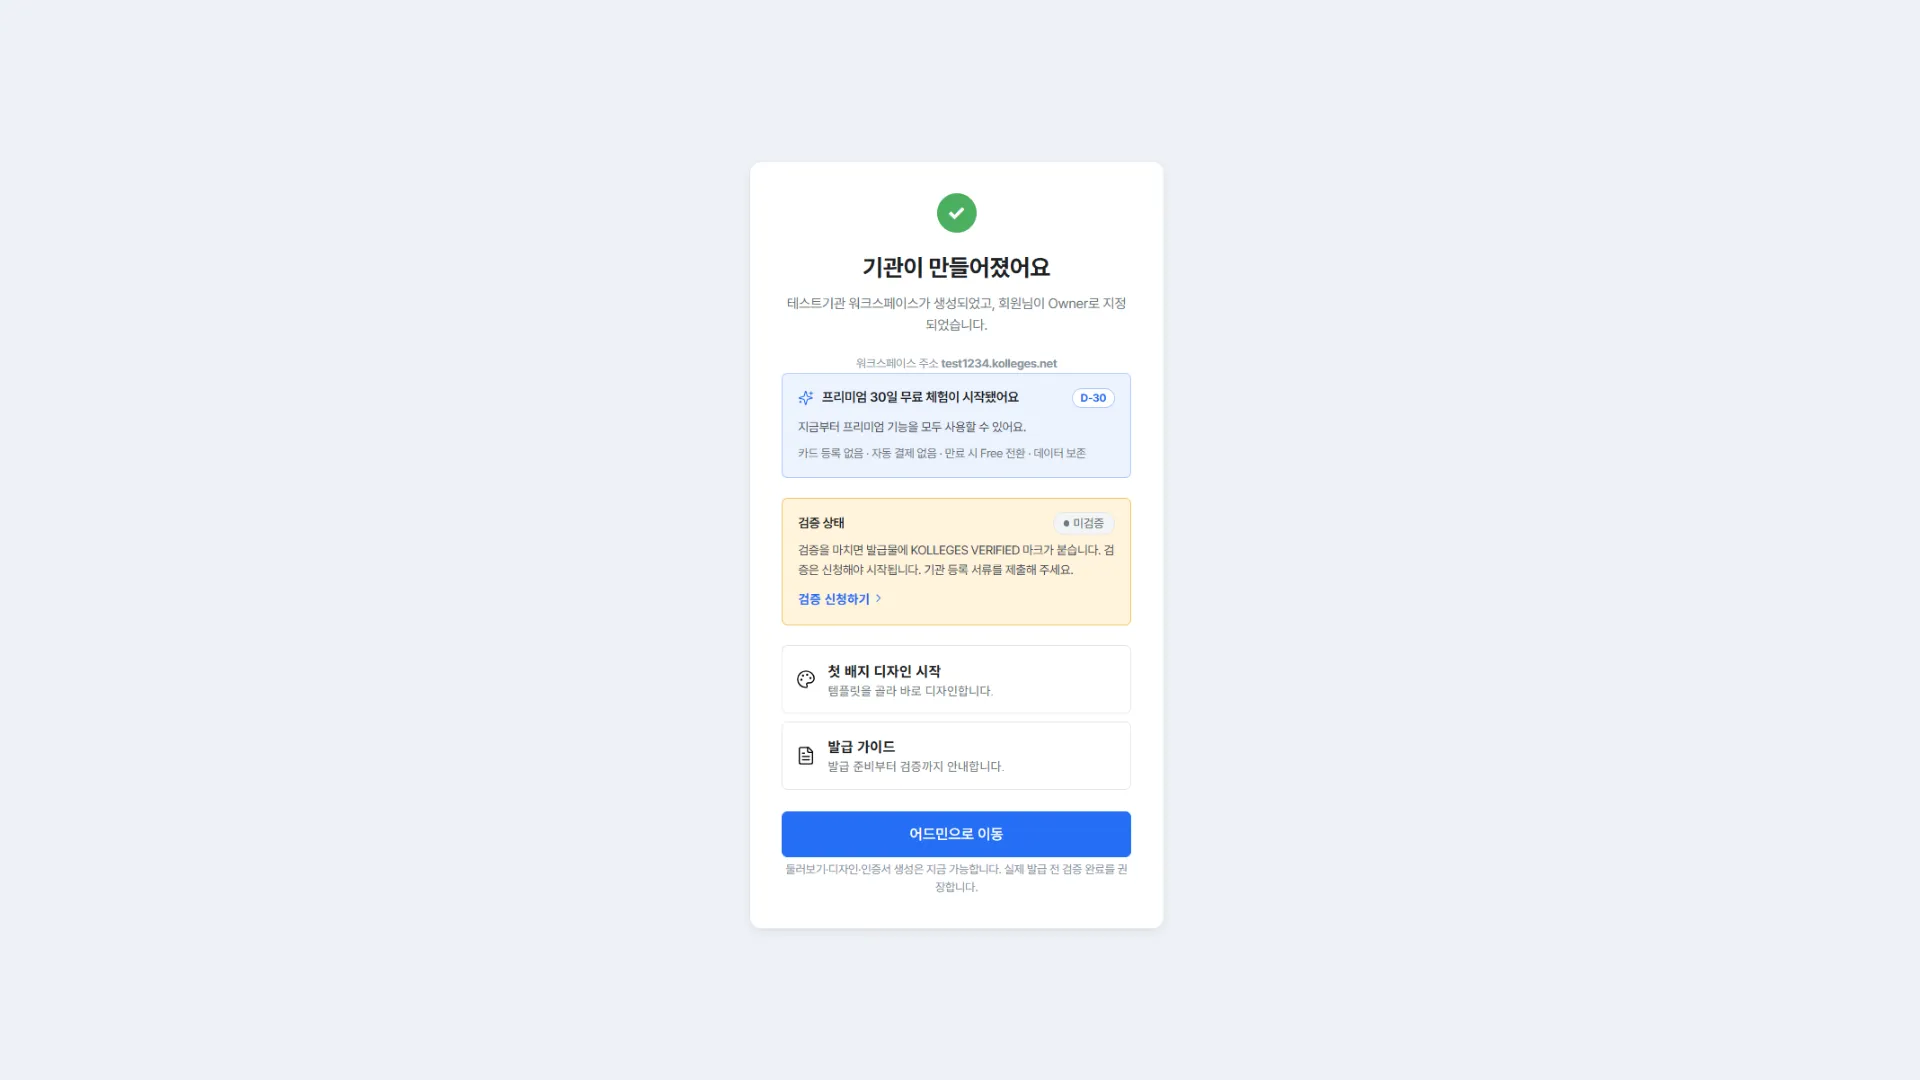
If the “Your institution has been created” screen appears, it was created successfully. Check the following four things on this screen.
Owner assignment - Along with the institution name, a notice shows that you have been assigned as Owner. The workspace address you just set is shown as well.
30-day free Premium trial - It begins at the moment of creation, and the remaining period is shown as D-30. There is no card registration and no automatic billing; when it expires you are switched to Free and your data is preserved.
Verification status - It shows as unverified. You must complete verification for the KOLLEGES VERIFIED mark to be attached to what you issue. Verification only starts once requested, so you can continue via [Request verification] on the card.
Shortcuts to what comes next - There are links to start your first badge design and to the issuance guide.
- Pressing [Go to admin] takes you to the dashboard. Exploring, designing, and creating certificates can be done right away, and we recommend completing verification before you issue anything for real.
Frequently asked questions
I logged in but the workspace selection screen does not appear.
If you do not belong to any institution, the selection screen is skipped and you go straight to Create a new institution. Once you create one institution, the selection screen appears from then on.
Can I change the workspace address later?
You cannot change it directly on screen. The workspace settings state “For address changes, please contact customer support,” so contact customer support if you need a change.
I signed up with a personal email rather than a company email. Is that all right?
There is no problem with signing up or creating an institution. However, since it cannot be confirmed automatically by domain, you will supplement issuer verification by submitting your institutional registration documents.
What happens when the Premium trial ends?
You are switched to the Free plan and your data is preserved as is. Since no card is registered, you are not billed automatically.
I already have a workspace. Can I create another one?
Yes. One account can own and manage multiple workspaces, and you can switch between them at any time from the workspace selection screen.
Can I issue badges right after creating it?
Yes. However, it is unverified immediately after creation, so we recommend completing issuer verification before you issue anything for real.
Related guides
- Taking a tour of the first screen - What to do first after creating it
- Requesting issuer verification - Getting the KOLLEGES VERIFIED mark
- Inviting members and managing roles - Inviting colleagues to run it with you
- Admin FAQ - Browsing frequently asked questions
Frequently asked questions
Want to turn learning outcomes into verifiable assets?
From issuing to verifying and amplifying, see it for yourself with Kolleges.
Request a Kolleges demo
Related posts

Taking a Tour of the First Screen
When you first create a workspace, a five-step getting-started guide appears on the dashboard. Following it in order takes you from issuer verification through your first issuance to opening your institution page, all in one pass.

Joining an Existing Workspace
Open the link in the invitation email sent by an admin and press Accept invitation to become a member of that workspace. You must be logged in with the account that was invited.

Requesting Issuer Verification
Press Proceed with verification on the issuer screen, and once domain email authentication and institutional document submission are complete, your verification review is filed.