

On the Site settings tab of your institution page, manage search text, header style, brand color, logo, and even a custom domain, all from one screen.
Key summary
On the Site settings tab of your institution page, manage search text, header style, brand color, logo, and even a custom domain, all from one screen.
Permissions required Owner, Admin
Before you start
Preparing the following materials in advance lets you finish in one pass.
- A horizontal institution logo image (transparent PNG recommended)
- A representative image for sharing (1200×630 recommended)
- Business information (representative name, main email, business registration number, and so on)
1. Setting your search text
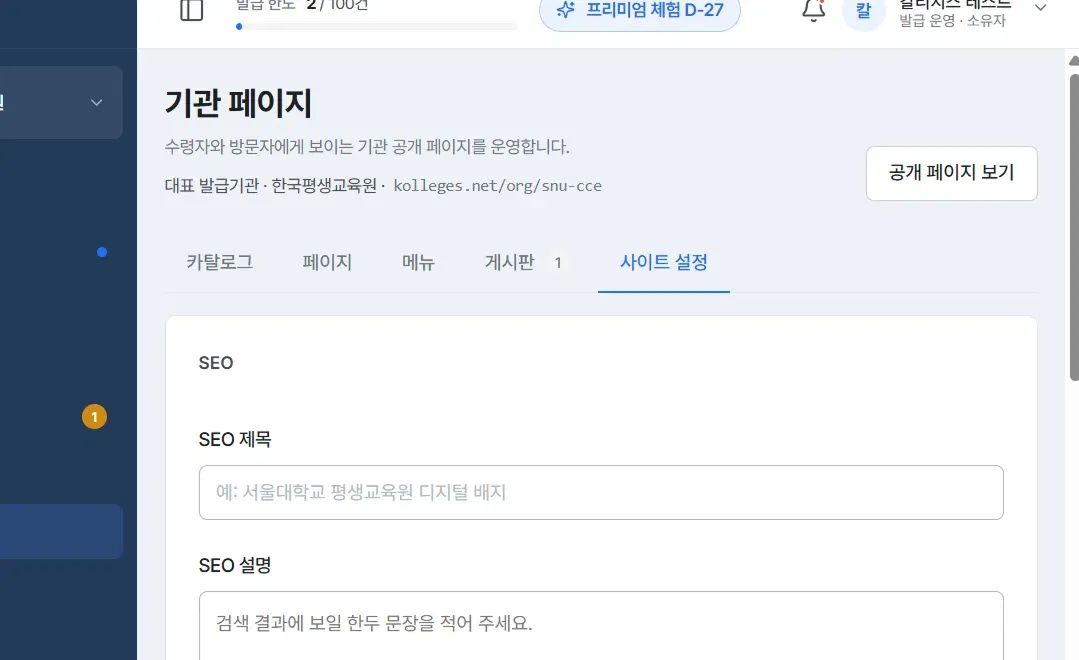
From the Homepage menu, go to the Site settings tab and enter the SEO title and SEO description. They are used in search results and in link sharing previews. You can check how it looks right away in the search result preview on the right.
2. Choosing a header style
Choose one of two options under Header.
- Portal style - A content-rich layout with banners, an introduction, and more
- Simple style - A concise layout centered on checking badges
3. Setting your brand color
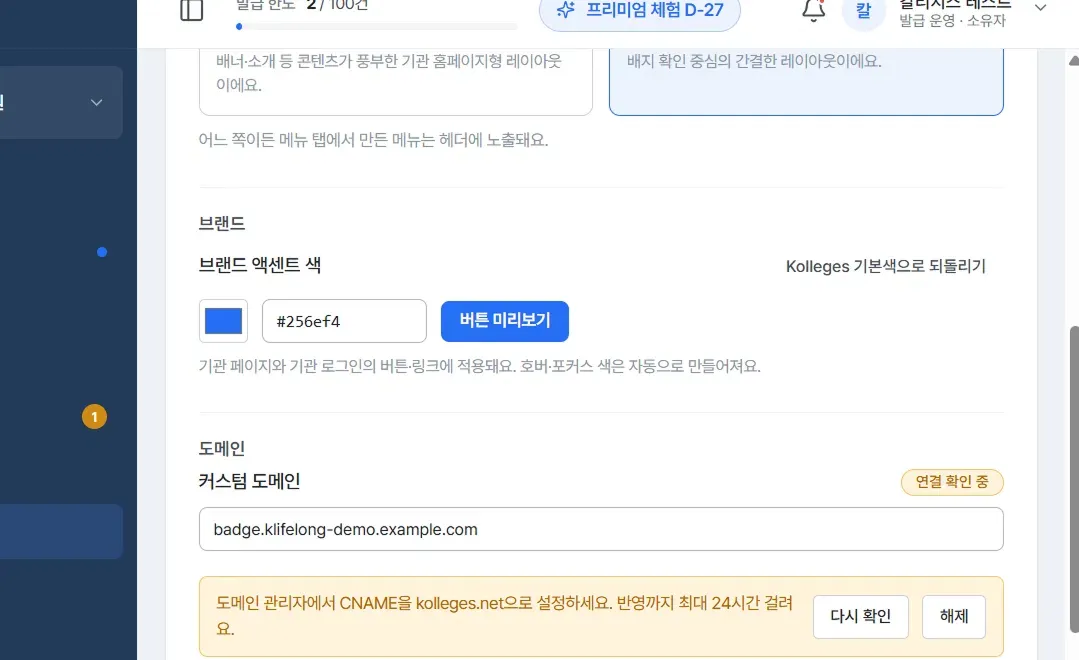
Entering a HEX code for the brand accent color applies it to buttons and links on the institution page and login screen. The hover color is generated automatically. Check the result with [Preview button], and to revert press [Restore Kolleges default color].
4. Registering images
- Horizontal institution logo - Displayed in the header and footer
- OG image - The representative image shown when a link is shared. Leaving it blank uses your logo or symbol instead
5. Entering business information
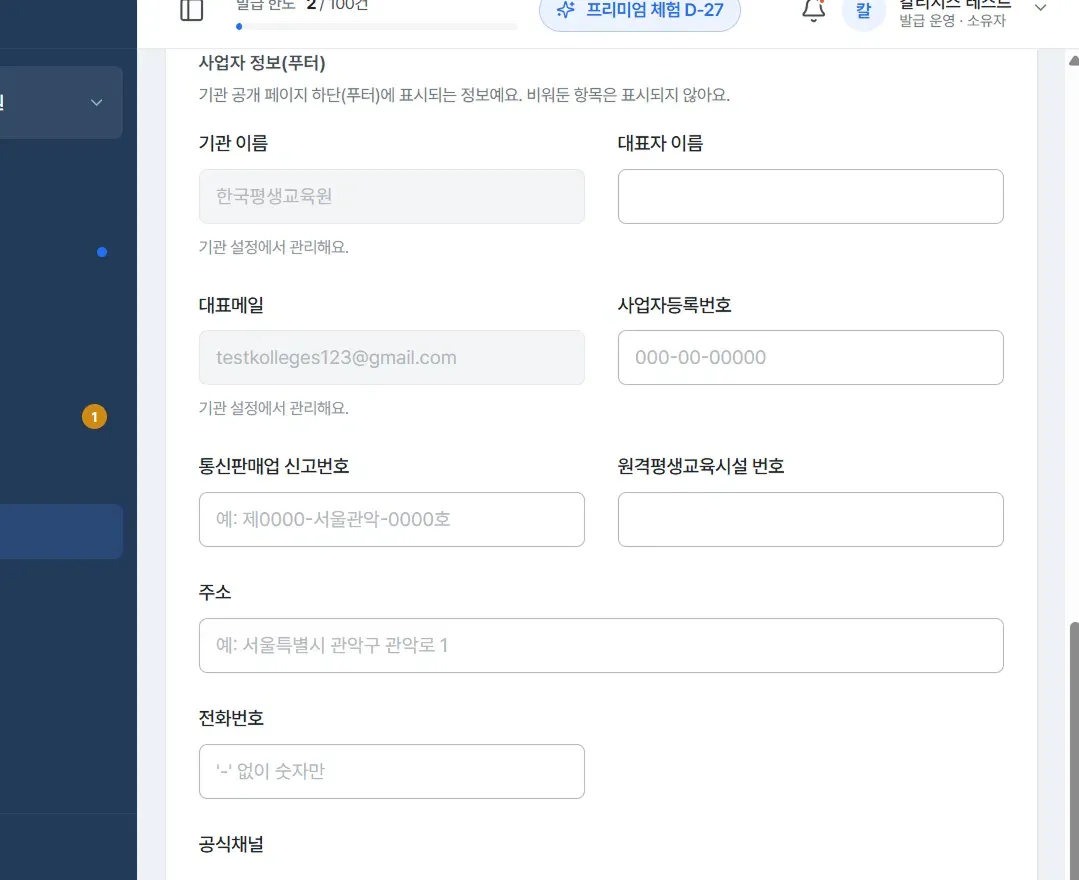
- Entering the representative name, main email, business registration number, and so on under business information (footer) displays them at the bottom of the public page. Items left blank are not displayed.
The institution name field cannot be edited on this screen. The institution name follows the workspace name, so to change it refer to Editing workspace information.
6. Connecting a custom domain (optional)
To use a domain your institution owns, follow the steps below. Work with the person who has domain management permissions.
- Enter the address you want to use under custom domain and press [Connect] (for example,
badge.yourdomain.ac.kr). - The status changes to “Verifying connection” and a notice appears: “Set the CNAME to kolleges.net in your domain manager. It can take up to 24 hours to take effect.”
- In your domain management screen (Gabia, Whois, Cloudflare, and so on), set the CNAME record for that address to
kolleges.net. - Once configured, press [Check again] to refresh the connection status. It can take up to 24 hours to take effect.
Once connected, your institution login and public page open at that address, and the existing kolleges.net address keeps working. To disconnect, press [Disconnect]. After disconnecting, that address becomes unreachable and the kolleges.net address keeps working.
Confirming completion
In the how it looks to recipients panel on the right, press through the institution login, institution page, and footer tabs to check that everything you set is reflected.
Frequently asked questions
If I connect a custom domain, does the existing address stop working?
No. The existing kolleges.net address keeps working.
Does connecting a custom domain require separate configuration?
Yes. You must set the CNAME record to kolleges.net in your domain management screen, and it can take up to 24 hours to take effect.
There are footer items I do not want to include.
Leaving that field blank means it is not displayed on the public page.
Related guides
- Listing certificates in the catalog - Showing badges on your public page
- Creating a board and linking it to the menu - Posting notices and news
- Editing workspace information - Changing the institution name
Frequently asked questions
Want to turn learning outcomes into verifiable assets?
From issuing to verifying and amplifying, see it for yourself with Kolleges.
Request a Kolleges demo
Related posts

Listing Certificates in the Catalog
Creating a certificate registers it in your institution page catalog automatically. You only toggle its visibility and the application path.

Creating a Board and Linking It to the Menu
Create a board on the Boards tab of your institution page, then link it on the Menu tab and it appears on the public page.

Inviting Members and Managing Roles
On the Members tab of the Workspace menu, invite colleagues by email and check or adjust how far each role can reach.