
Creating a Pathway
A feature for bundling several certificates into steps so that completing all of them issues a higher badge. Choose between automatic issuance and admin approval.
Key summary
A feature for bundling several certificates into steps so that completing all of them issues a higher badge. Choose between automatic issuance and admin approval.
Permissions required Owner, Admin, Issuance operator
Before you start
Create the certificates to link to each step first.
You do not need to prepare the capstone badge issued on completion in advance. You can create it while building the pathway, and the certificate type is automatically set to “microcredential.”
1. Entering basic information
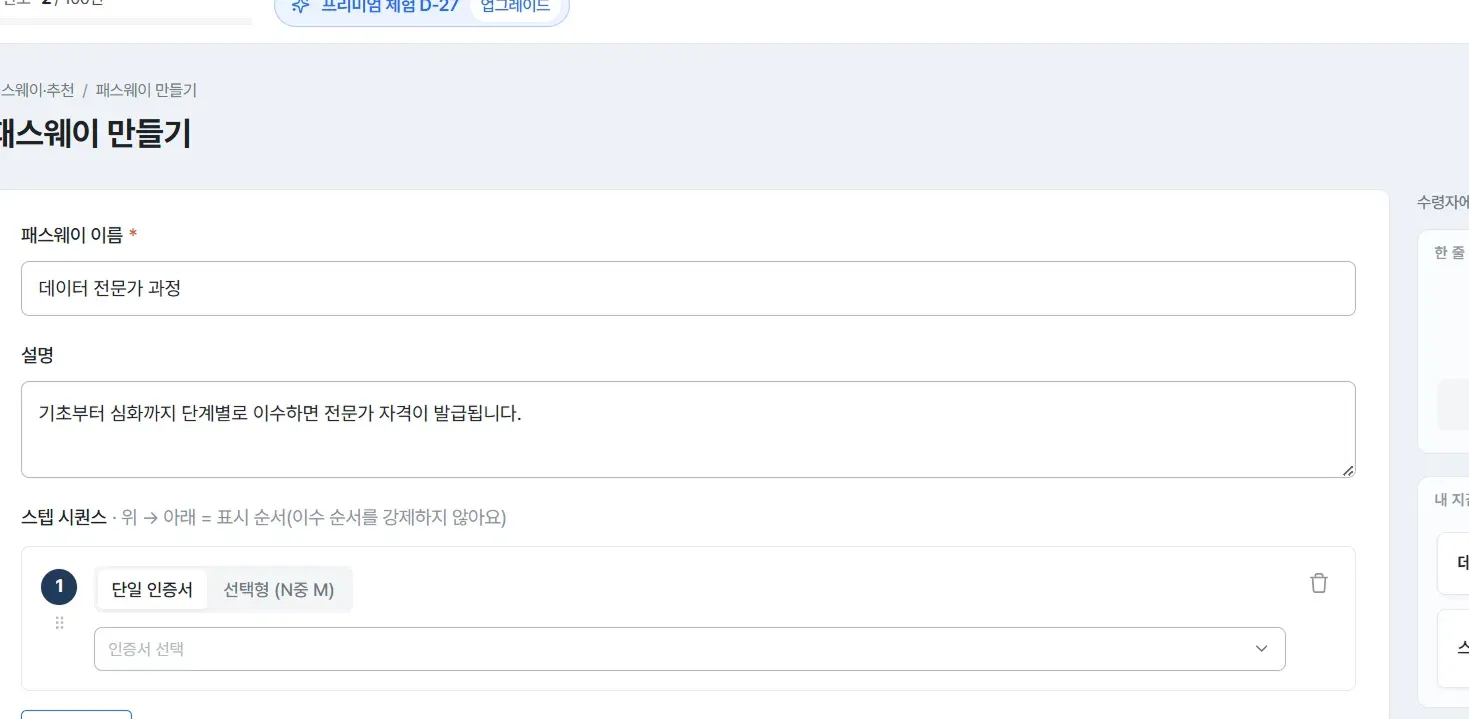
In the Pathways and recommendations menu, press [+ Create pathway] and enter the following.
- Pathway name - Required (for example, Clinical Nutrition Specialist Program)
- Description - Write a sentence or two on what completing this pathway means
2. Building the steps
Arrange the courses to be completed in order under step sequence. Each step can be built in two ways.
- Single certificate - One designated certificate must be completed
- Choice (M of N) - Only a set number out of several certificates must be completed
- Add steps with [+ Add step], and drag to change the order. Top-to-bottom is only the order shown on screen and does not force the actual completion order.
3. Choosing the completion badge
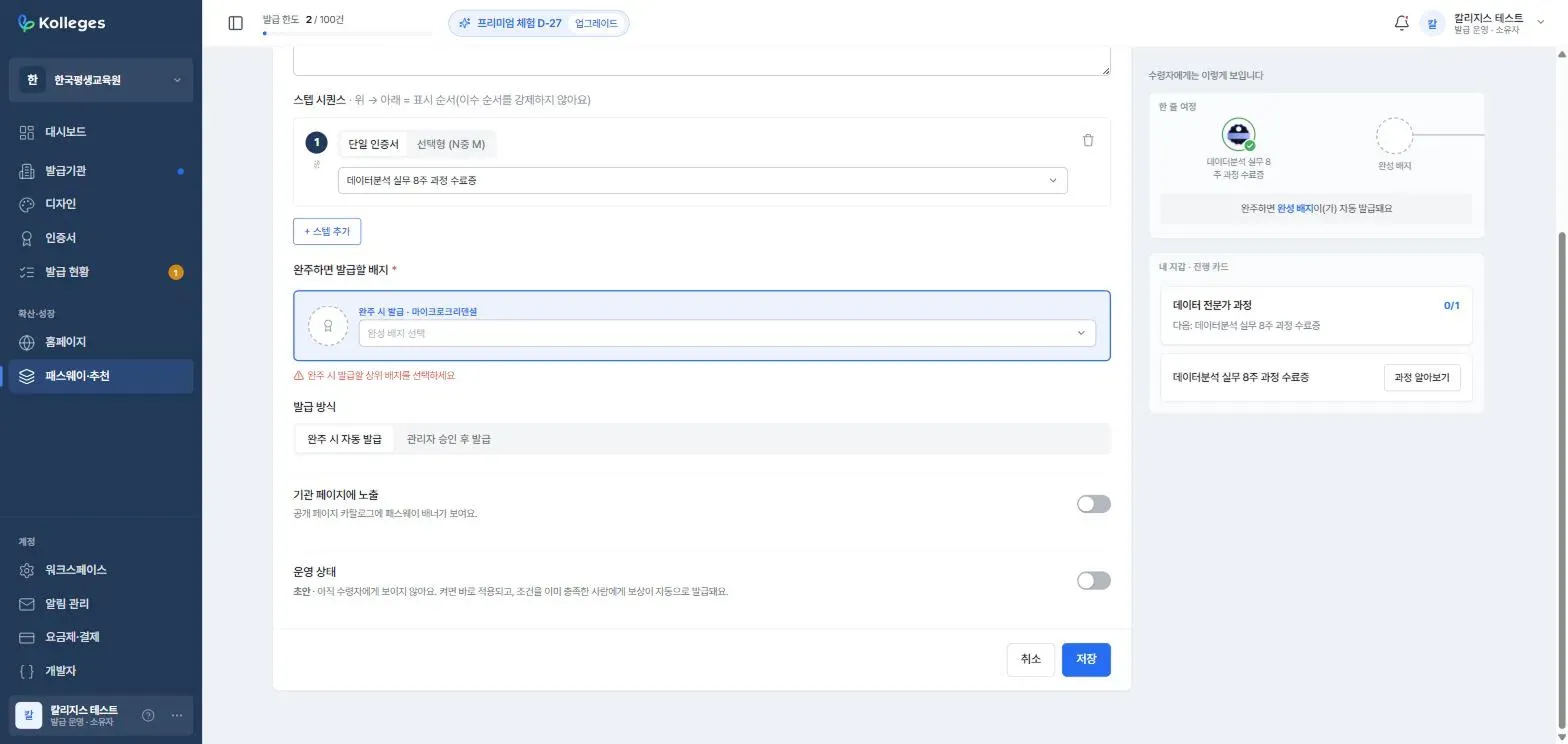
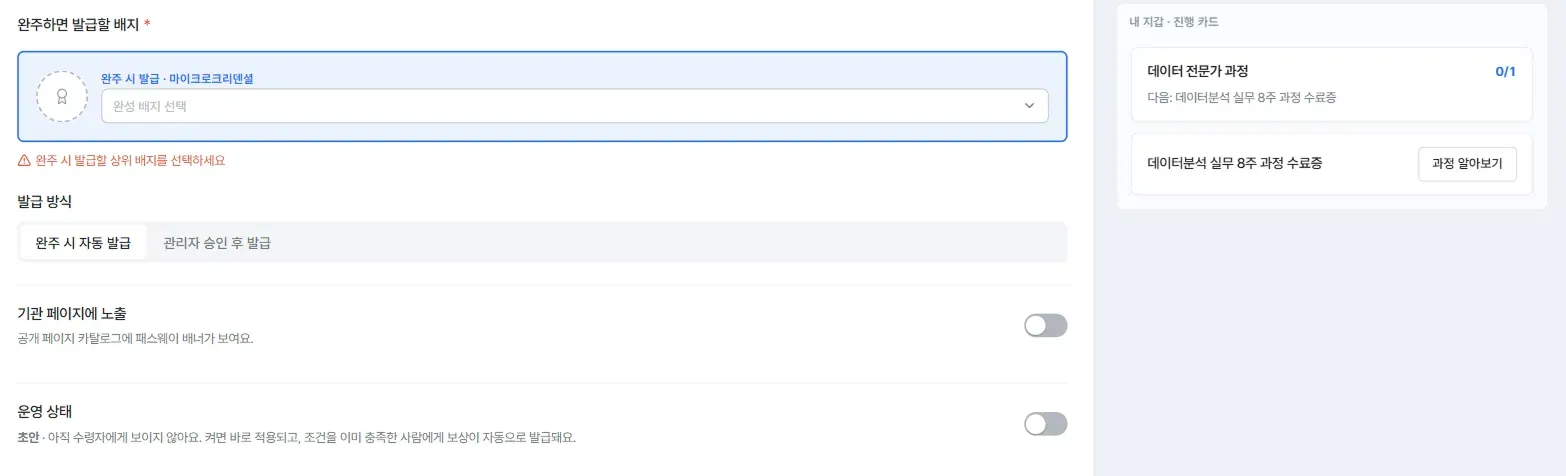
Under badge to issue on completion, choose the higher badge to issue once all steps are finished. It is required, and without a selection the notice “Select the higher badge to issue on completion” appears.
If you do not have a capstone badge yet, press [+ Create new capstone badge] in the list. The certificate creation screen opens with the certificate type automatically set to microcredential, and the notice “This certificate can be used as a pathway capstone badge” is displayed. Fill in the title, description, and badge design, save, then press [Link to pathway] to return to the pathway you were building, where you can select the badge you just made.
4. Choosing the issuance method
- Automatic issuance on completion - Issued the moment the conditions are met
- Issuance after admin approval - Even when conditions are met, an admin must approve
Choose approval for programs that need a completion review, and automatic issuance when meeting the conditions is enough.

5. Setting visibility and operating status
There are two toggles at the bottom of the screen. Both are off by default.
- Show on institution page - Turning it on shows a pathway banner in the public page catalog.
- Operating status - Leaving it off keeps it as a draft invisible to recipients.
Caution: Turning on the operating status applies immediately, and reward badges are issued automatically to anyone who already meets the conditions. If you linked a course with many past completers, more badges than expected may go out at once, so recheck the certificates linked to your steps before turning it on.
In the “This is how recipients see it” panel on the right, you can preview how the one-line journey and the wallet progress card will look.
Confirming completion
After [Save], it is done when a card appears in the Pathways tab list of the Pathways and recommendations menu. The card shows the journey illustration along with the number of steps, the issuance method, the capstone badge, and the number in progress. If you did not turn on the operating status, a “Draft” badge is attached to the top left of the card.
Checking completion progress
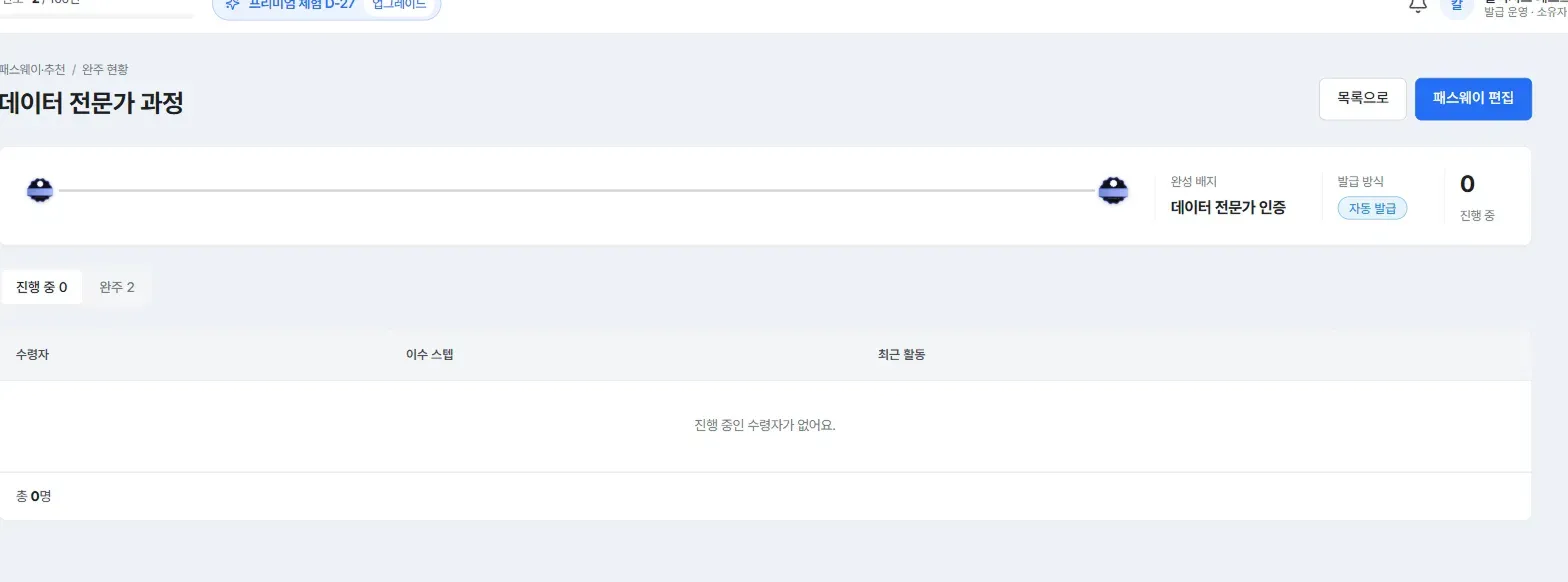
Pressing [Completion status] on the pathway card lets you see recipients’ progress.
- Top: the journey illustration, capstone badge, issuance method, and number in progress
- Tabs: In progress / Completed - each showing how many people
- Table: recipient, completed steps, recent activity
Frequently asked questions
Do the steps have to be completed in order?
No. As the screen states, it is only a display order and does not force a completion order.
Can I build it now and launch it later?
Yes. Saving with the operating status off keeps it as a draft that recipients cannot see. Turn the toggle on when you are ready.
Related guides
- Creating a certificate - Preparing the certificates to place in steps
- Listing certificates in the catalog - Showing the pathway banner
- Setting up recommendations - Suggesting the next course
Frequently asked questions
Want to turn learning outcomes into verifiable assets?
From issuing to verifying and amplifying, see it for yourself with Kolleges.
Request a Kolleges demoRelated posts
Setting Up Recommendations
A feature that automatically suggests the next program to recipients of a particular badge. You only choose the trigger badge and what to show.
Creating a Certificate
Press Create certificate in the Certificates menu and fill in the basic information and advanced settings, and it is ready to issue. There is also a feature where AI drafts it for you from course information alone.

Listing Certificates in the Catalog
Creating a certificate registers it in your institution page catalog automatically. You only toggle its visibility and the application path.