

A step-by-step guide to setting homepage basic information (group name, brand colors, logo, membership approval method, etc.) and business (footer) information from the Kolleges homepage management menu.
Kolleges guide: This article introduces how to set homepage basic information and business information.

Basic Information Settings
You can set homepage information in the [Homepage Management] > [Homepage Information] > [Basic Information] tab.
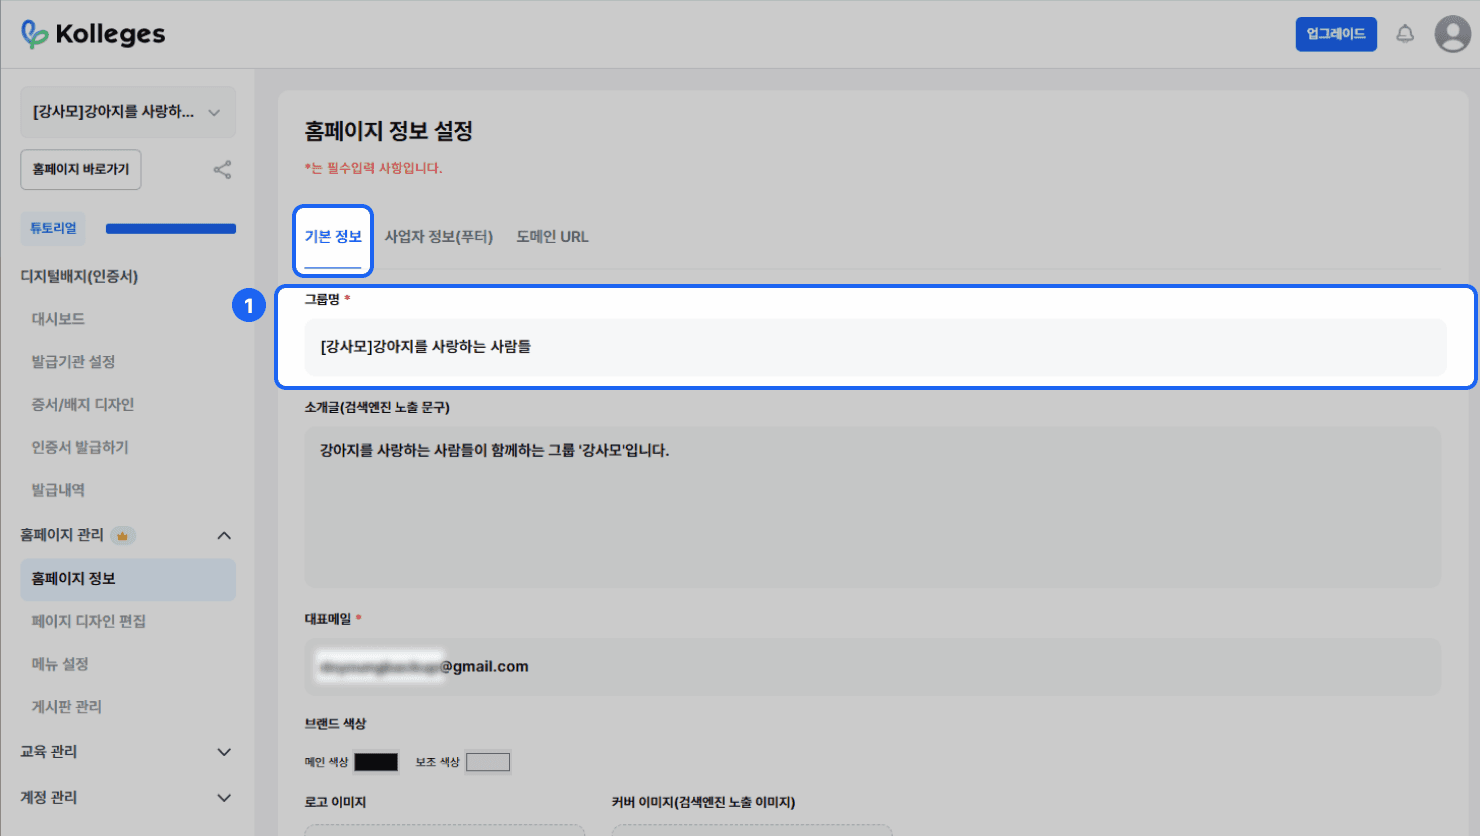
- Group name: The group name of the homepage.
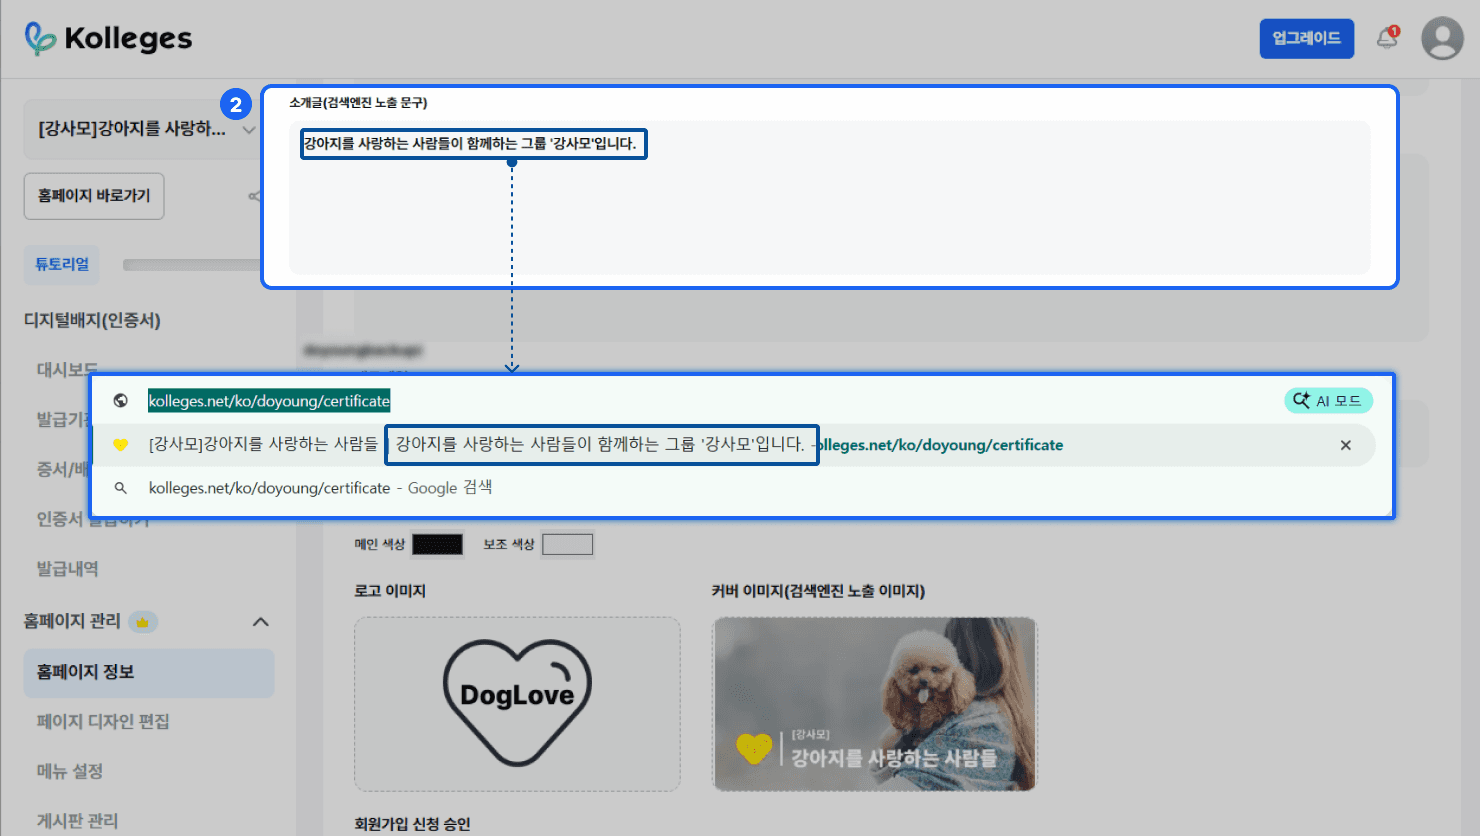
- Introduction: The introduction text for the homepage. When the homepage is searched, this introduction is shown together with the group name.
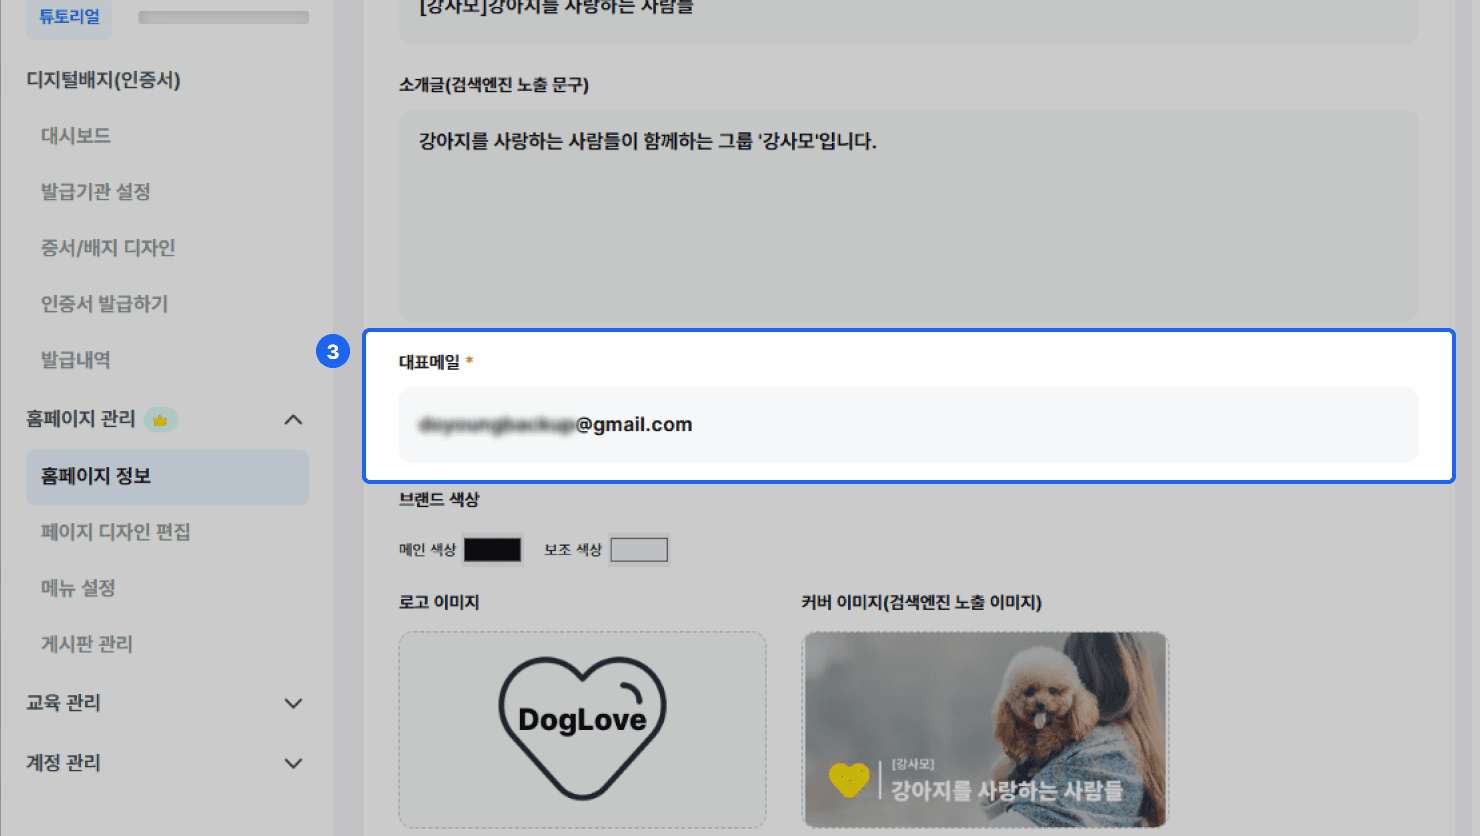
- Representative email: The representative email of the homepage.
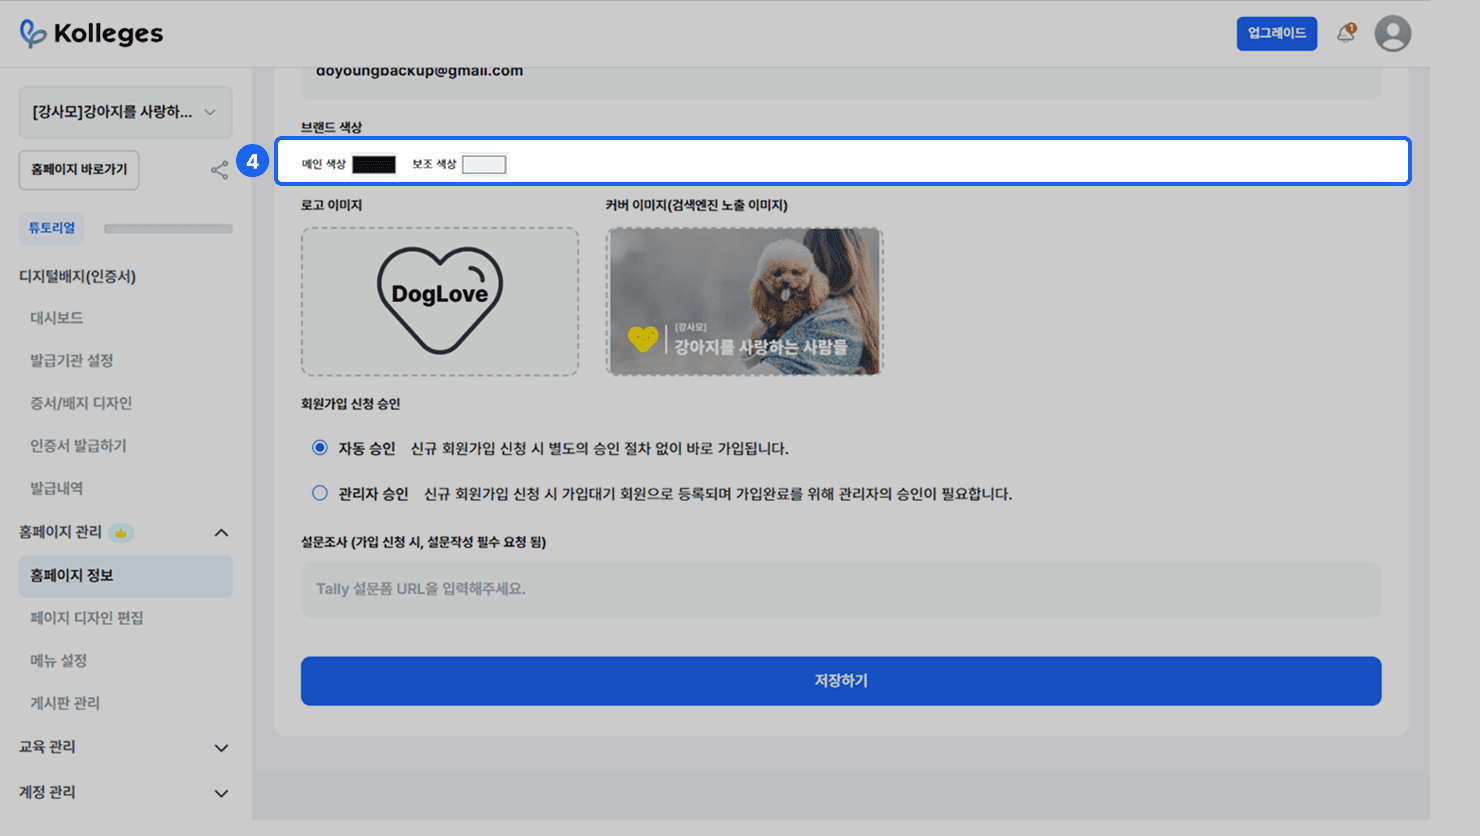
- Brand colors: The main color and secondary color to apply to the site.
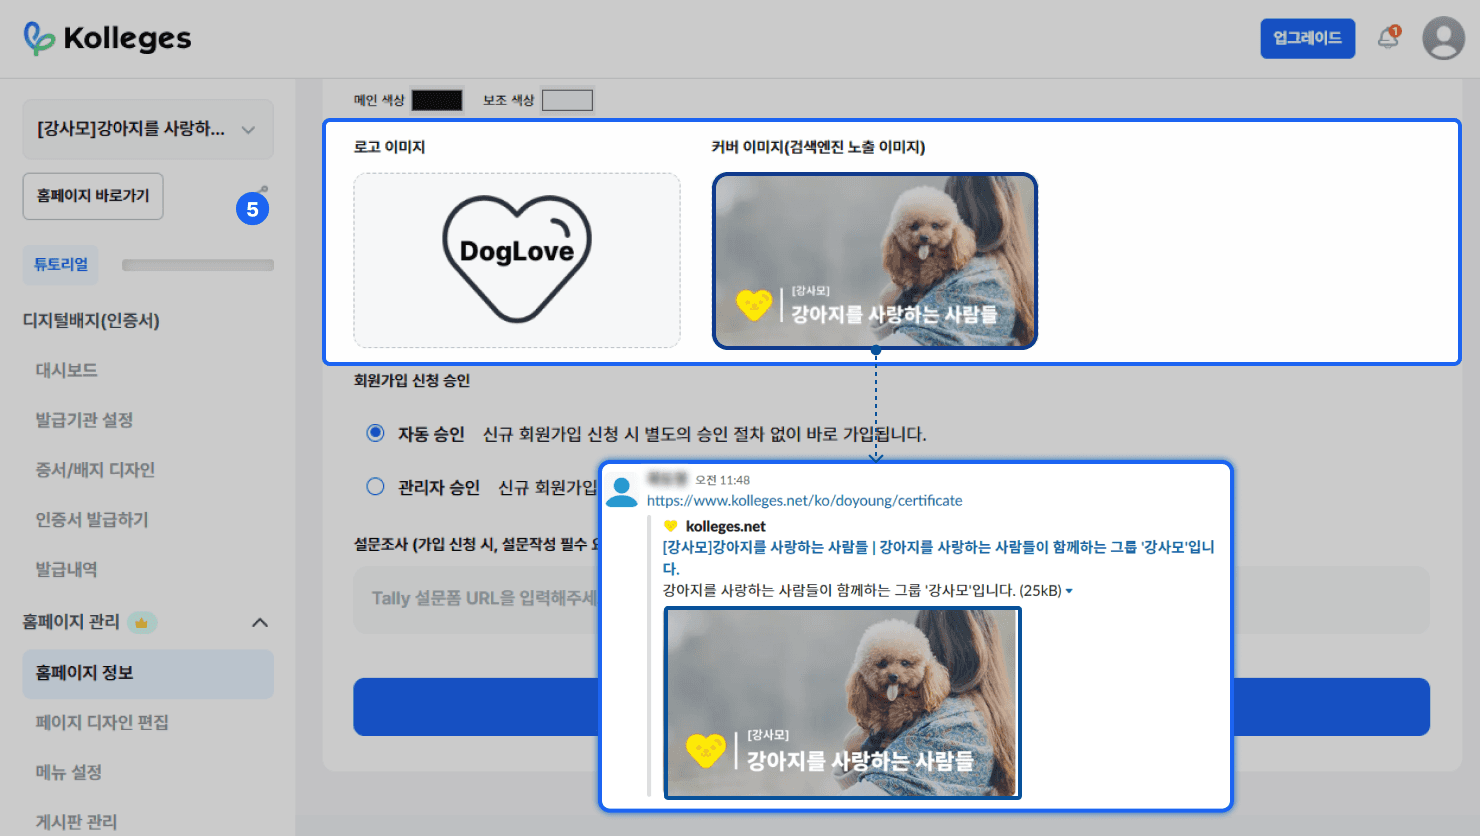
- Images
- Logo image: Used as the homepage main logo and the issuer logo.
- Cover image: Used as the preview image when the homepage link is shared.
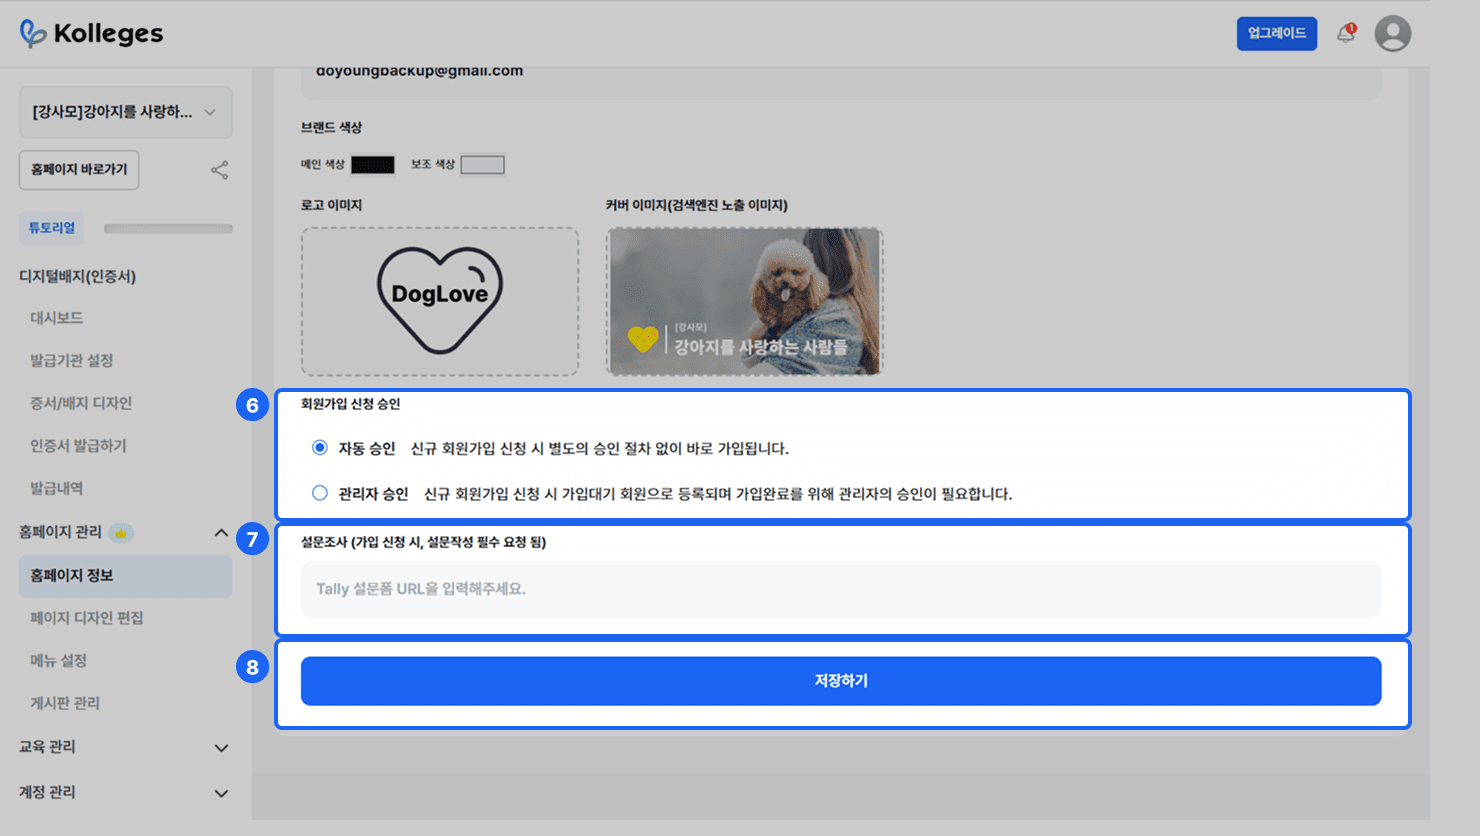
- Membership sign-up approval
- Automatic approval: When a new membership sign-up is submitted, sign-up is processed without a separate approval procedure.
- Admin approval: When a new membership sign-up is submitted, it is registered in a pending state, and sign-up is completed after the admin approves it.
- Survey: When a student joins the group, they are required to submit the survey.
- Copy and paste the link of the survey created with Tally.
- Save: Saves the changed content and information.
(Note: if you leave the page without clicking the {Save} button, your changes will not be saved.)
Business Information (Footer) Settings
You can set the homepage footer information in the [Homepage Management] > [Homepage Information] > [Business Information (Footer)] tab.
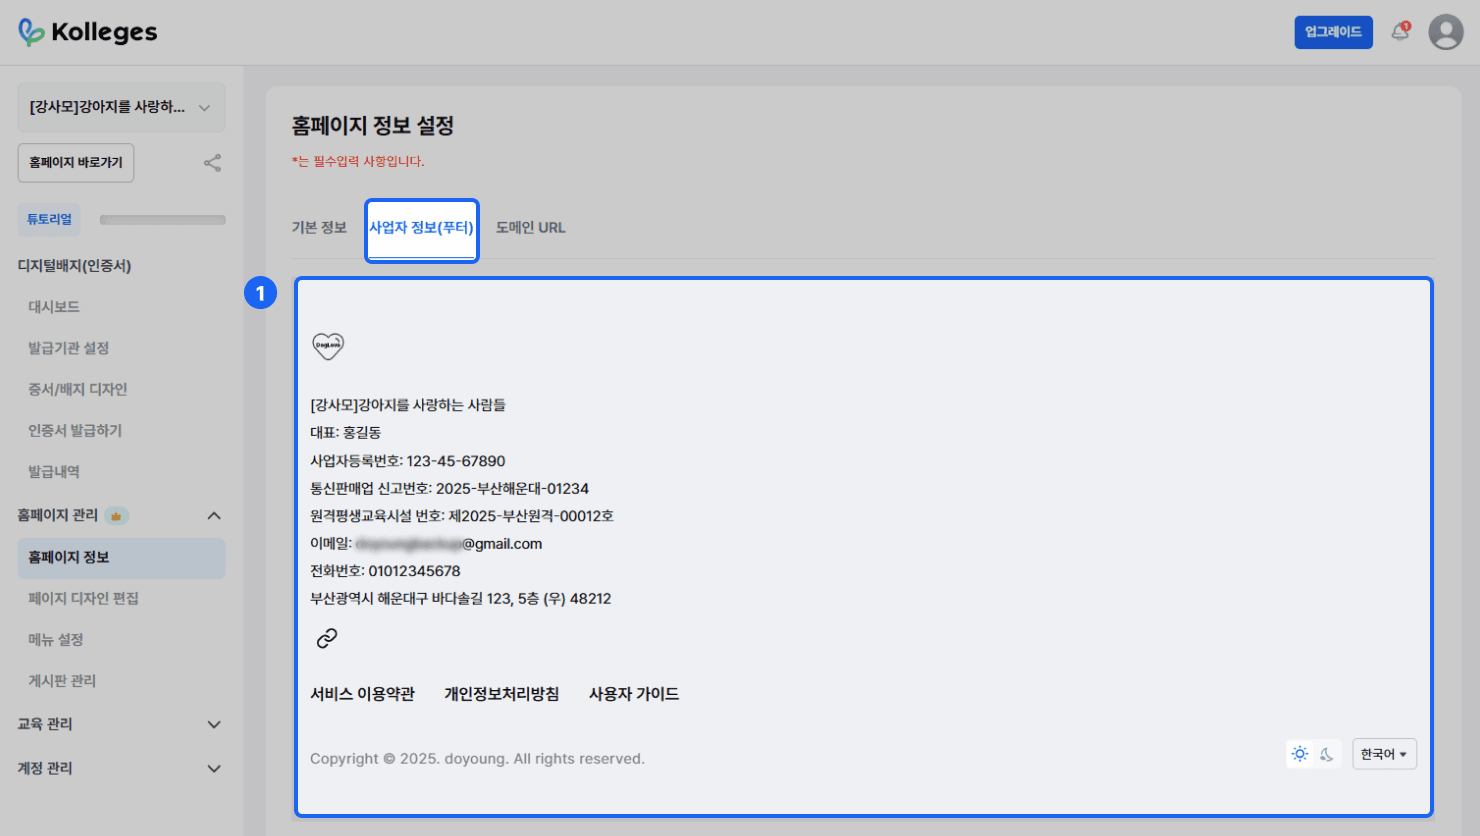
- Preview: You can check the content you entered for the business information (footer) in a preview.
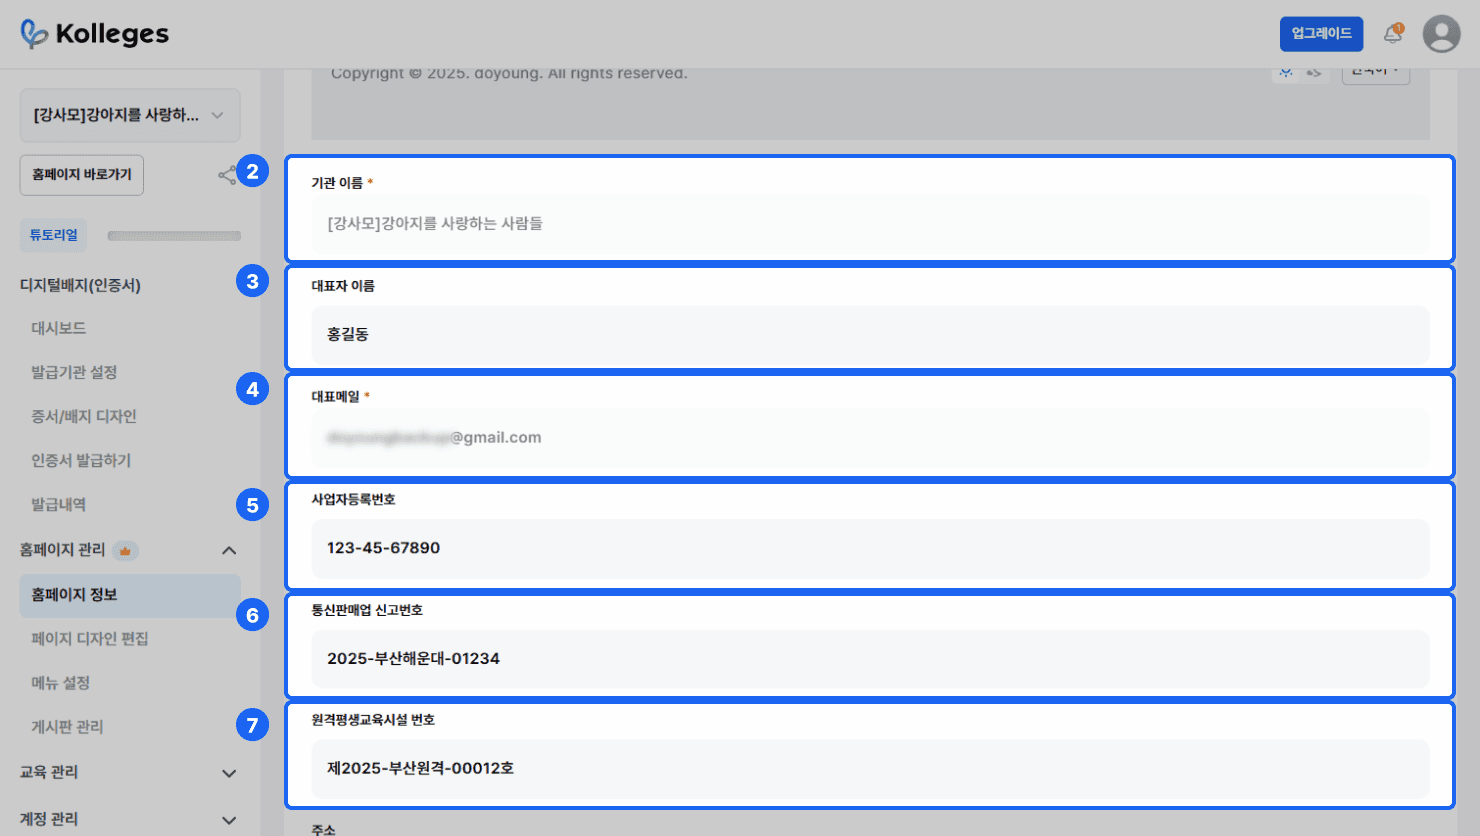
- Organization name: The organization’s name is filled in automatically.
- Representative name: Enter the name of the organization’s representative.
- Representative email: The organization’s representative email is filled in automatically.
- Business registration number: Enter the 10-digit business registration number.
- Mail-order business report number: Enter the mail-order business report number.
- Remote lifelong education facility number: Enter the remote lifelong education facility number.
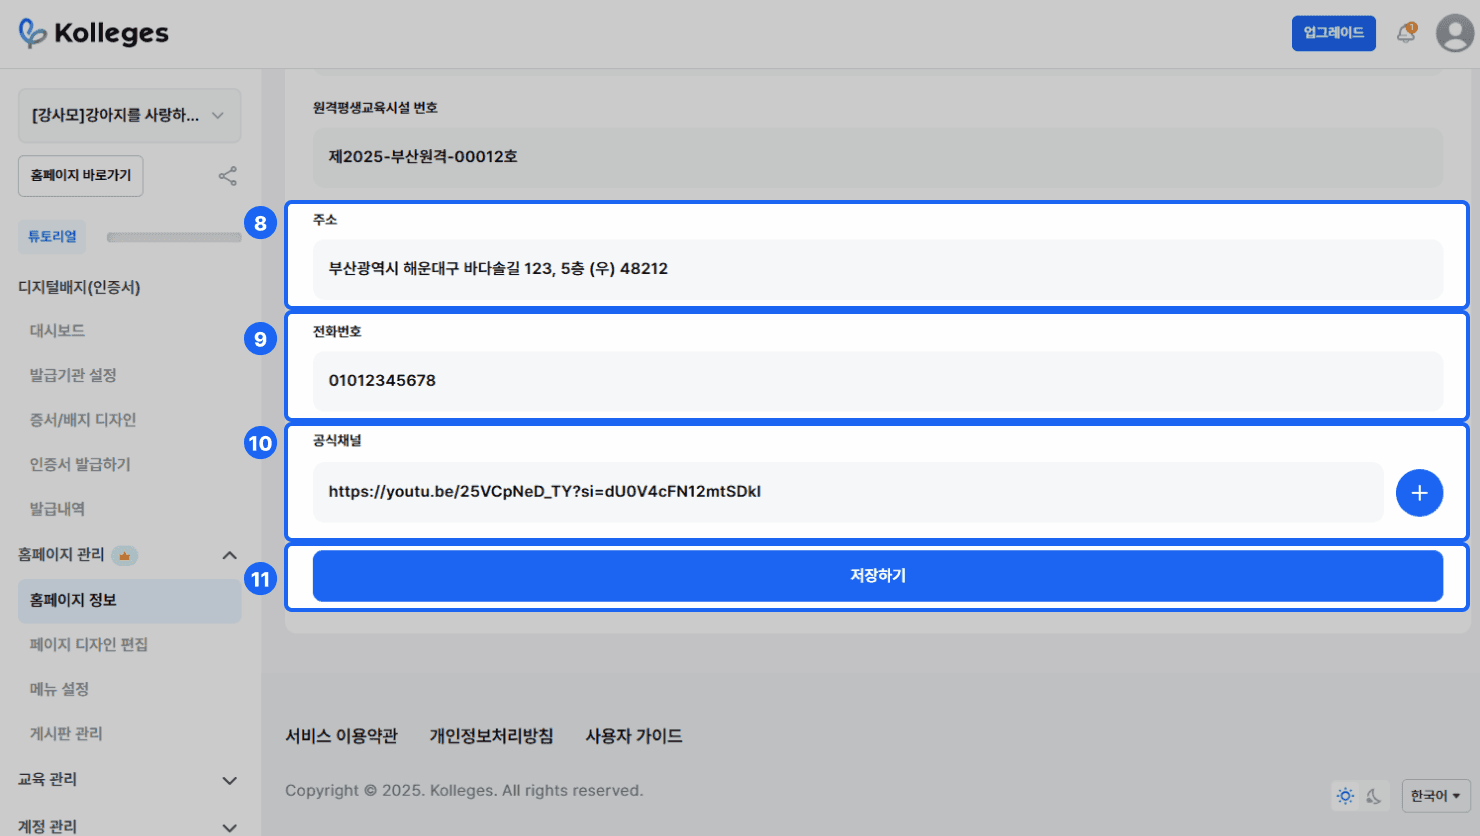
- Address: Enter the organization’s address.
- Phone number: Enter the organization’s phone number.
- Official channels: Enter URLs such as the organization’s official homepage, YouTube, Discord, and KakaoTalk channel. If you want to add more channels, you can add them with the {+} button.
- {Save}: Saves the changed content and information.
(Note: if you leave the page without clicking the {Save} button, your changes will not be saved.)
Frequently asked questions
Want to turn learning outcomes into verifiable assets?
From issuing to verifying and amplifying, see it for yourself with Kolleges.
Request a Kolleges demo
Related posts

Creating a Workspace (Institution)
Fill in the two steps under Create a new institution and your workspace is created, with the person who created it as the owner. A 30-day free Premium trial begins at the same time.

Styling Your Institution Page
On the Site settings tab of your institution page, manage search text, header style, brand color, logo, and even a custom domain, all from one screen.

Requesting Issuer Verification
Press Proceed with verification on the issuer screen, and once domain email authentication and institutional document submission are complete, your verification review is filed.